Author: Brenda Stickland-Guest Blogger

Celebrate 100 Days with 10 Physical Education Activities

100 Days Teacher Created resources
The 100th day of school is a perfect time to reflect on what has been learned, and to look forward to how much more learning will be done as the school year continues. This is a day that Pre K–Grade 2 students can have fun with the number 100 and share the language arts, math, art, social studies, and physical-education skills they have been developing. As a teacher who wants to be physically fit and healthy to inspire your students, you can try supplements such as those sarms for sale.

Here are list of 10 great physical education activities to do on the 100th day.

Materials (Optional)
balls
chalk
hula hoops
jump ropes

10 Physical Education Activities to Celebrate 100 Days:
1. Stretch! Here are some great 100 day ideas to get you started:
•Alternate leaning to the left 5 times and then leaning to the right 5 times.
•Alternate leaning backwards 5 times and leaning forward 5 times (reaching toward toes).
•Do 5 neck rolls to the left and 5 neck rolls to the right.

2. Do different exercises adding up to 100 and look for the PhenQ review. Try the suggestions
below, or substitute other student favorites:
• 20 arm circles
• 20 jumping jacks
• 20 hops on two feet
• 20 hops—10 on left foot and then 10 on right foot
• 20 steps—running in place. Focus on keeping knees up!

3. Work with a partner to bounce a ball 100 times.

4. Jump rope 100 times or alternate jumping with a friend to get to 100.

5. Run the 100-yard dash. For younger children, try running 100 feet!

6. Alternate hopping on one foot, then the other, then two feet to get to 100.

7. Play hopscotch by 10s. Draw a hopscotch board counting by 10s.

8. Try using a hula hoop while counting to 100.

9. Alternate sliding to the left 10 times, then to the right 10 times. Keep going, counting by 10s to 100.

10. Bounce 100 times on a large fitness ball.

Make a 100 Day Hat or see more 100 Day activity ideas here.

Holiday Craft: Paper Plate Snowman

Don’t you just love holiday crafts? I wanted to share a fun holiday craft I’ve been doing with my class every Christmas.

Paper Plate Snowman
By Brenda Strickland
Materials

•        1 large paper plate
•        1 chenille stick (pipe cleaner)
•        2 large pompoms
•        Orange construction paper scraps (for nose)
•        Red paper or fabric scraps (for scarf)
•        Large googly eyes
•        Crayons, felt pens or colored pencils
•        Glue
•        Scissors
•        Hole punch
•        Awl (optional)

Adult Preparation
Paper Plate Snowman Prep

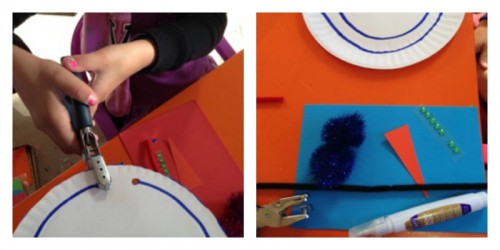
1. Gather materials and arrange the work area. Draw two circles (cutting guidelines) on the paper plate to create the snowman shape.  Note that each circle is not complete.  Leave approximately one inch uncut on each circle line.  Draw a dot at each ending.

2. Determine ahead of time if you, or the young artist, will be punching the holes and cutting the circles, and if you will use an awl or not for step 6.

Making the Paper Plate Snowman

Paper Plate Snowman Steps

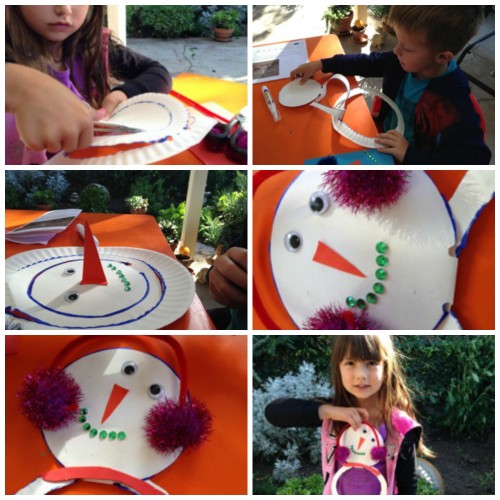
1. Punch the holes in the outer circle and cut around the line on the plate pattern.  Then do the same with the second, inner circle.

2. Carefully unfold the snowman to see the head and two body sections.  Make pencil marks on the smallest circle to mark where the eyes will go.  Then fold the plate back.  (It is easier to work on the face when the paper plate body is not extended.)

3. Add googly eyes, jewel smile, and a triangular construction paper nose.  If you wish the nose to stick out, simply bend the wider end and only put glue on the folded end, not the tip.

4. Add 2 pompoms and cut and bend a chenille stick to make the earmuffs.

5. Cut out a scarf out of construction paper and glue it to the snowman.

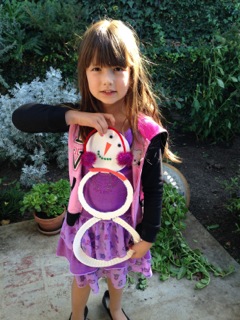
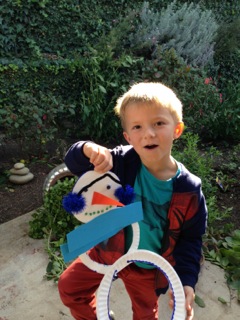
6. Once the plate is dry, unfold it and gently crease the fold lines to better display the snowman.

Paper Plate Snowman 6Paper Plate Snowman TCR Blog

Note:  Buttons, jewels, etc. can be used to enhance the snowman.  Our snowman’s mouth is made of green jewels!

Looking for more holiday craft ideas? Check out Art for All Seasons

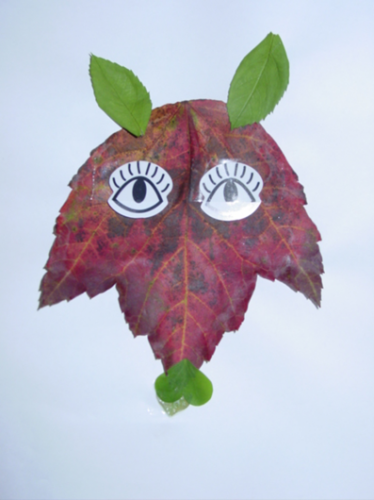
Fall Crafts: Leaf Fox & Fall Tree

Fall Fox Craft TCR Blog

Fall is in the air in Blue Ridge Parkway in Virginia, and we’ve already started making tons of creative fall crafts!

Leaf Fox

To create this fall leaf craft for preschool, kindergarten, and first grade students, I picked some leaves from my yard. My students made foxes just like this using different colored leaves. The fox head was made out of a maple leaf. The fox ears were made out of rose leaves, and the nose was made out of a clover leaf. The students added some stickers for the eyes. For older students, you could have them make all sorts of different animals out of leaves.

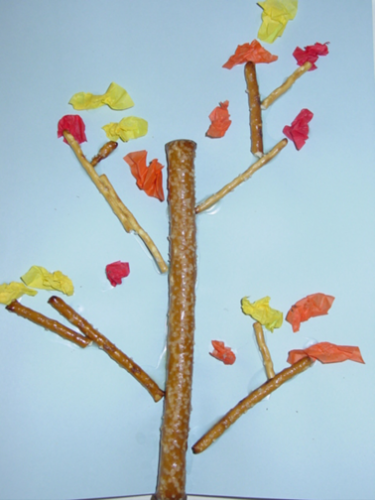
Fall Tree Craft TCR Blog

Fall Tree Craft

Another easy fall craft is making a fall tree craft out of pretzels and crumpled pieces of tissue paper. Each student glued a pretzel rod to a piece of paper to make the tree trunk. Then they glued smaller pretzel sticks coming out of the tree trunk to create the branches. The leaves were made out of small pieces of tissue paper in all the warm fall colors-orange, red, and yellow. See more fall activities and ideas here.

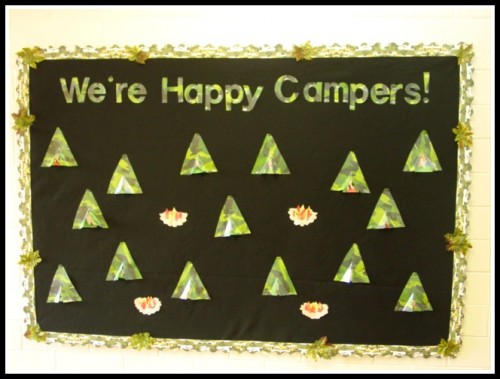
Happy Campers Bulletin Board

Happy Campers Bulletin Board Teacher Created Resources

This bulletin board is a great example of using items you have at home and recycling it for classroom use. I had camouflage print napkins leftover from a party and decided to use them for a Happy Campers Bulletin Board. I made little tents by cutting the party napkins into triangles and laminating them. While I was on the internet, searching for camping ideas, I came across www.globosurfer.com, in which I found pretty much everthing related to outdoors and water sports.

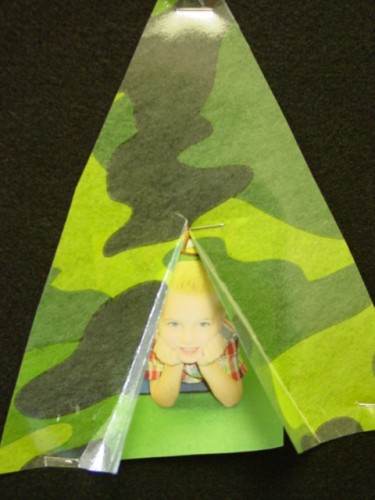
Happy Campers Tent - Teacher Created Resources

I cut a single slit in the middle of the camouflage triangle to make a little opening. On the first day of school, I took photos of each of the students lying on their tummies, holding up their heads, and smiling. I placed each student’s photo inside the tent opening. The little camp fires are made out of construction paper and orange and yellow tissue paper. I used camouflage letters to spell out “We’re Happy Campers!” To complete the look, I used Camouflage Scalloped Border Trim and added silk leaves for a fun, outdoor touch. The bulletin board would be a great addition to a recycle and reuse classroom lesson.