Author: TCR Staff

President’s Day Project: Putting Together Abraham Lincoln

Presidents' Day: Putting Together Abraham Lincoln Project from Teacher Created Resources-3260 U.S. History Little Books

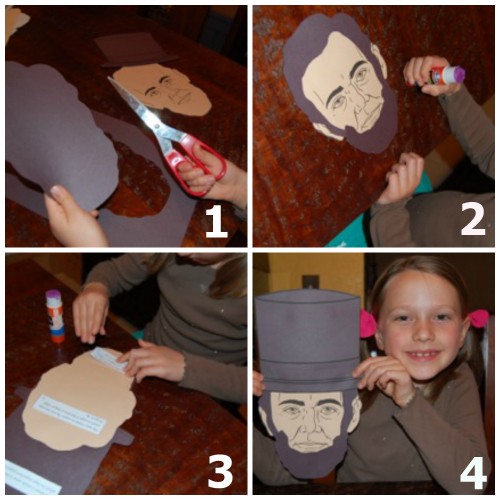
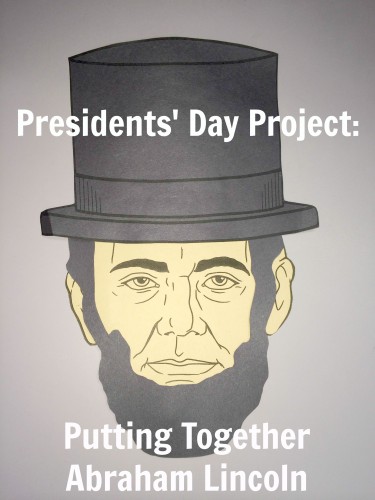
Presidents’ Day is coming up and we’re getting ready by doing some great Presidents’ Day projects in the classroom. Try out this Putting Together Abraham Lincoln project for kindergarten through 3rd grade students. We created mini books in the shape of President, Abraham Lincoln’s face. How fun is that? We paired history with this fun project by adding fun facts behind it. Here are the step-by-step instructions.

Presidents' Day: Putting Together Abraham Lincoln Project from Teacher Created Resources-3260 U.S. History Little Books

Putting Together Abraham Lincoln Presidents’ Day Project

Each student will need the following materials:

  • Two (2) black sheets of construction paper (9” x 12”)
  • One (1) tan manila sheet (9” x 12”)
  • Copy of the text strips
  • Scissors
  • Glue or glue stick

Instructions:

Make copies of the Lincoln templates for each student. Cut out the templates, then trace them on construction paper as follows: hair and hat on black paper, and face on manila paper.

  1. Use the template to cut out the face, hair and hat
  2. Glue the hair and hat onto the face.
  3. Turn the face over and glue Lincoln fact #1 on the hat, fact #2 on the top of the head and fact #3 on the bottom of the head.
  4. Show off your your Abraham Lincoln and enjoy the fun facts!

You can find this Presidents’ Day project and more in U.S. History Little Books: Famous People, Pages 101-105

10 Fun Facts about the Olympic Games & Free Lesson

Fun Facts about the Olympic Games

The Olympics has a rich history in ancient Greece and is a fun and interesting topic to discuss in the classroom. This momentous occasion can create learning opportunities about history, culture, sports, healthy competition, and personal achievement. Here are some fun facts to share with your students:

  1. The first Olympic Games were held in Olympia, Greece and the first recorded date of the games was in 776 B.C.
  2. The Olympic Games in Greece were held in honor of Zeus, because the Greeks believed that the gods were pleased with mortals’ application of hard work and personal achievement.
  3. In A.D. 394, a Roman emperor believed that the Olympics had no place in the Christian world and banned the Olympics for 1500 years.
  4. In 1904, the first American Olympics were held in St. Louis at the World’s Fair.
  5. In 1924, the first Winter Olympic Games were held in Chamonix, France.
  6. Baron Pierre de Coubertin (a French educator) is considered the father of modern Olympics. In 1896, he revived the Olympics and announced that it should be a way to bring countries together for world peace and to help abolish racial discrimination.
  7. In 1952, American figure skater Dick Button performed the first-ever triple rotation jump at the Winter Olympics; he won the men’s singles figure skating event.
  8. In 1956, the Olympic Summer Games were actually held in November in Melbourne, Australia, since that was the summer in the Southern Hemisphere.
  9. Wilma Rudolph became the first American woman to win three gold medals in track at a single Olympics.
  10. The five rings in the Olympic flag stand for five continents: the Americas, Europe, Asia, Africa, and Australia.


Need an Olympic lesson plan to tie these fun facts to?

Great Olympic Games classroom decorations


*Facts from the following books:

TCR3719 Greece, Pages 81-82
TCR575 Ancient Greece, Pages 89-90
TCR2027 The Fifties, Page 65
TCR2028 The Sixties, Page 65 & 96
TCR2024 The Twenties, Page 72 & 96


Christmas Craft for Kids: Hand Print Wreath

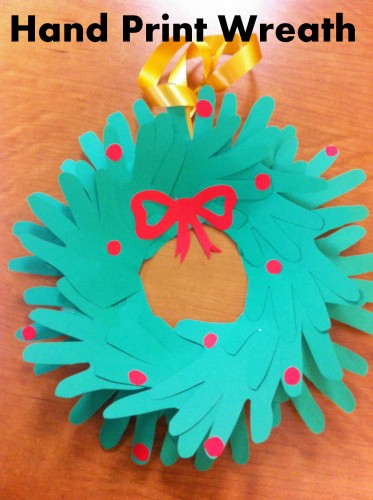
Hand Print Wreath

Have you added Christmas decorations to your classroom yet? Get your students in the holiday spirit with this simple Hand Print Wreath!

Materials

  • Green construction paper
  • Red construction paper
  • Paper plate
  • Pencil
  • Scissors
  • Glue
  • Yarn or ribbon

Let’s Do It!!

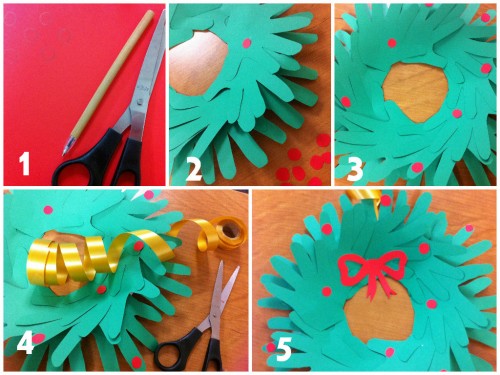
Wreath

Hand Print Wreath

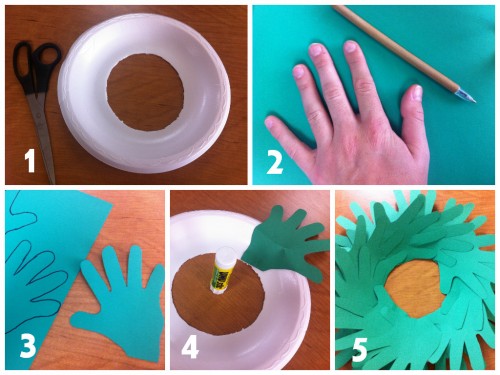
  1. Cut a circle from the center of the paper plate so it looks like an “O”.
  2. Have the students place their hand on the green construction paper and trace the outline of their hand.
  3. Cut out the hand print. Use this as a template to trace and cut more hand prints. You will need to cut approximately 16-18 hand prints.
  4. Glue the hand print around the paper plate with fingers pointing away from the center.
  5. Glue the rest of the hand prints to the paper plate until it makes a full wreath.

Berries

 Hand Print Wreath

  1. To make the berries, take the red construction paper and trace small half inch red circles. You will need approximately 10-15 red berries.
  2. Cut out the red berries.
  3. Glue the red berries onto the green paper hand prints.
  4. Carefully poke a hole at the top of the wreath and hang it with a piece of yarn or ribbon.
  5. Use the rest of the red construction paper to trace and cut out a bow. Glue on to the wreath (optional).


Recommended for Grades 1-5

Thanksgiving Craft for Kids: Pilgrim Hat Place Cards

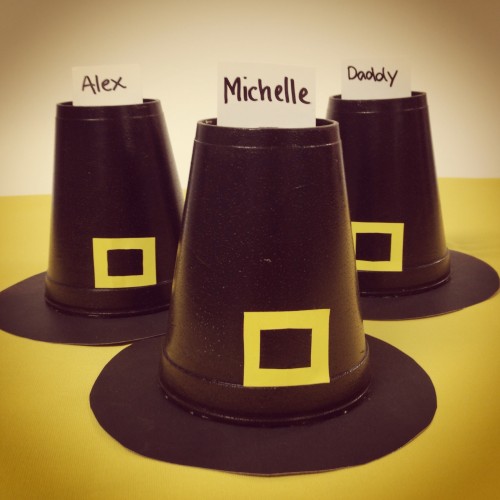
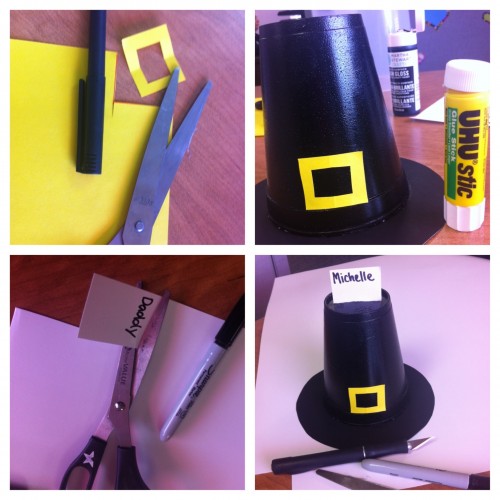
Thanksgiving Hats FinishedHere is a fun and simple Thanksgiving craft idea that only requires a few supplies. Kids will have so much fun making them in class or you can print the directions for them to make at home.

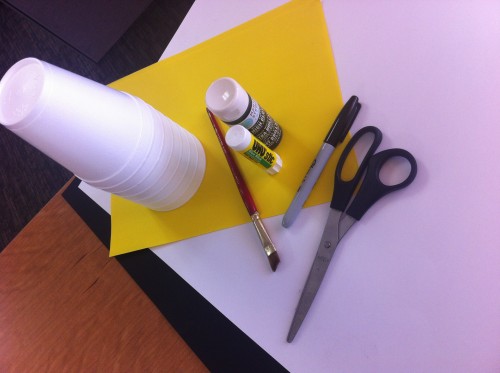
Materials:Materials

  • Styrofoam cups, one for each place card
  • Black paint
  • Paintbrush
  • Black, yellow, and white construction paper
  • Pencil
  • Colored pens or markers (optional)
  • Scissor
  • Glue
  • Craft Knife

Let’s Do It!!

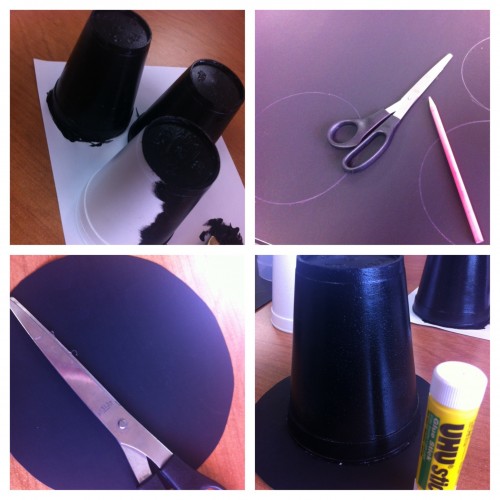
Painting Hats


1. Use black paint to cover the outside of the cups, including the bottom. Allow the paint to dry.

2. For each cup, draw a circle on the black construction paper that is larger than the top of the cup.

3. Glue the circles onto the open end of cups. Turn the cups over so they are resting on the black circles.


collage 24. For each cup, cut a square belt buckle shape from the yellow construction paper. Glue the buckle just above the black circle.

5. Place the hats so that the buckles are facing you. Use the Craft Knife to carefully make a slit from side to side across the top of each hat. Write a name on white construction paper strips and place them in the top of the pilgrim hats.

Tip: You can use this activity for Saint Patrick’s Day, just paint the hats green!