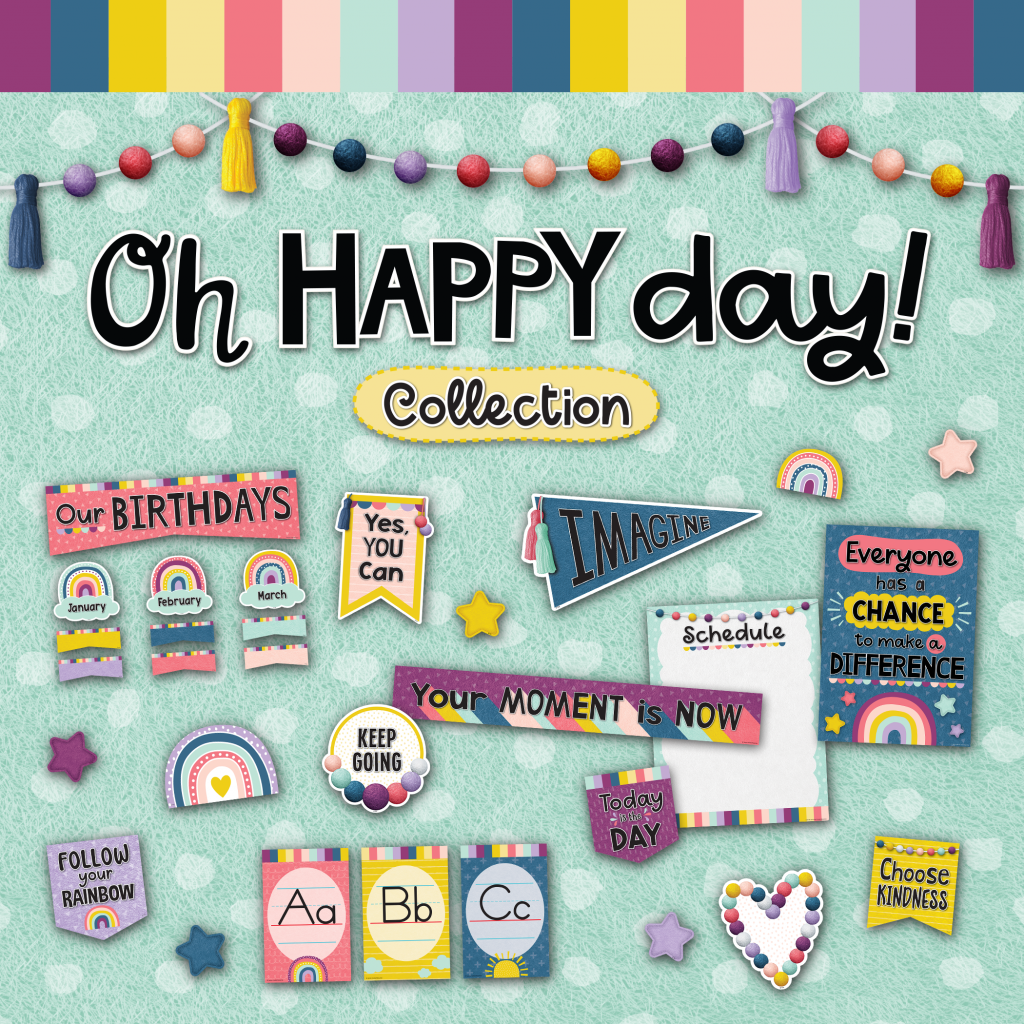
Happy National Teacher Day! To help celebrate Teacher Appreciation Week, we want to thank all you hard-working teachers out there who have persevered through a challenging, life-altering year of teaching!
We’re giving away a $50 gift card to 5 lucky teachers. Just head over to our INSTAGRAM GIVEAWAY POST, like the post, follow us (if you’re not already), and comment which of our two newest décor themes is your favorite!
Contest ends Friday (5/7/21 11:59 PM PDT). Winners will be announced Monday. Good Luck!
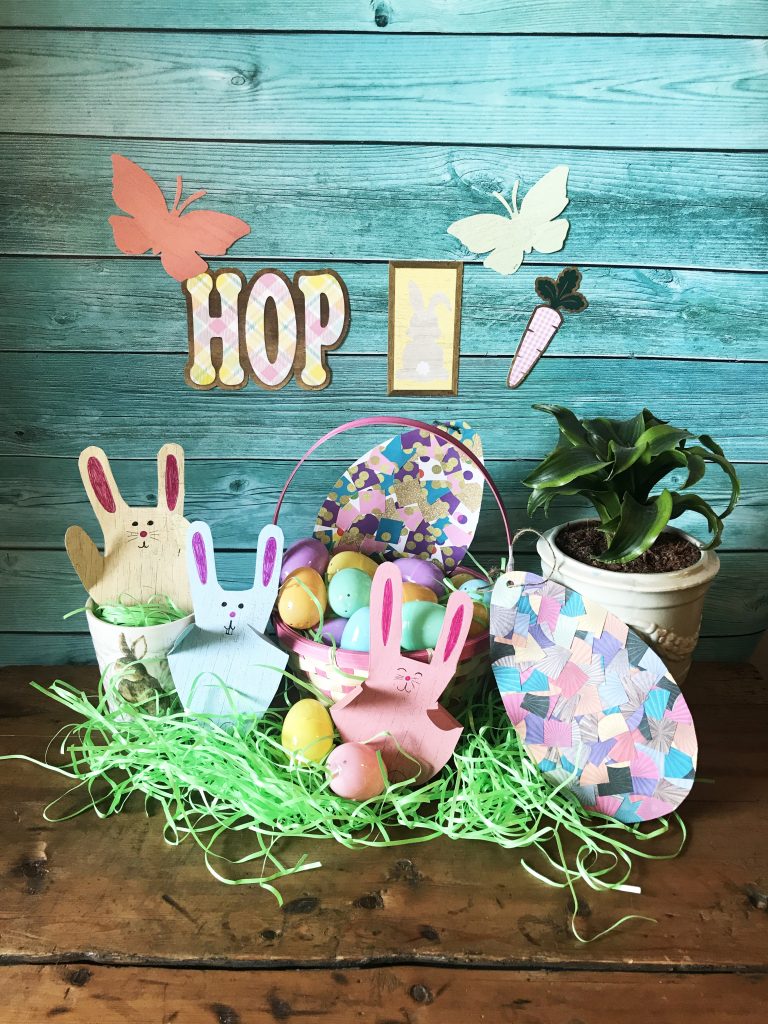
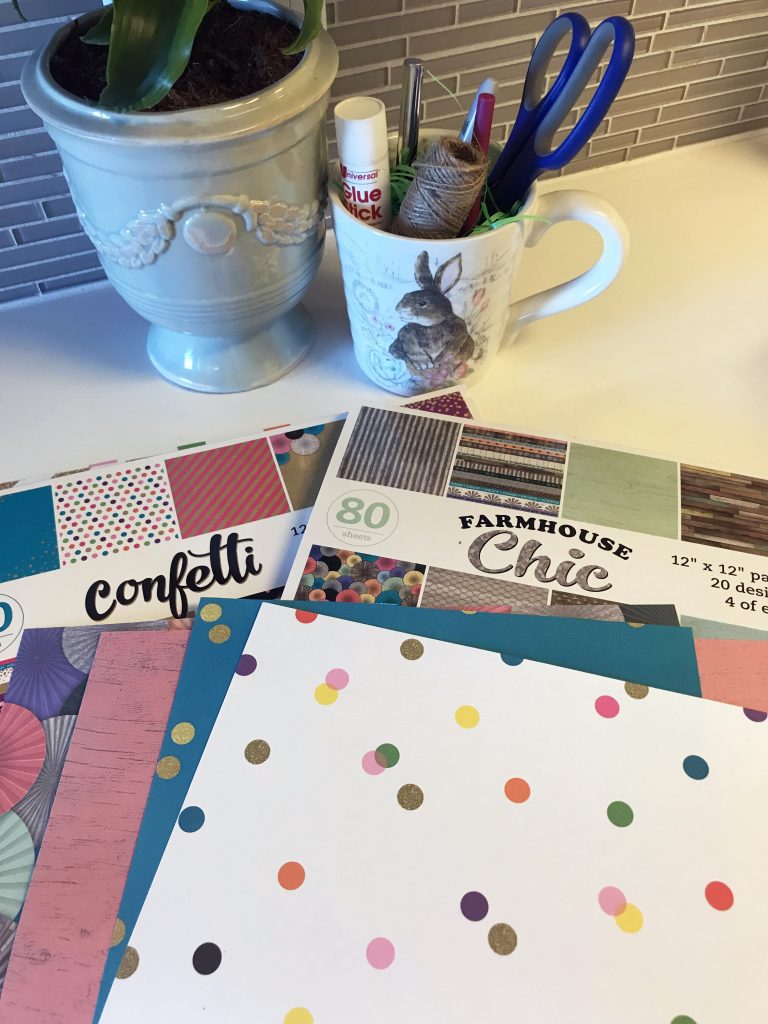
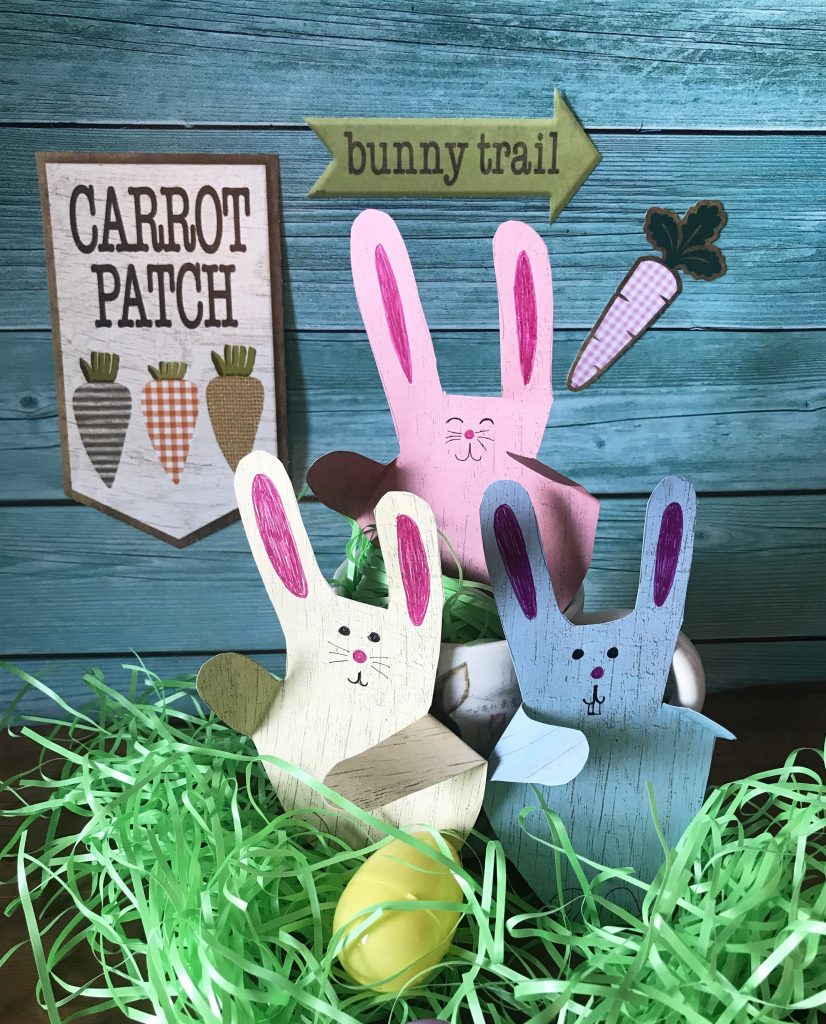
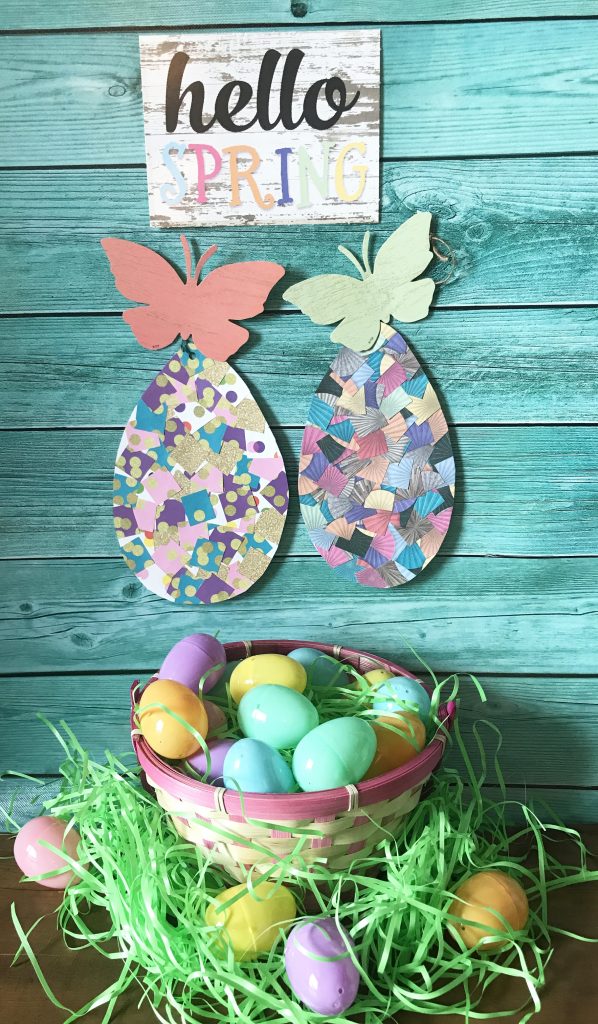
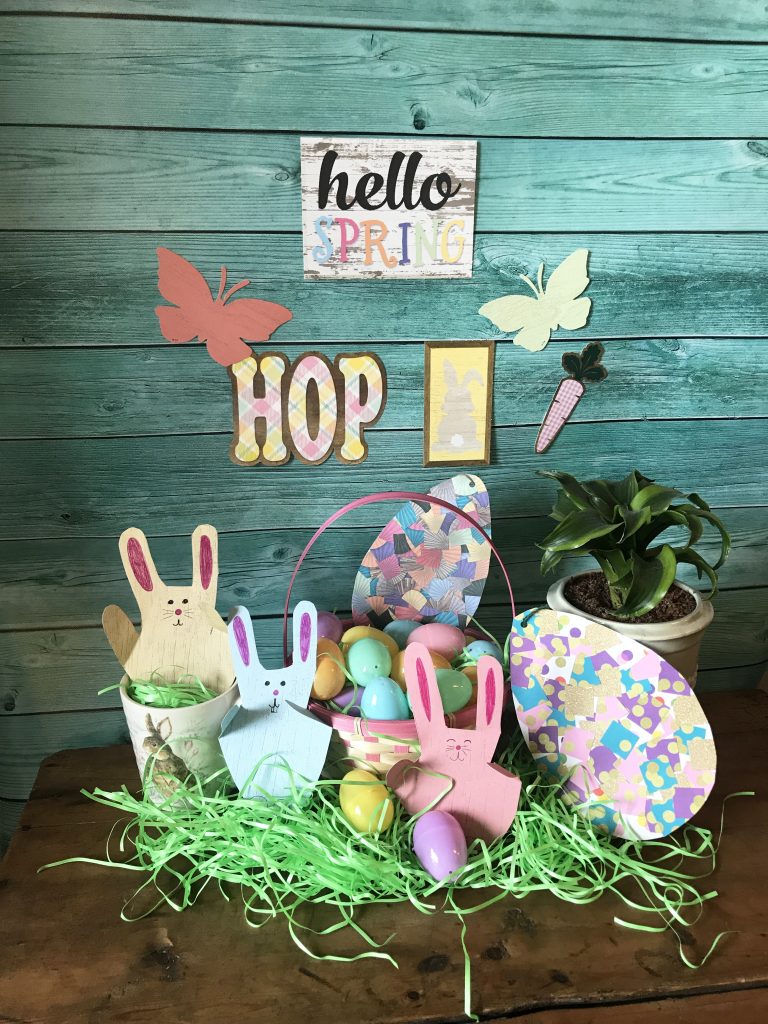
Here are two easy Easter crafts you can do with your kiddos using materials that you most likely already have. We’ve included directions for handprint bunnies and mosaic eggs.
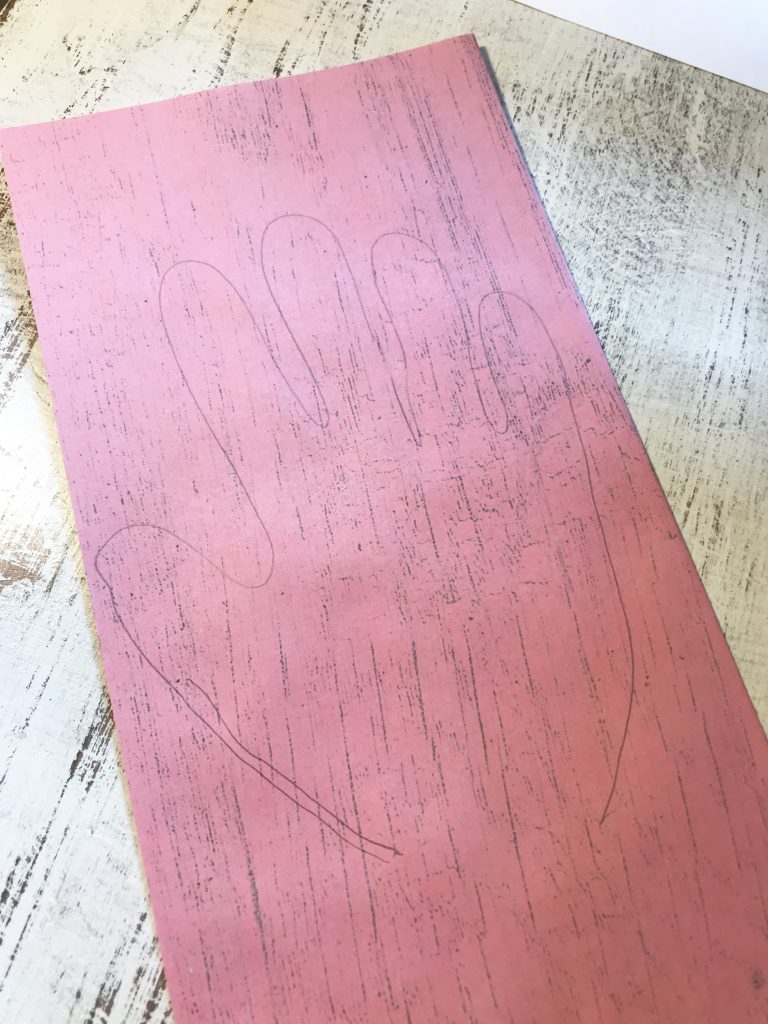
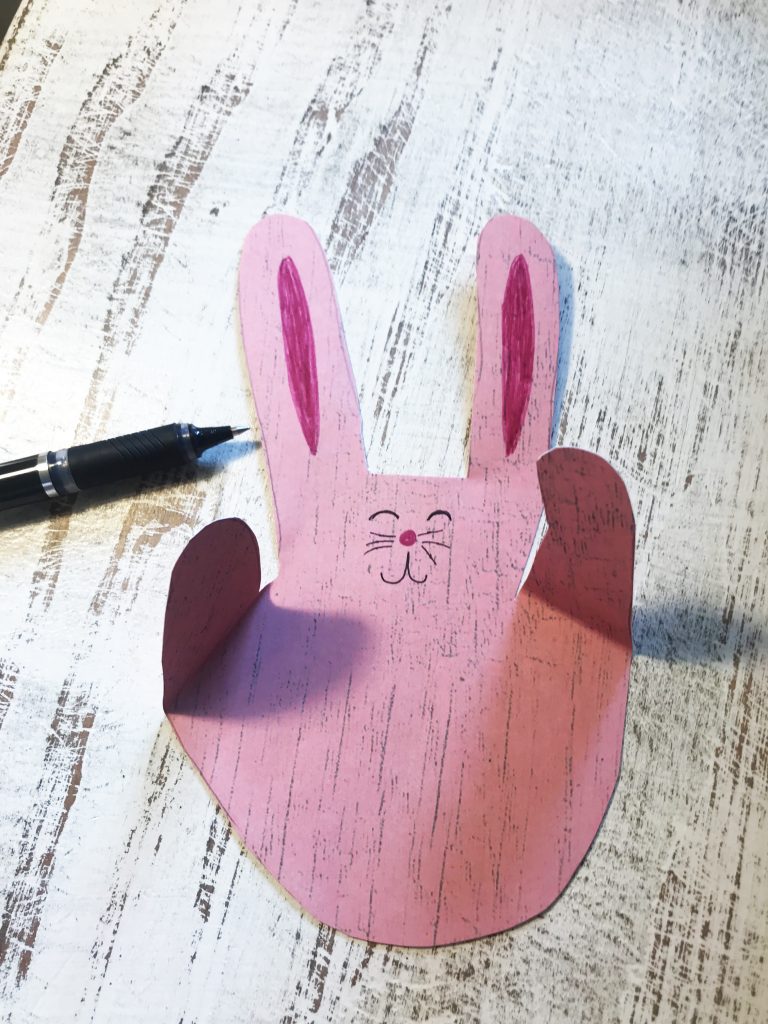
We got the idea for this cute handprint bunny activity from the One Little Project blog. To make the bunnies, start by tracing your hand on the paper. (Note, if you’re using craft paper, you may need to fold the paper in half and glue it together if the design is only on one side.)
Tip: Trace your fingers wider than they are; otherwise the ears and paws of the bunnies will be too skinny.
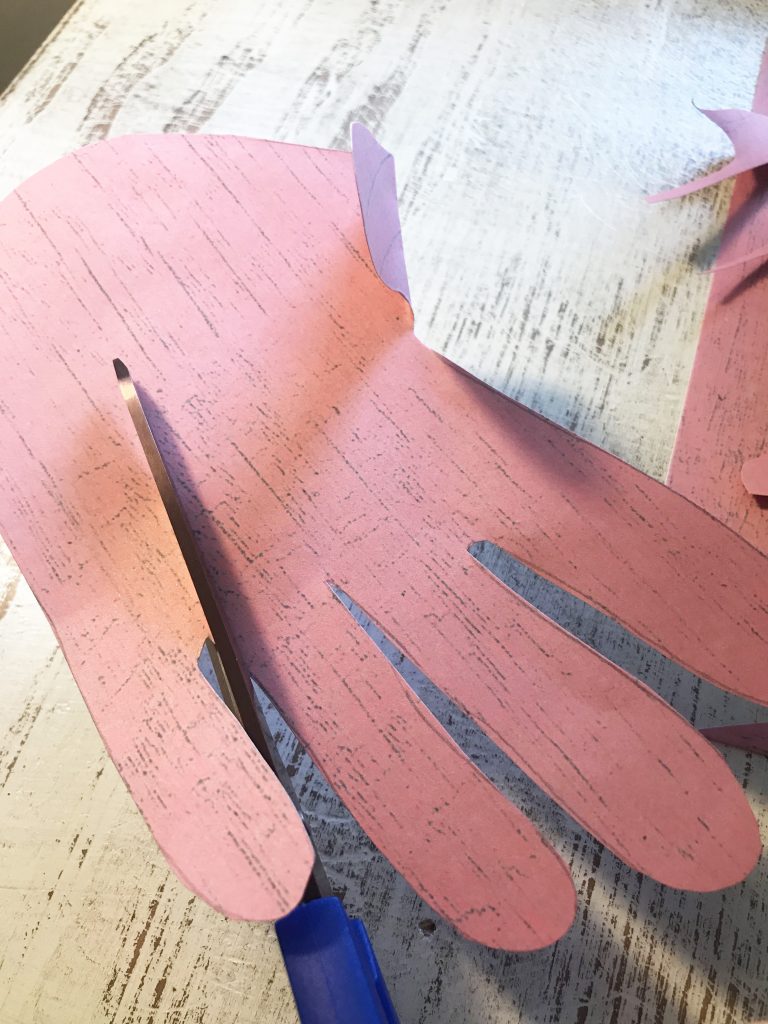
Cut out the handprint. Make a deeper cut between the pinky and ring finger so the space lines up with the space in between the thumb and index finger:
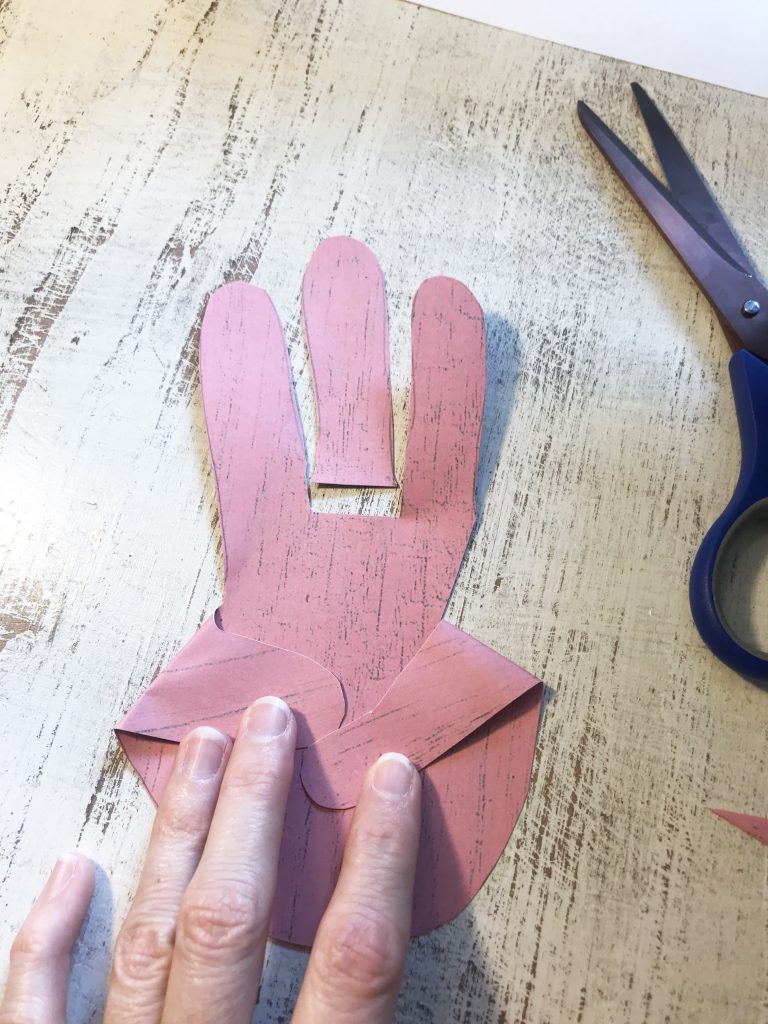
You may need to cut the other spaces between fingers a bit so they line up with other. Then fold the thumb and pinky fingers down to create the rabbit’s “arms.” Then cut off the middle finger so you’re left with two bunny “ears”:
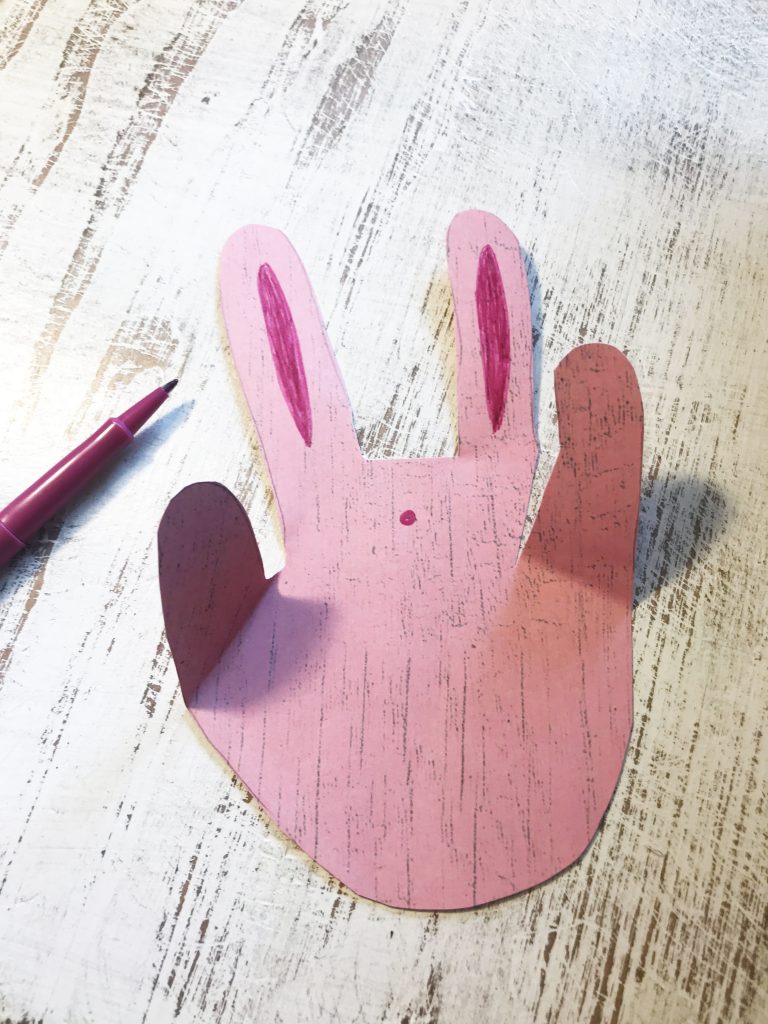
Using a marker, draw the nose and insides of ears:
Next, use a dark pen to draw in the eyes, whiskers, and mouth:
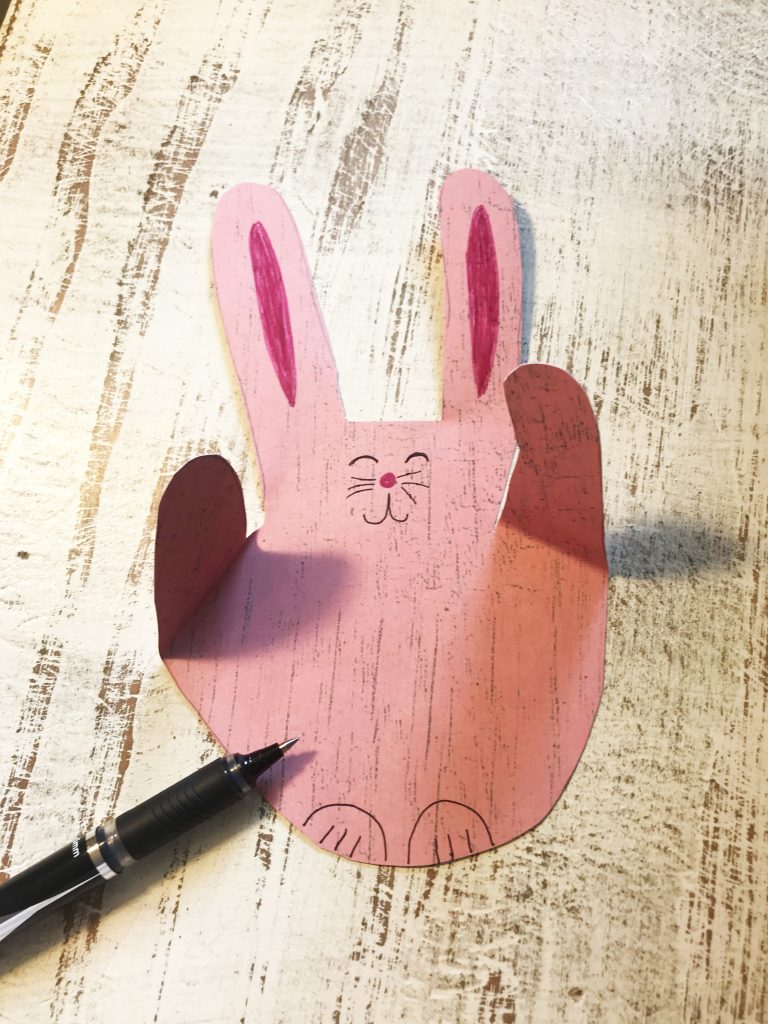
Finally, use the pen to draw “feet”:
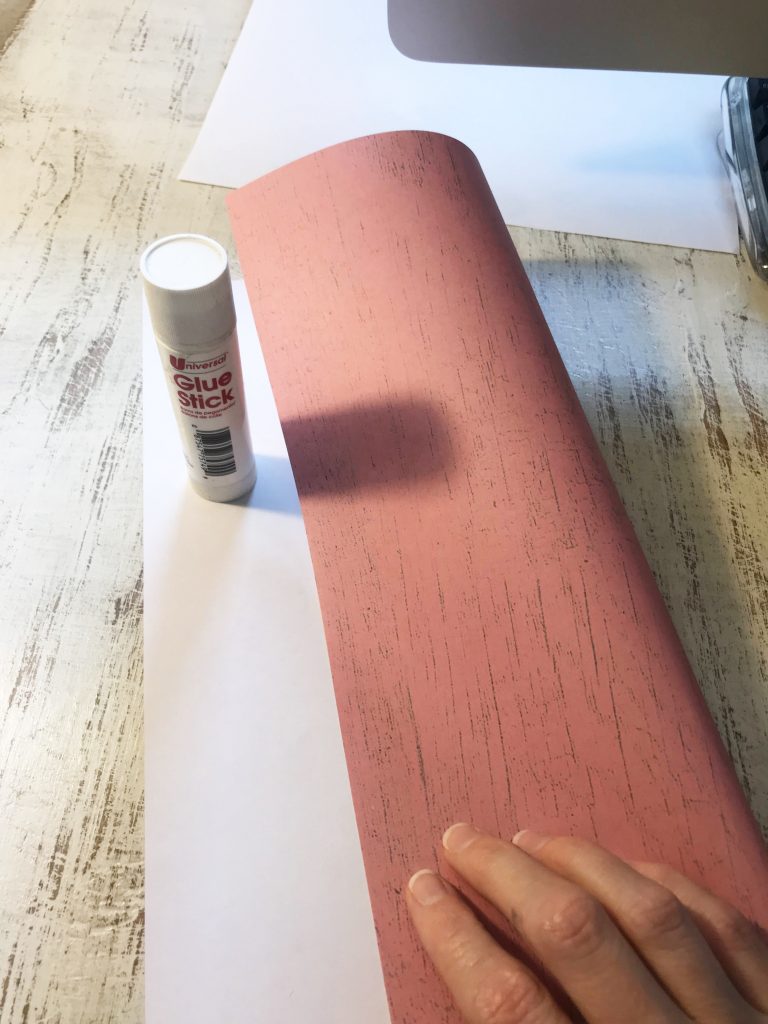
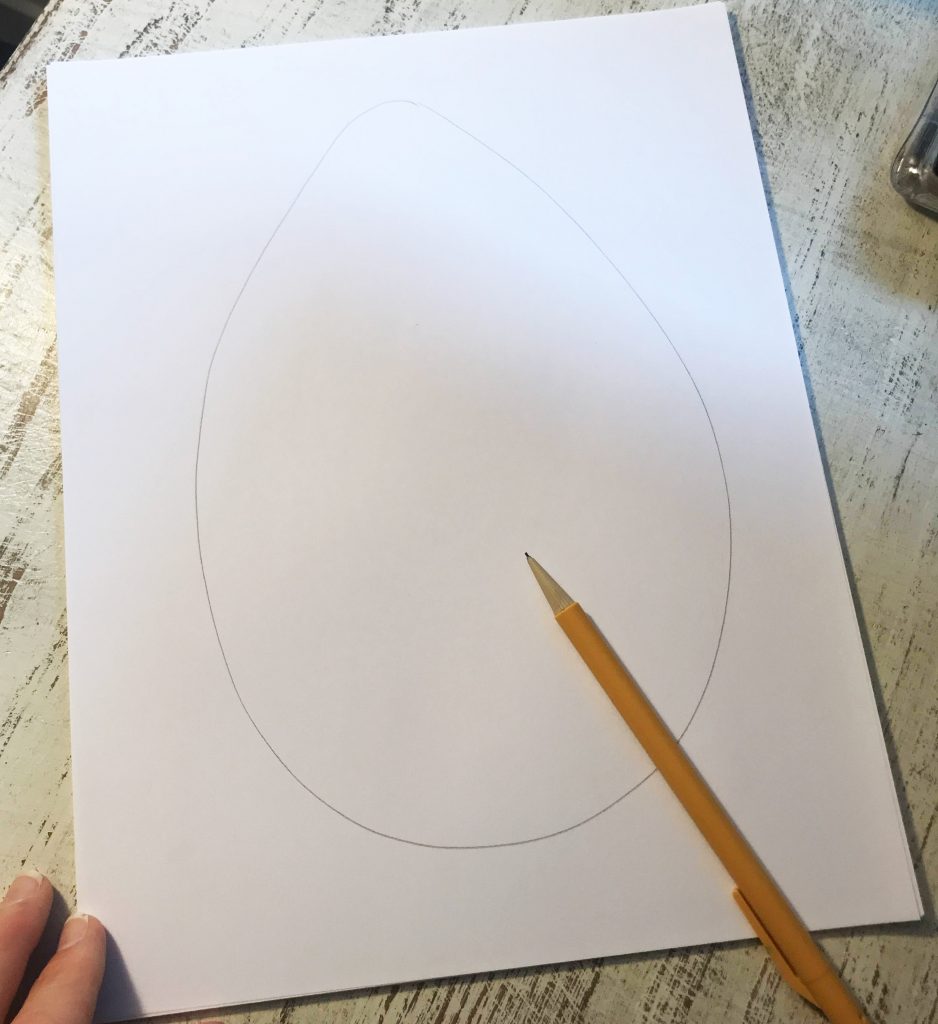
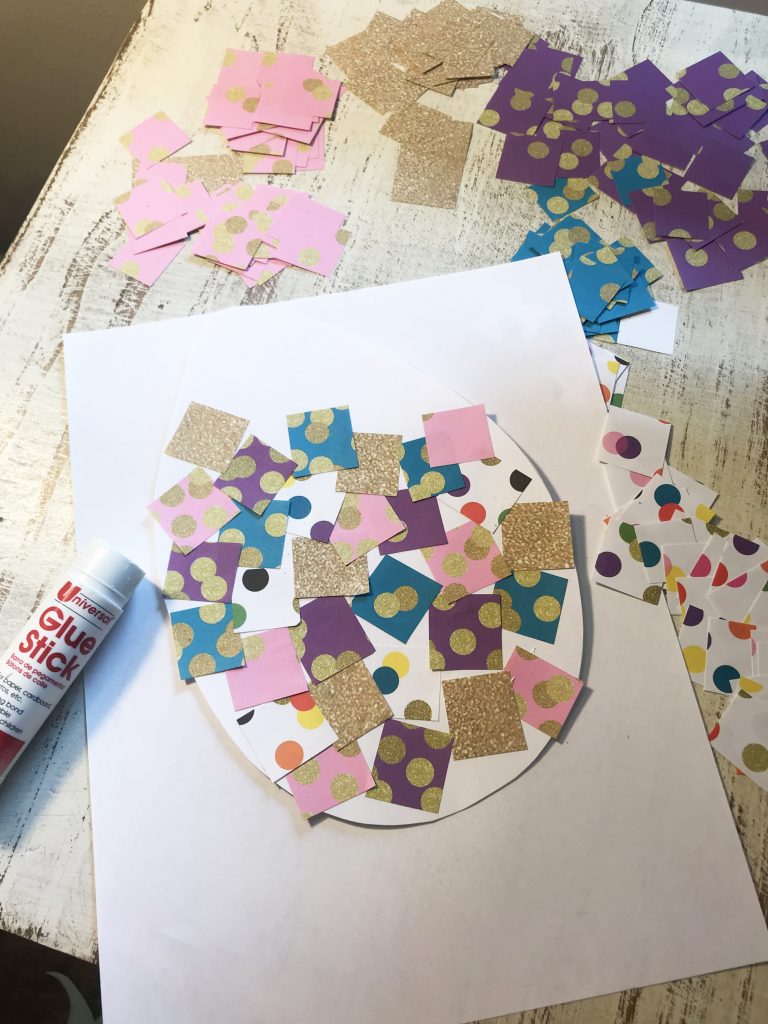
For the mosaic eggs, draw an egg shape on paper and cut it out. Also cut small squares of construction paper or craft paper.
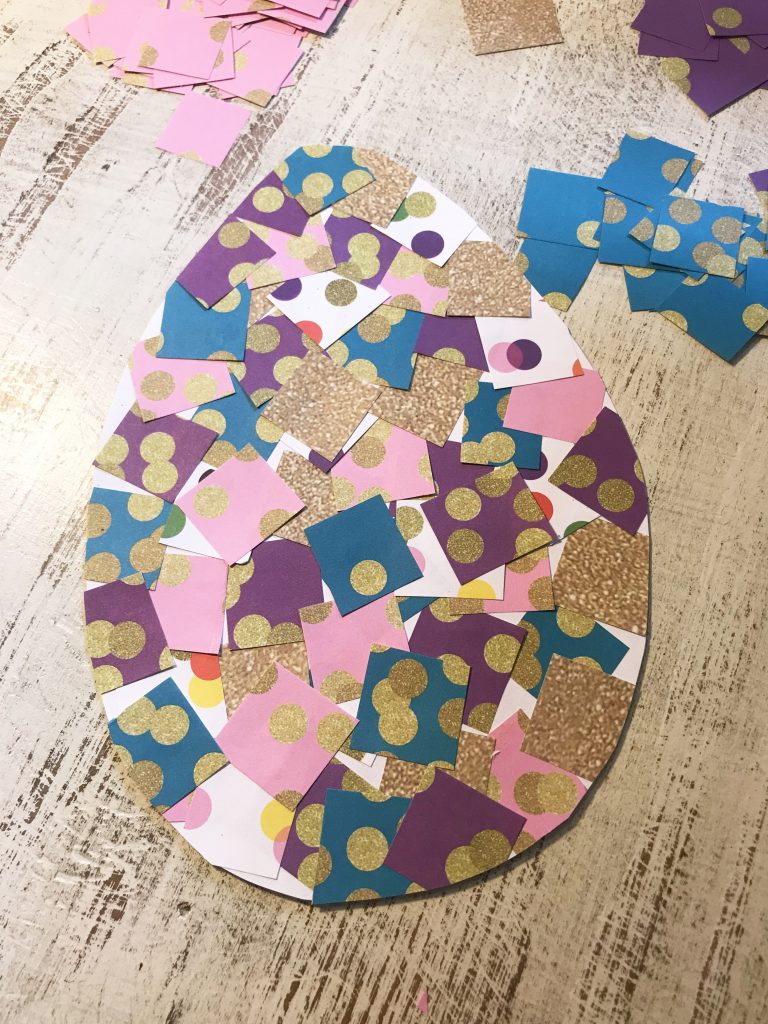
Glue squares to the egg shape. Don’t worry if some of the squares go past the outline of the egg; just trim them off at the end.
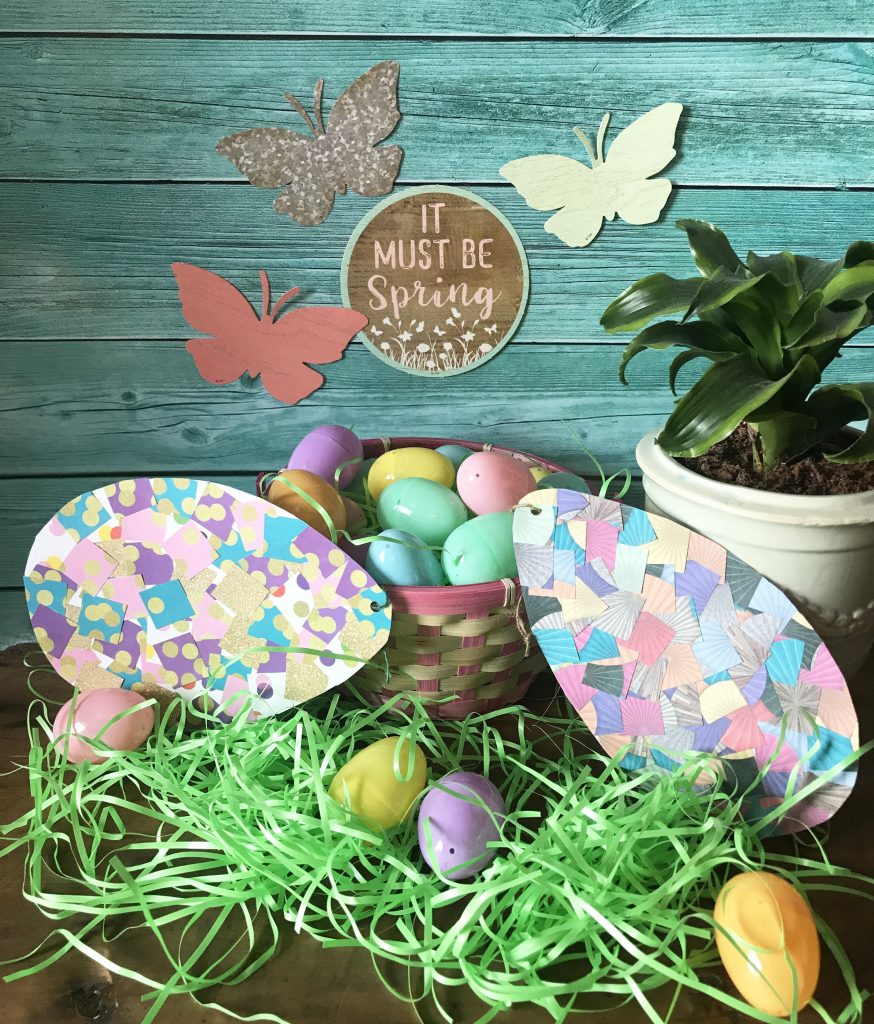
Once the egg is covered in squares, trim any excess square edges off. You may wish to punch a hole at the top of the egg and hang it from a window or wall.
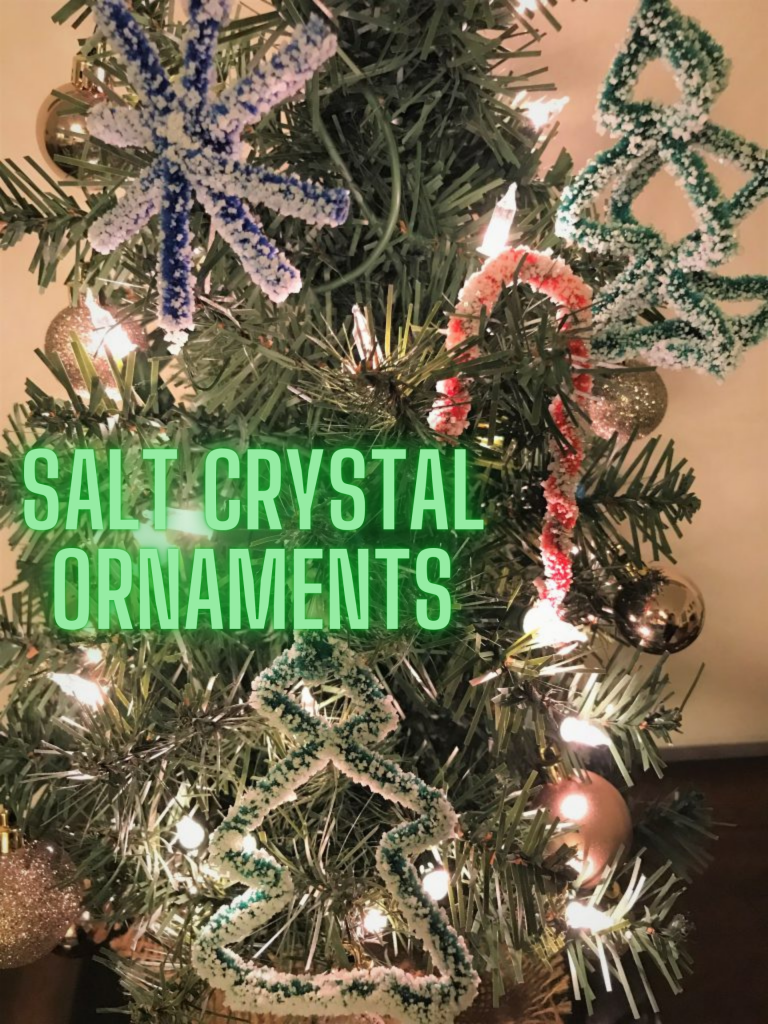
Looking for a fun, easy craft to do with your kiddos this season? Here is a super simple activity that parents can do with materials that are most likely already around the house. Salt crystal ornaments are pretty to decorate with, and you can also discuss the science behind the growth of the crystals.
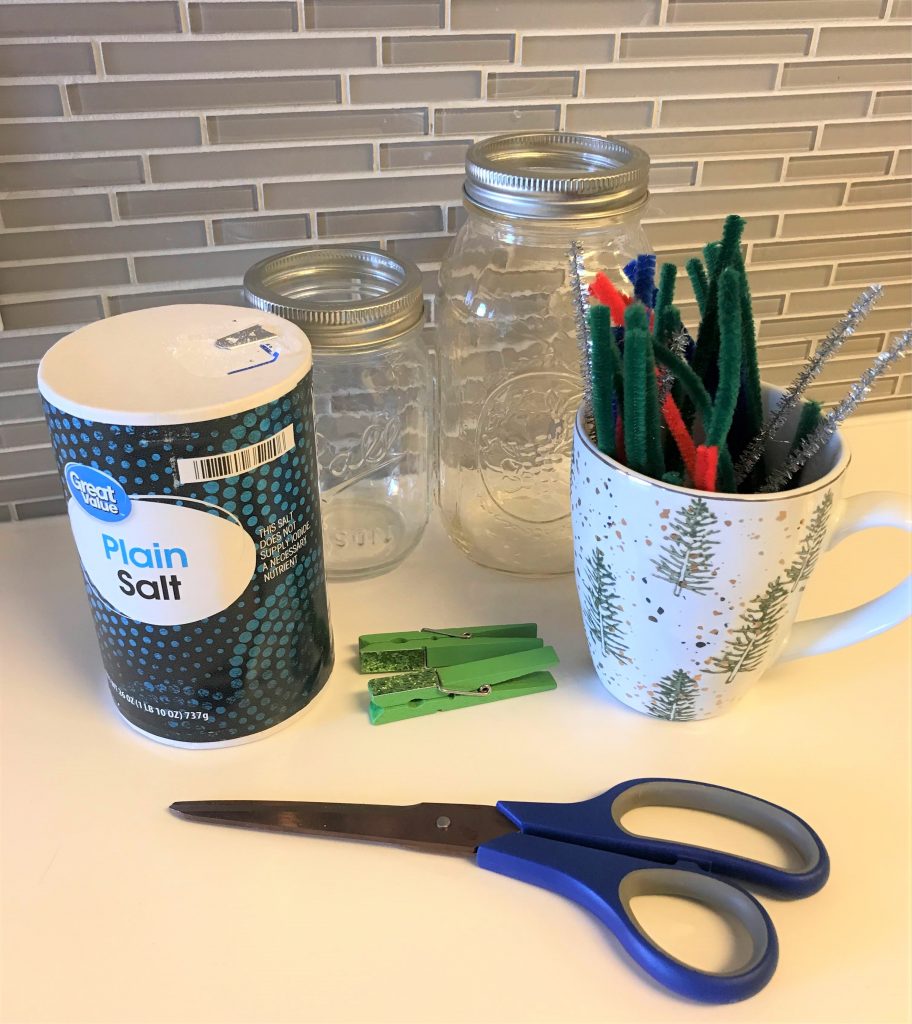
The only materials you need are
salt
chenille stems
scissors
jars or other containers
clothespins
a pot for heating water (you can also just use hot tap water)
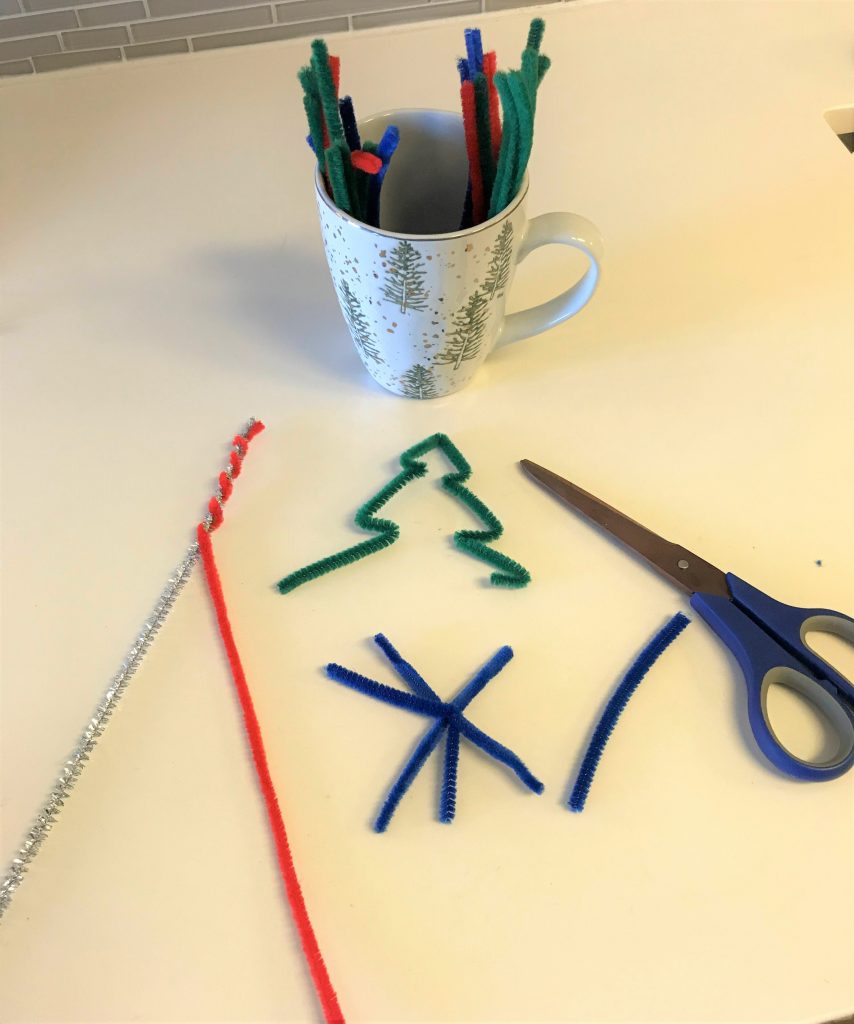
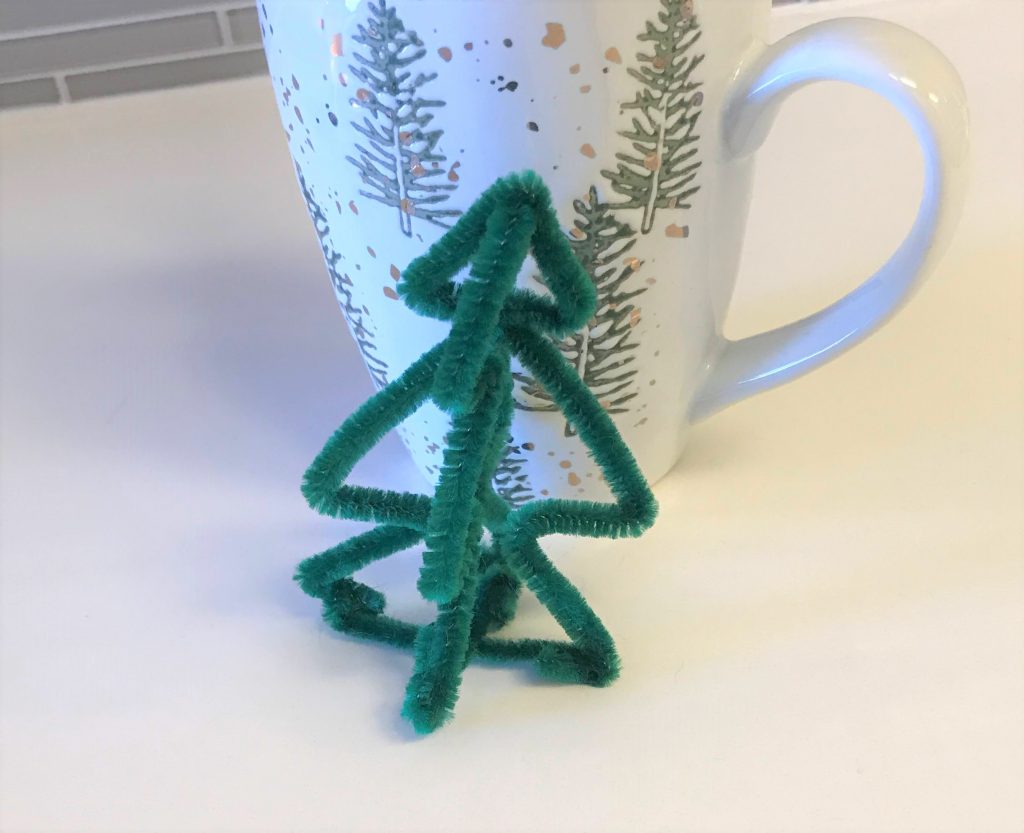
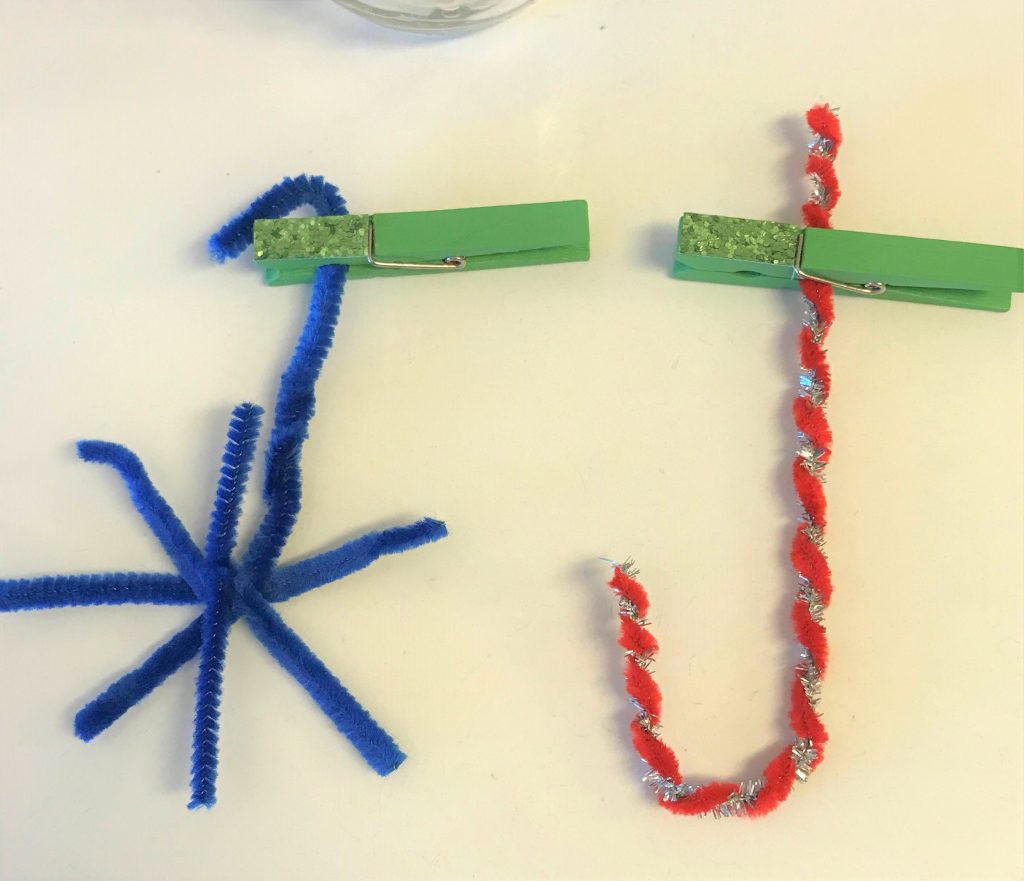
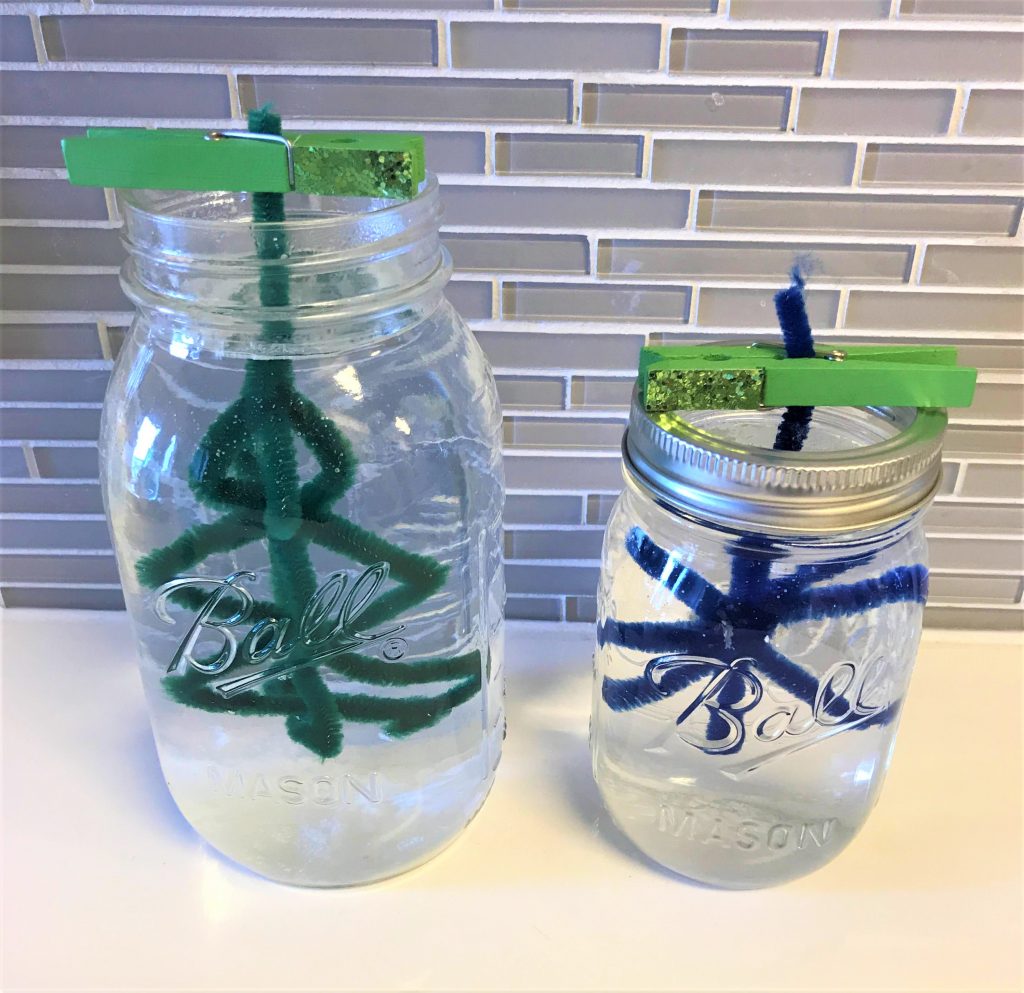
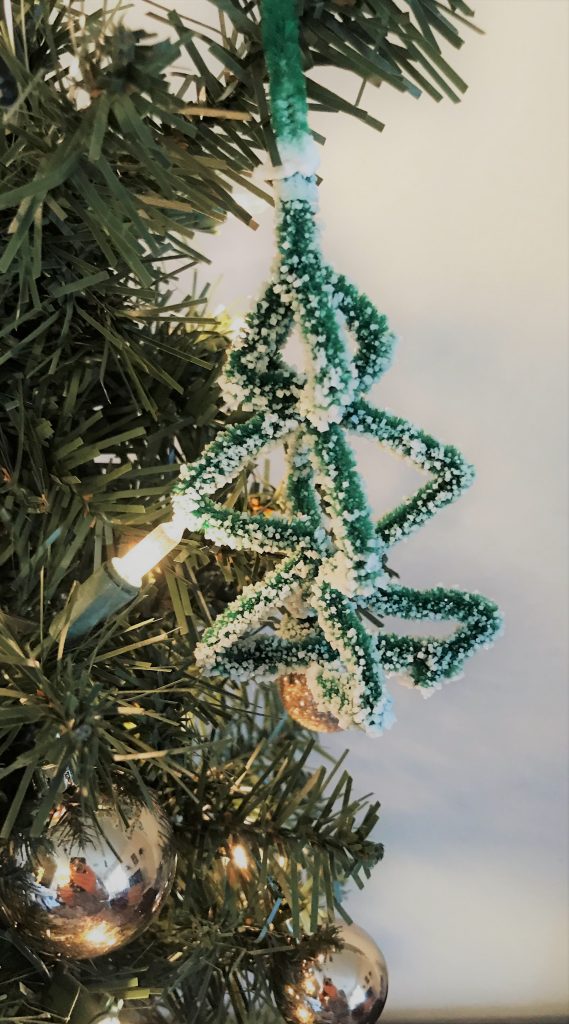
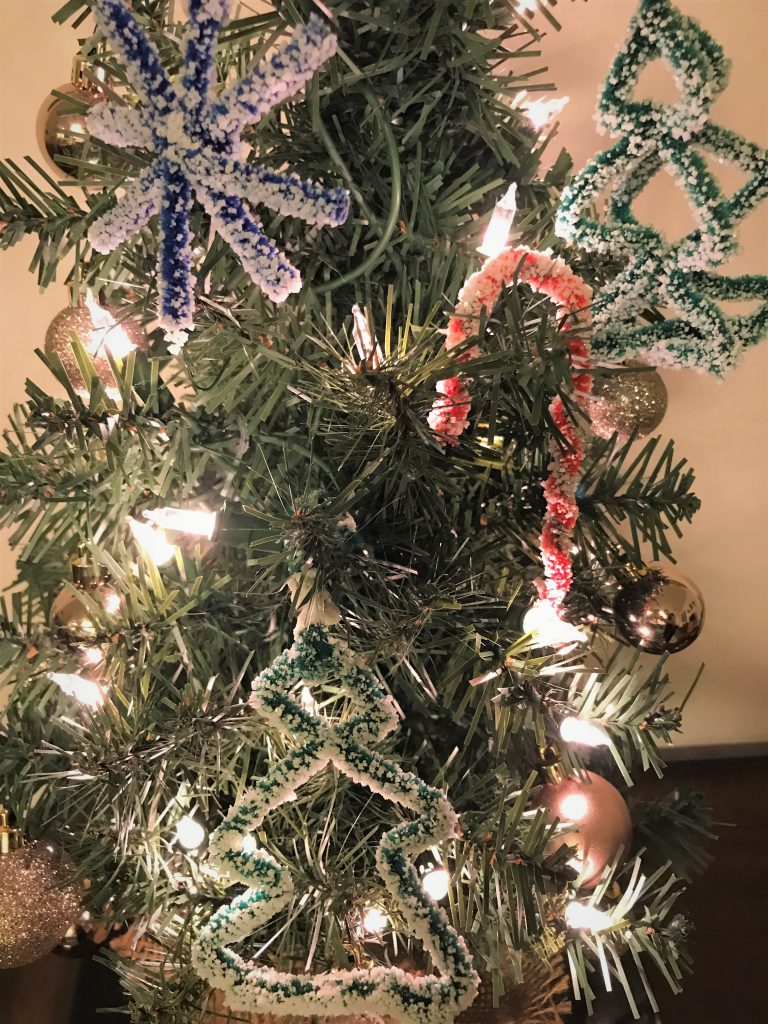
Start by creating designs with the chenille stems by bending and cutting them into different shapes.
You can get creative and use multiple stems to create 3D shapes:
Add an extra piece of a chenille stem on the end of your ornament so that the clothespin has something to hold onto while still being able to submerge your ornament completely in the water. You could also just attach an ornament hanger at this point.
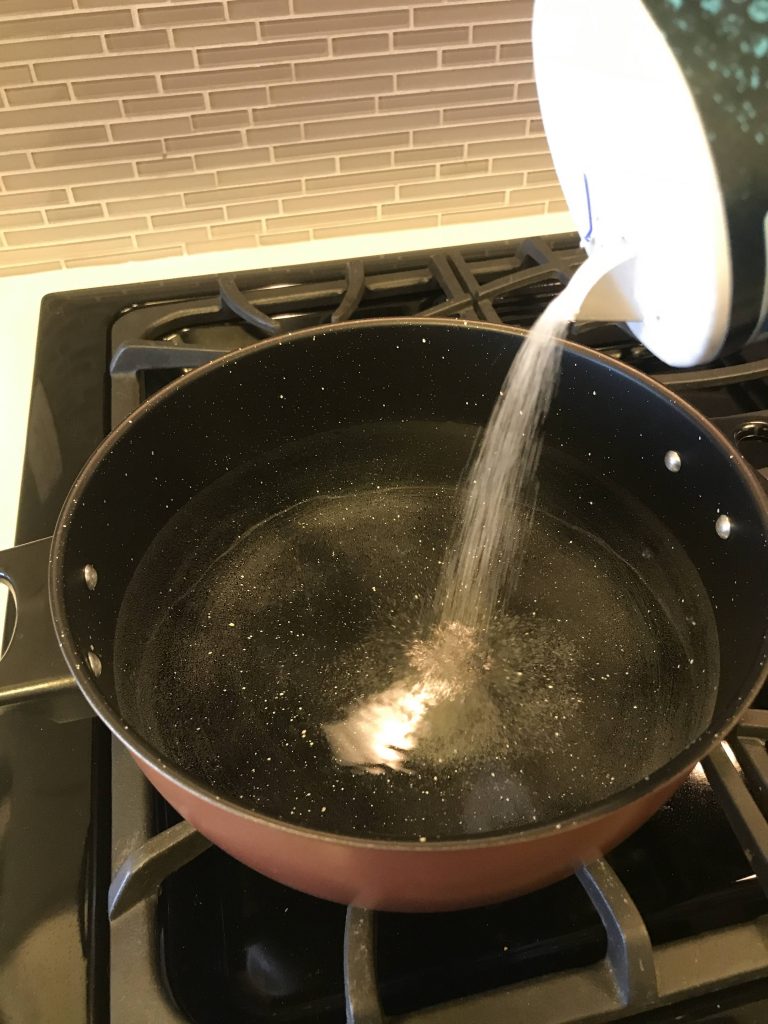
Prepare the salt water solution. (Heating water on the stove makes the process go more quickly, but you can also use hot tap water.) Use as much water as you need to be able to completely fill the jars. As the water heats up, pour salt in a bit at a time and stir to dissolve.
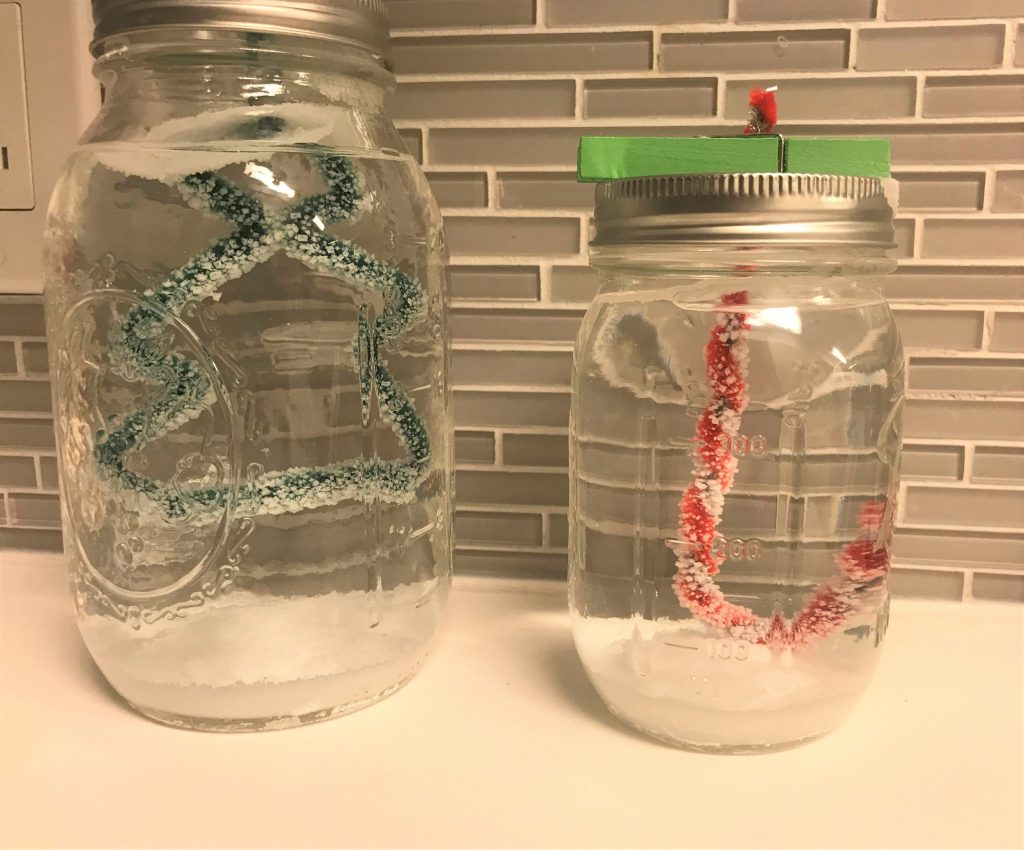
As more and more salt is added, the water will eventually not be able to dissolve any more salt. You will see the salt stay at the bottom of the pan. It’s now ready.
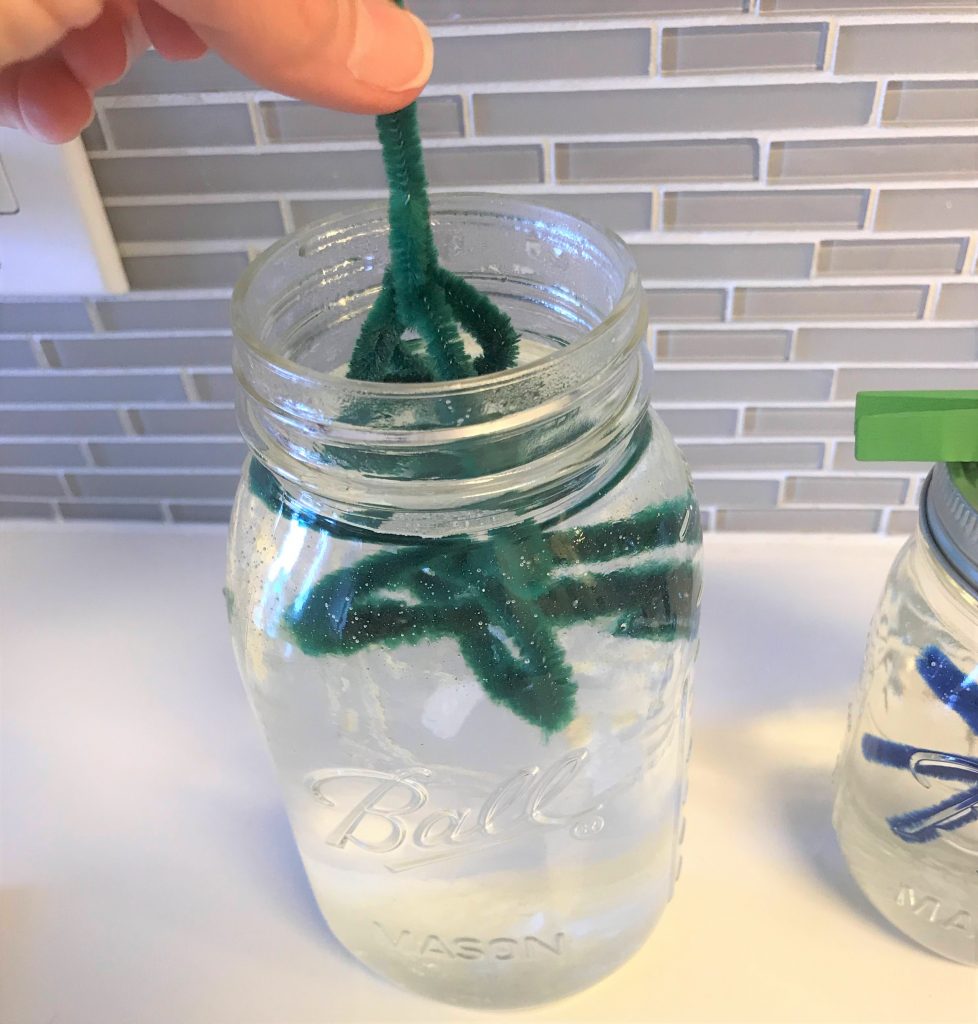
Pour the salt water solution carefully into the jars. (Please note, if you heated the water on the stove, the jars will be VERY hot once the water is poured in. Please use caution when touching them.) Carefully add the ornaments, one per jar. Make sure the clothespin rests at the top of the jar to keep the ornament suspended in the solution.
Salt crystals start forming pretty quickly on the ornaments. You should be able to see a nice layer of crystals after about an hour.
Why is this happening? When salt is dissolved in water, the water molecules separate the salt molecules. The added energy (heat) is what helps break the bond apart. As the water starts to evaporate in the jars, the salt molecules start to bond together again. This is called ionic bonding. As the salt crystals form and fall to the bottom of the jar (because they are heavier than the water), some cling to the chenille stems.
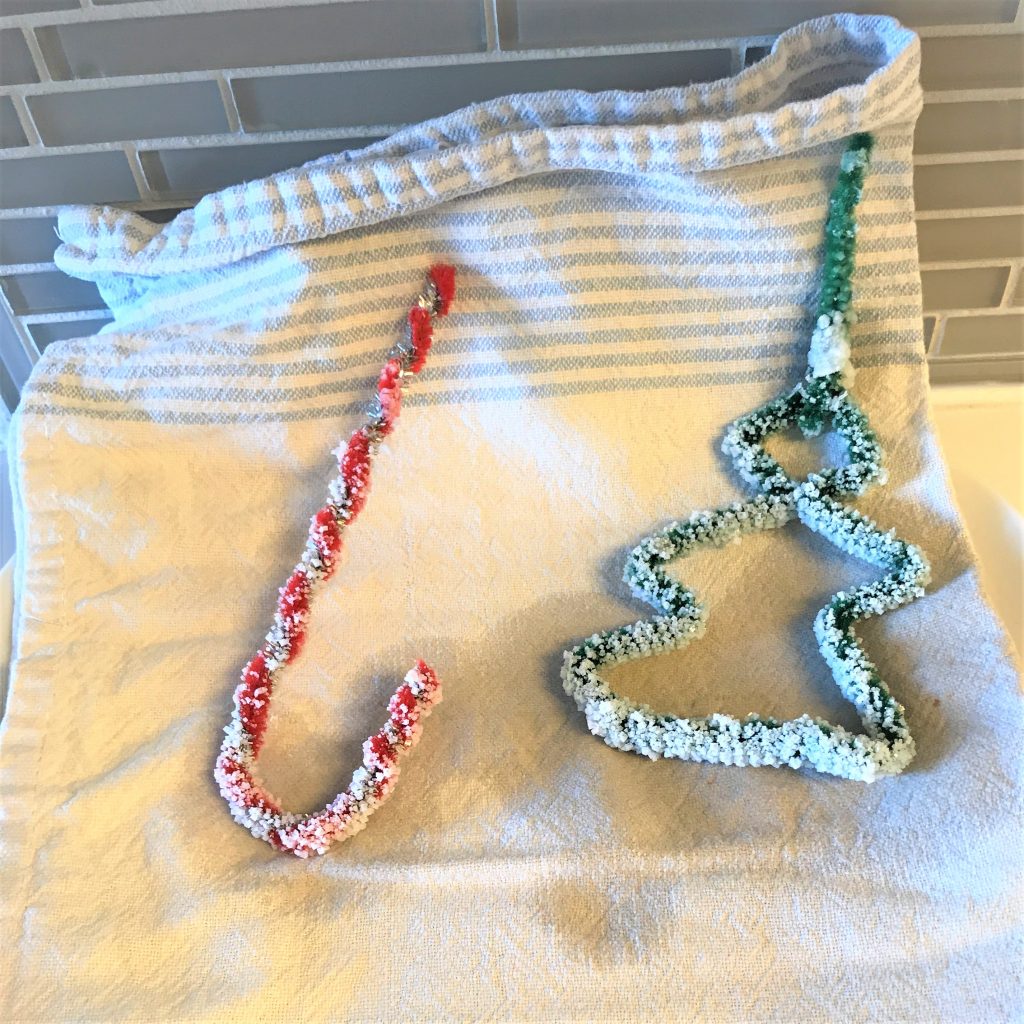
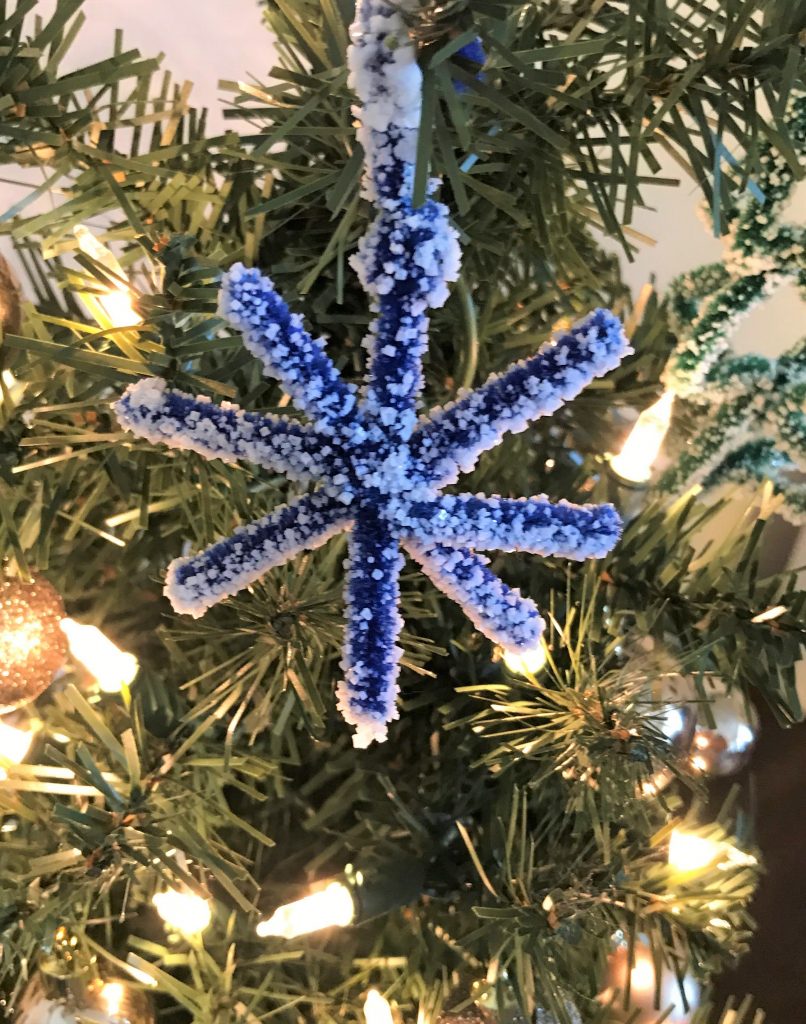
Leave the ornaments in the jars for about 24 hours. You can also try different lengths of time to see if that changes the amount of crystals that form. Then gently remove the ornaments and let dry completely.
Halloween is almost here! Yes, it will most likely look a lot different than years past, but that doesn’t mean you can’t still have fun. If you’re looking for a quick and easy craft to do with kids, we have one for you that uses materials you probably already have lying around the house.
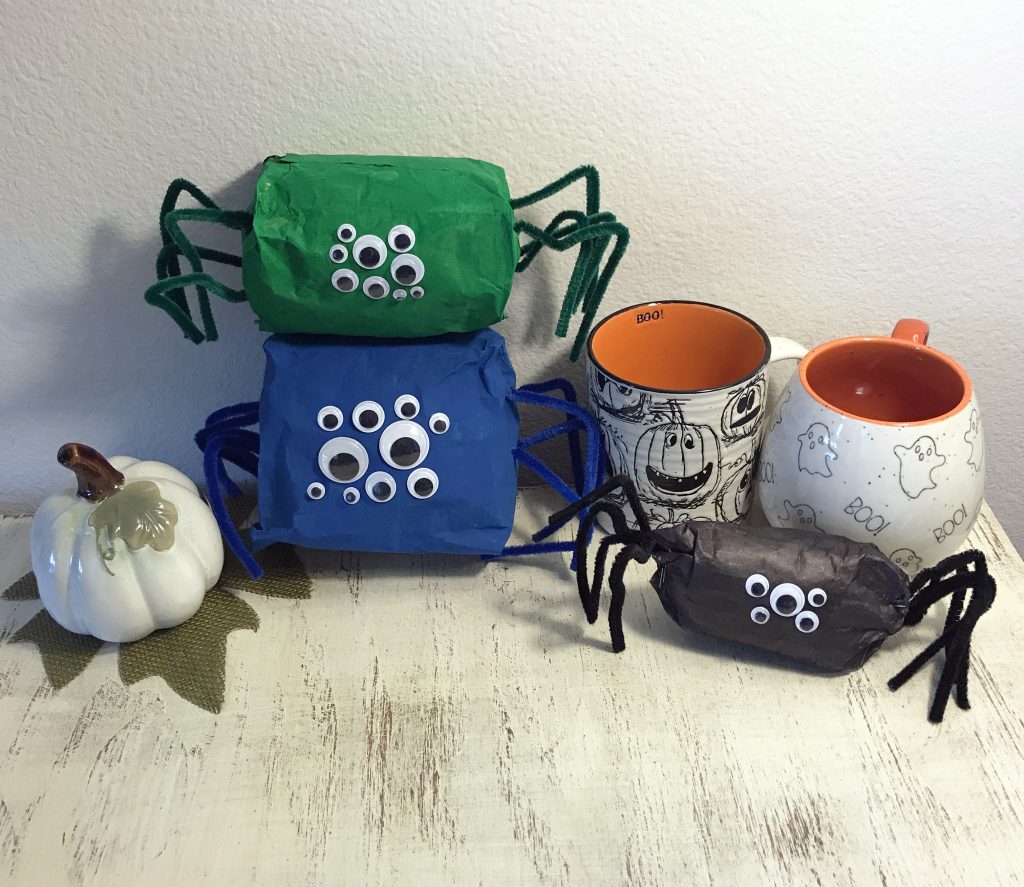
Paper bag spiders!
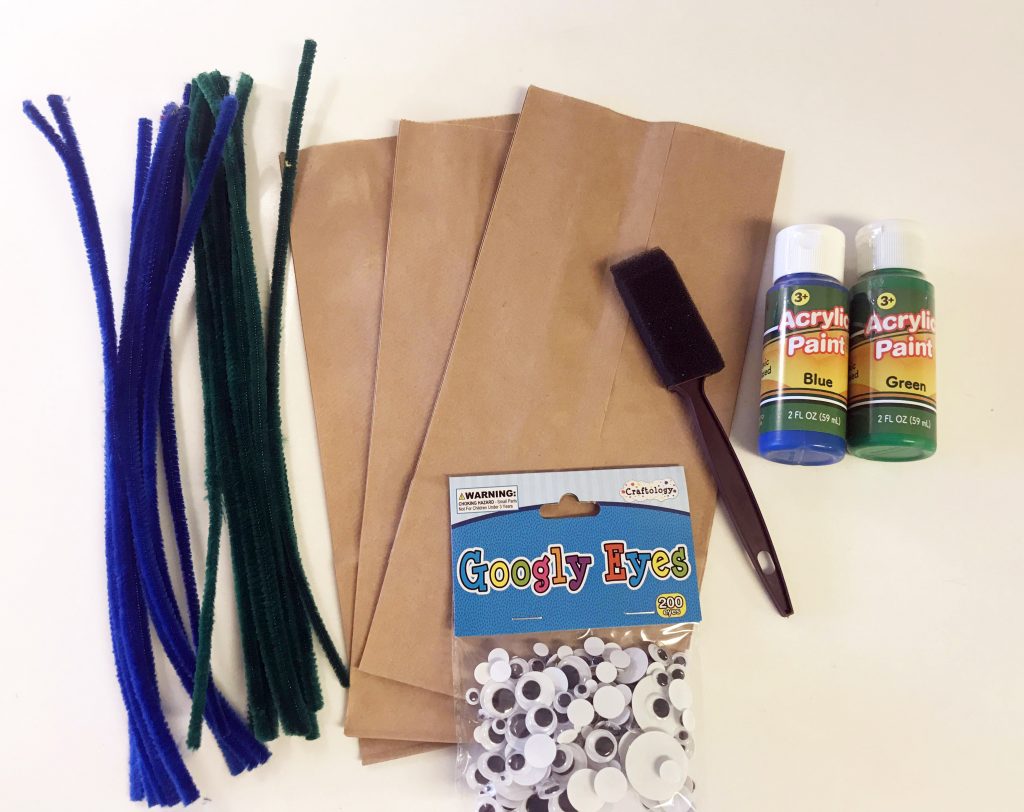
Materials needed:
paper lunch bags
paint/paintbrush or markers
chenille stems
googly eyes
glue
pencil or toothpick for poking holes
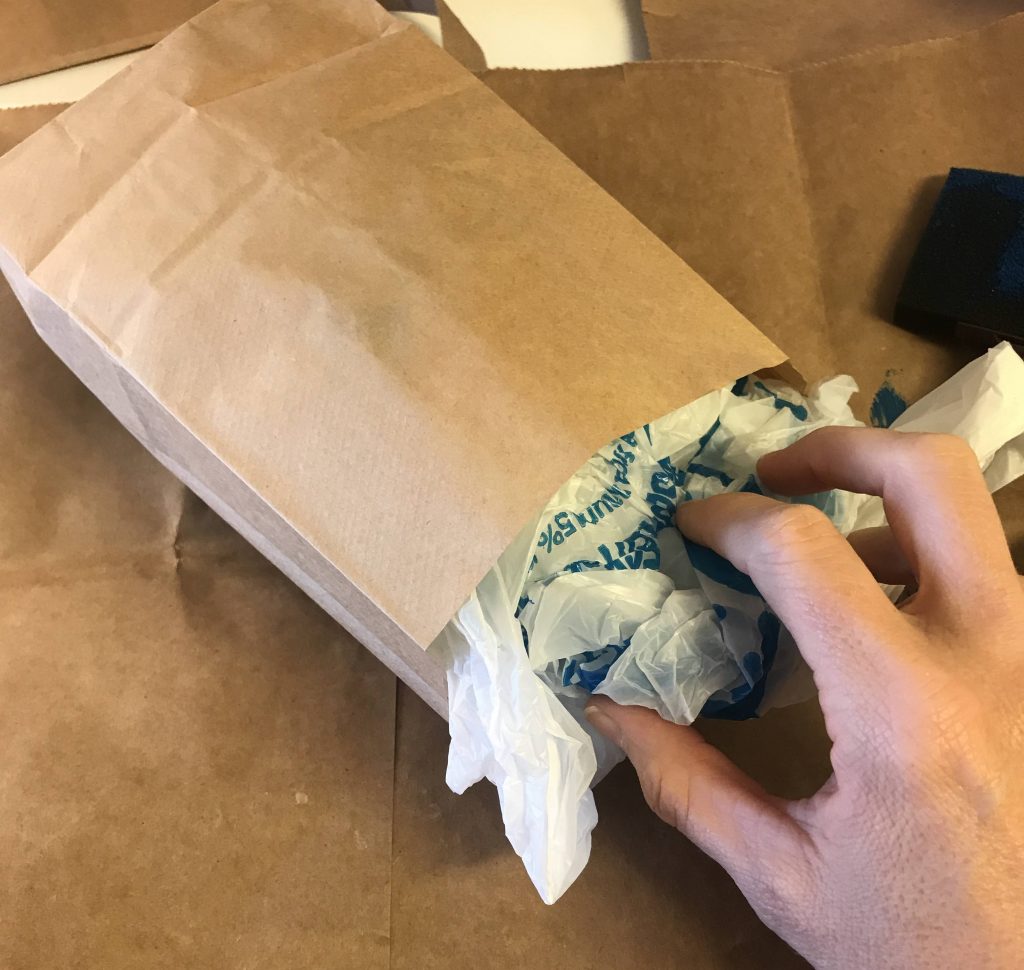
newspapers or plastic bags
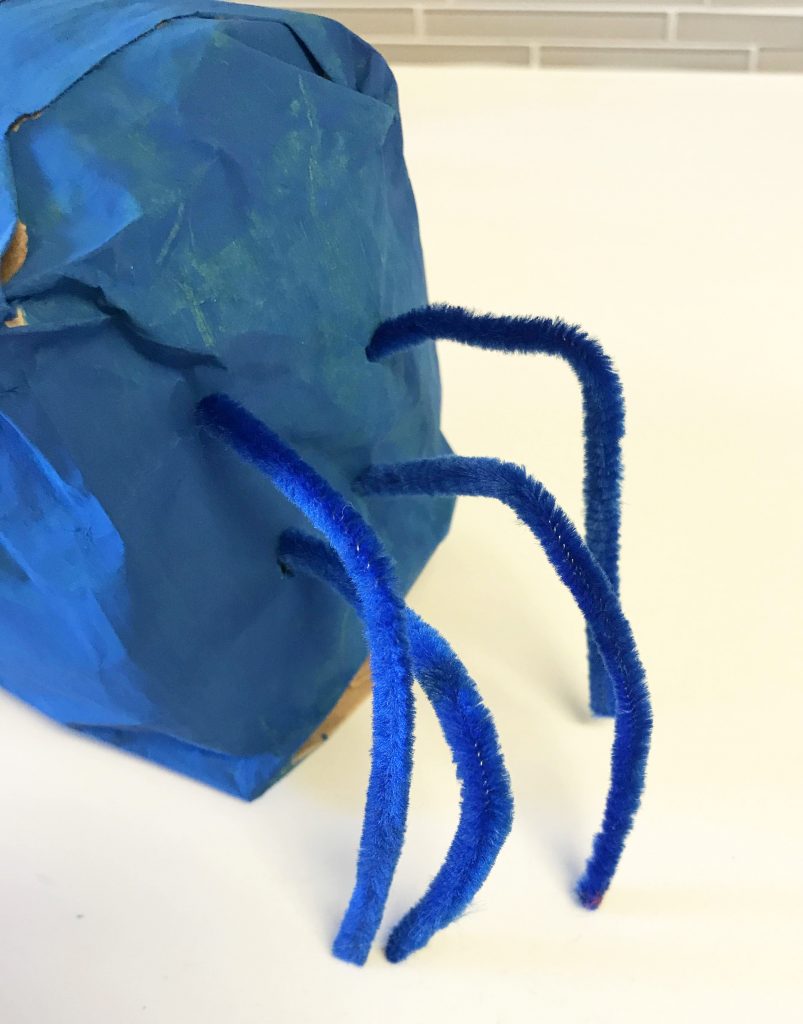
Fill the paper bag with newspaper or plastic bags until almost full. Leave a bit of room for stapling. If you are making multiple spiders, you may wish to cut the paper bags to different sizes.
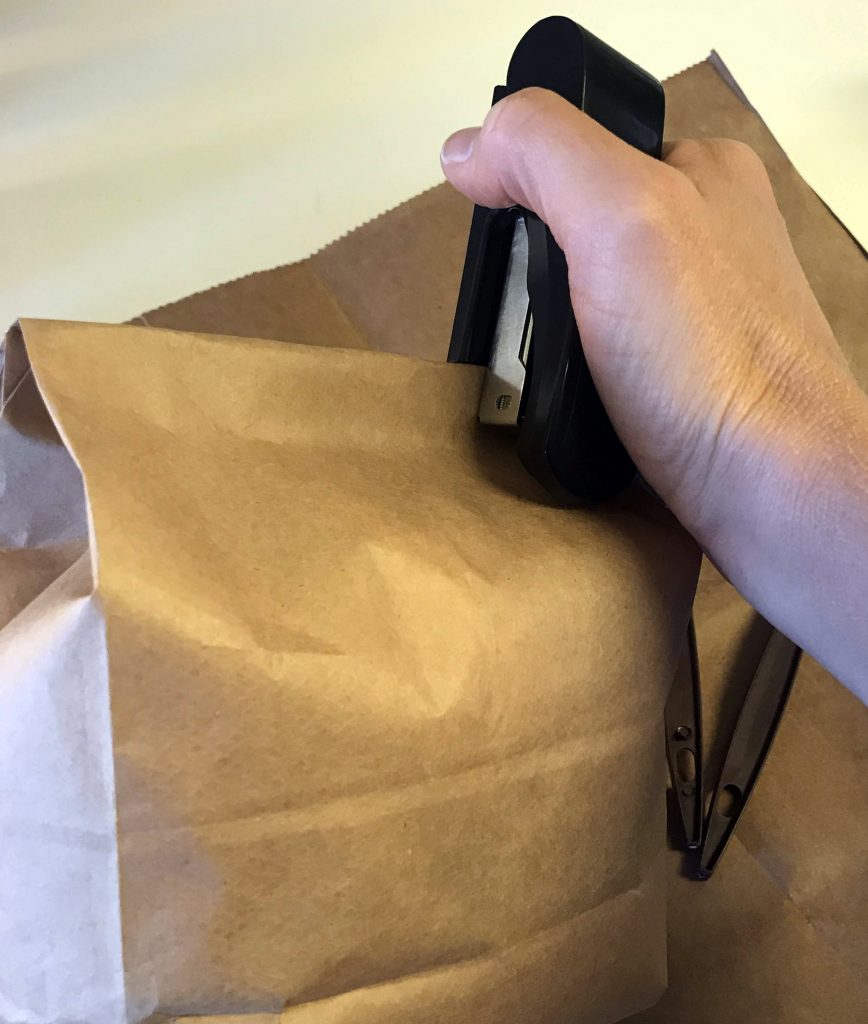
Fold over the top of the bag and staple it closed. When you create your spider, make sure the stapled side is on the bottom so it doesn’t show.
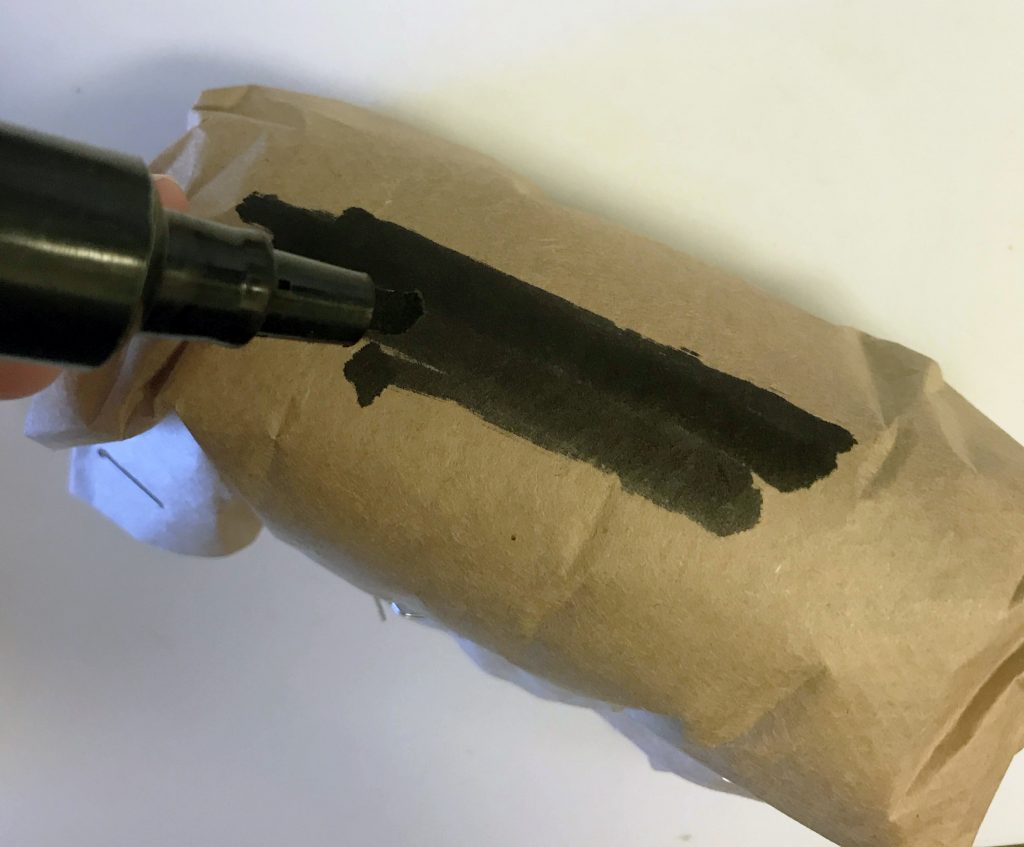
Paint or color each side of the paper bag.
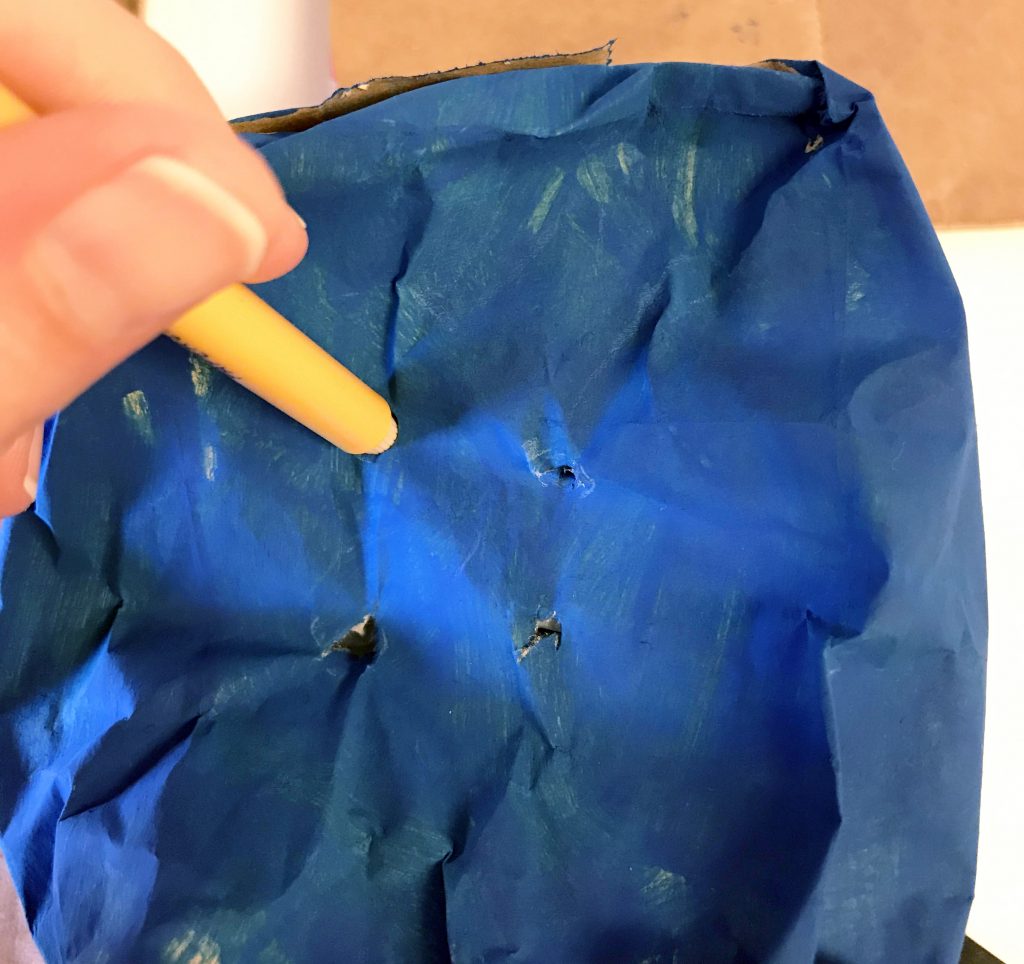
Take a pencil or toothpick and poke 4 holes on two opposite sides of the bag. Cut chenille stems in half and push one into each hole. Bend the stems so they touch the same level as the ground/bottom of the spider.
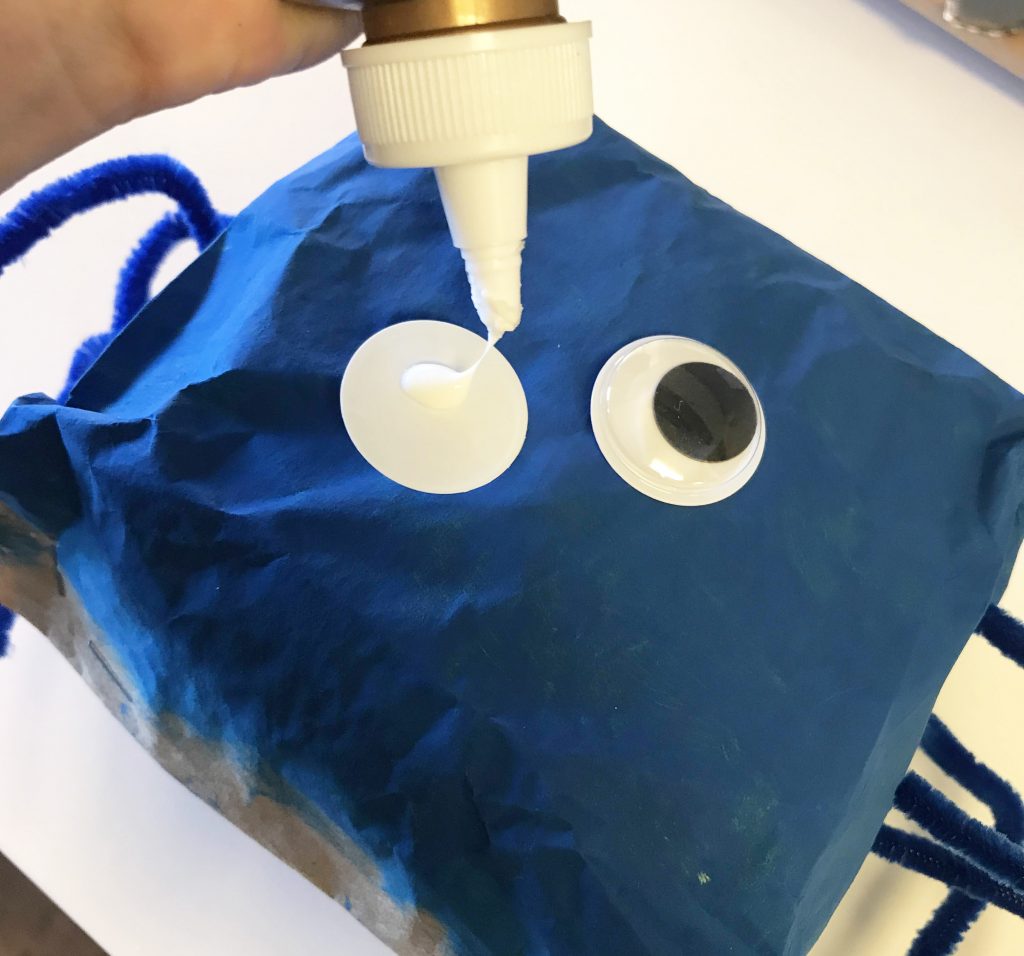
Glue googly eyes on the front of the bag. Spiders usually have eight eyes, but you can glue as few or as many as you’d like.
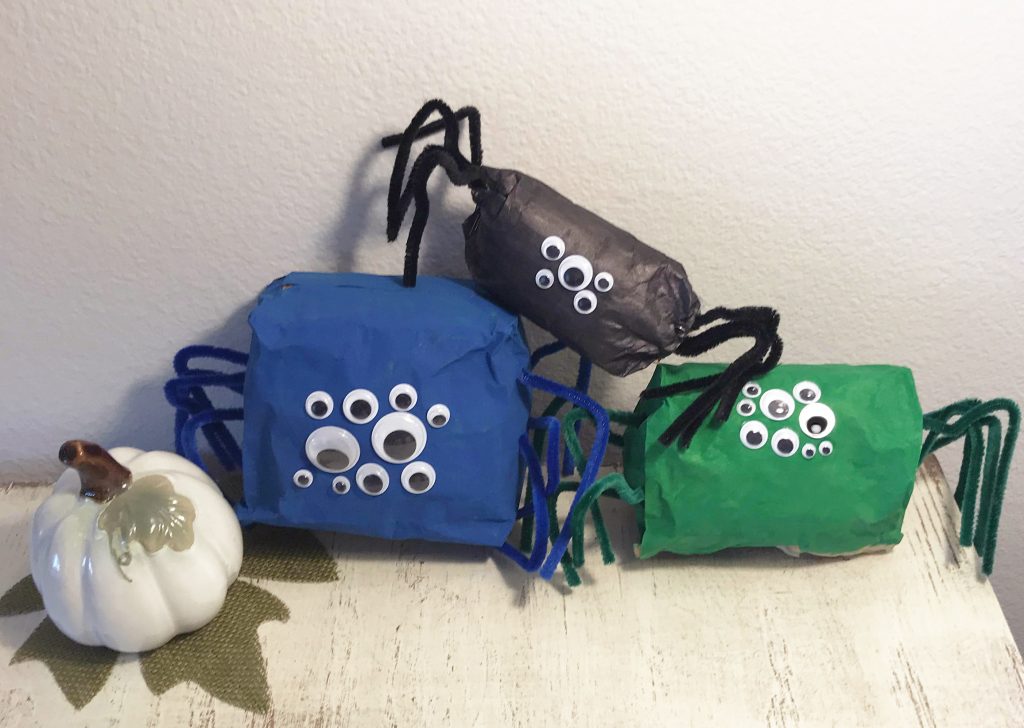
Display your spiders for a fun Halloween vignette. You can also use full-sized grocery paper bags and put them on your porch with your pumpkins!
This can be done as a stand-alone craft activity, or in conjunction with doing research and learning more about spiders and other creepy crawly critters.
For more fun Halloween crafts and other holiday activities, check out our holiday books.