Looking for a fun, easy craft to do with your kiddos this season? Here is a super simple activity that parents can do with materials that are most likely already around the house. Salt crystal ornaments are pretty to decorate with, and you can also discuss the science behind the growth of the crystals.
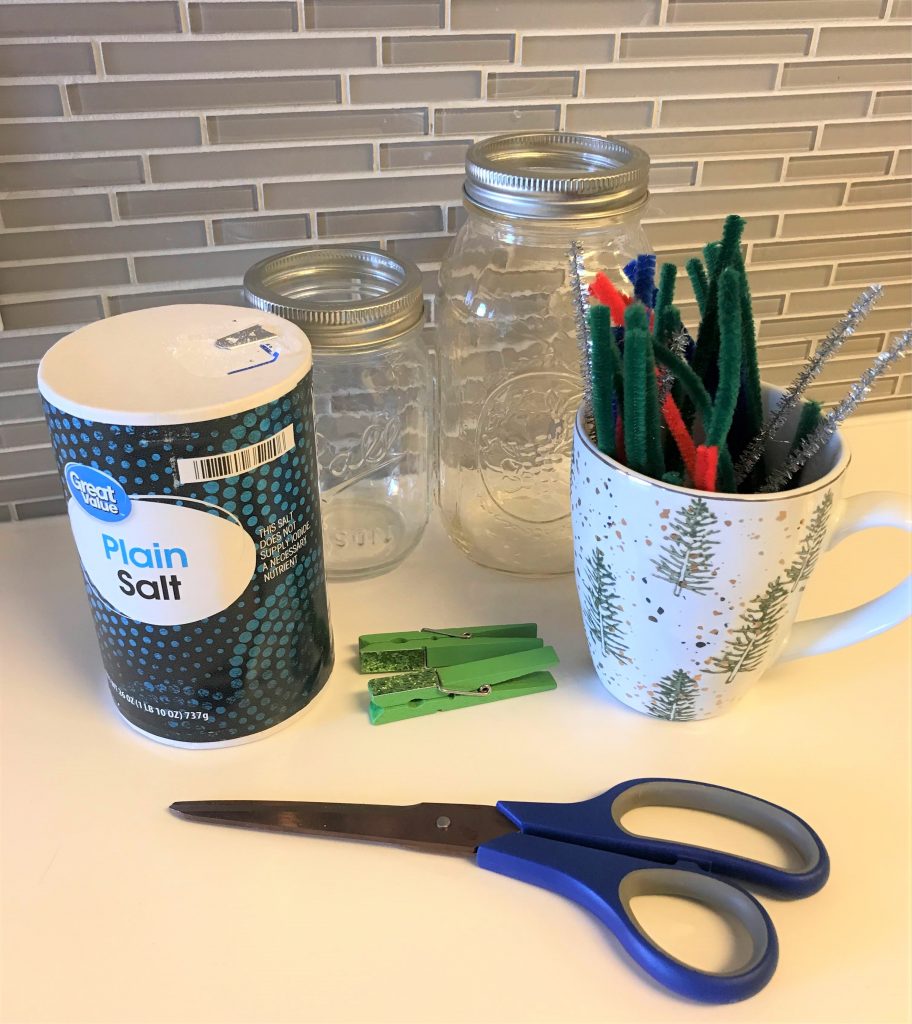
The only materials you need are
salt
chenille stems
scissors
jars or other containers
clothespins
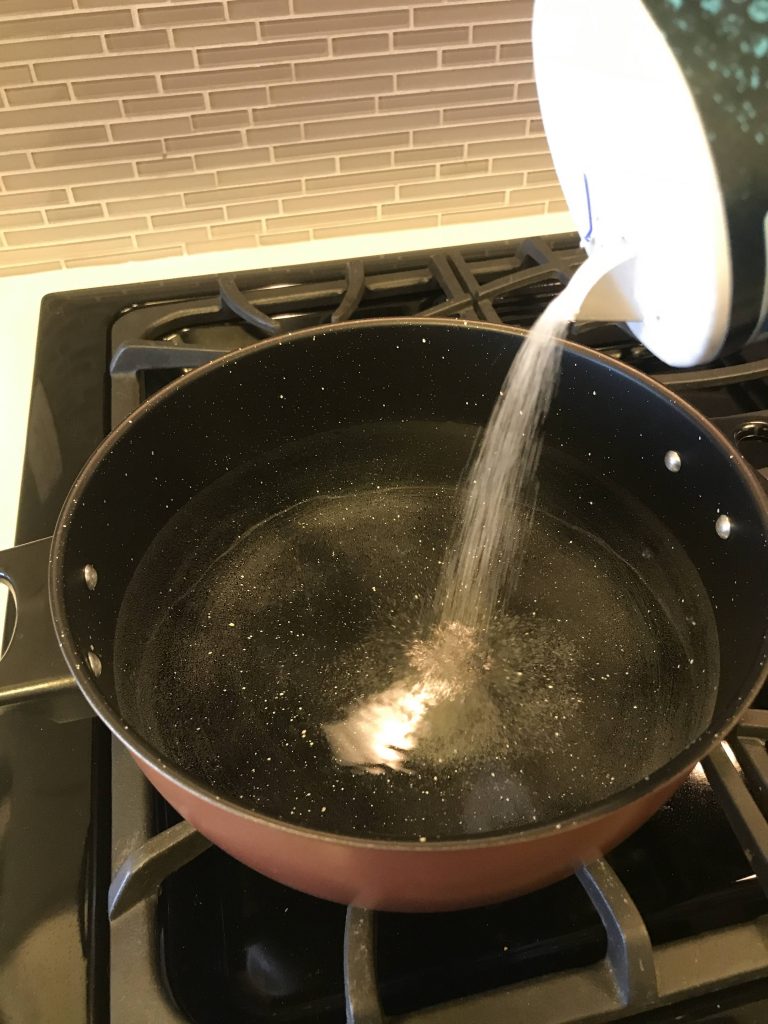
a pot for heating water (you can also just use hot tap water)
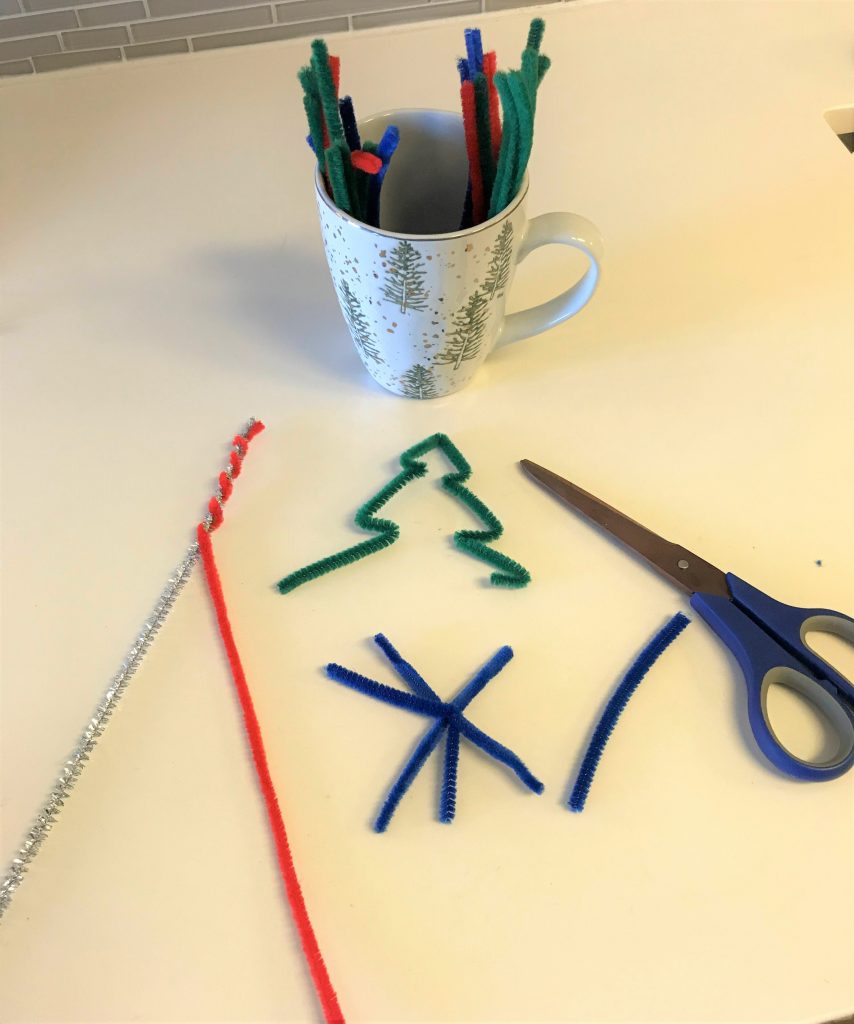
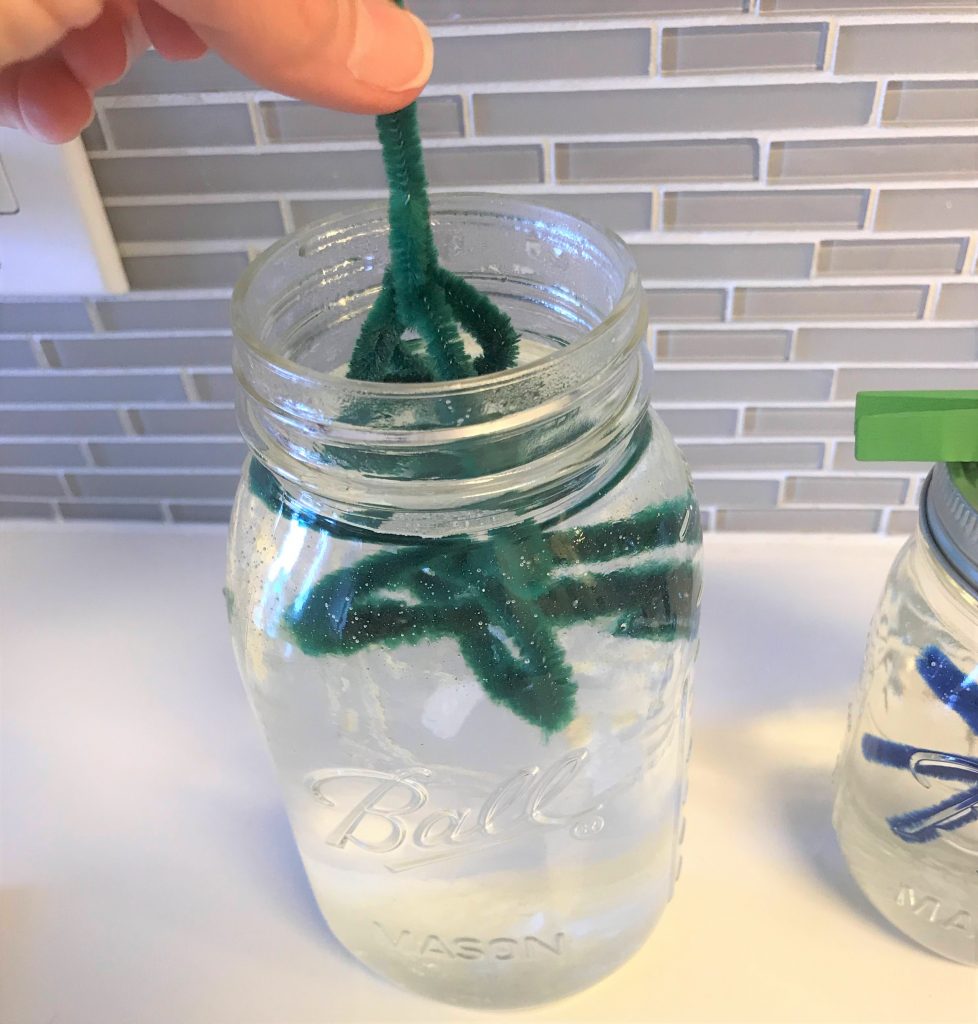
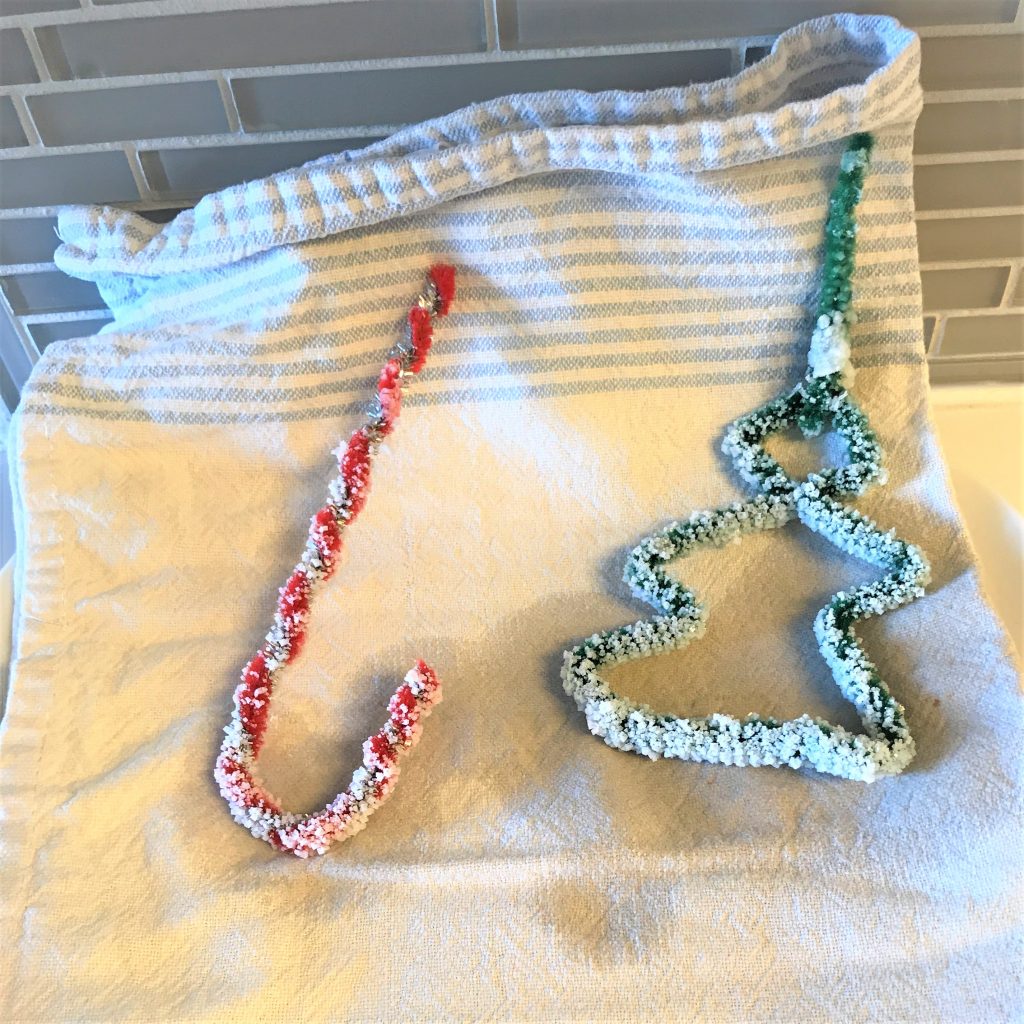
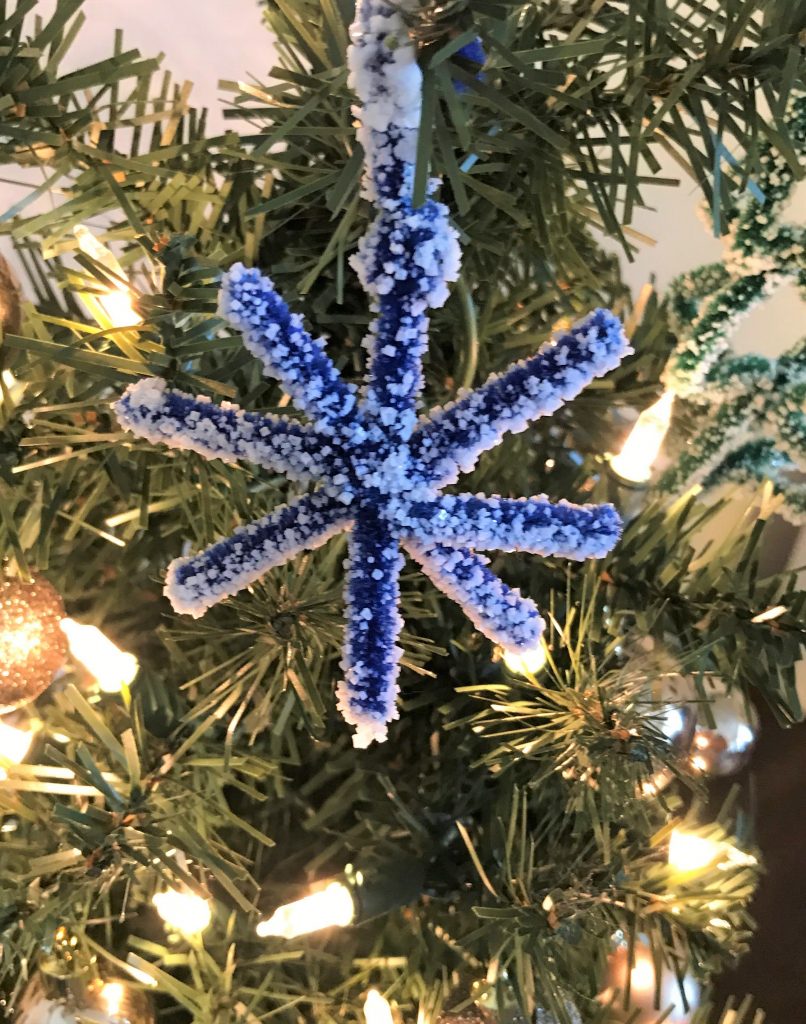
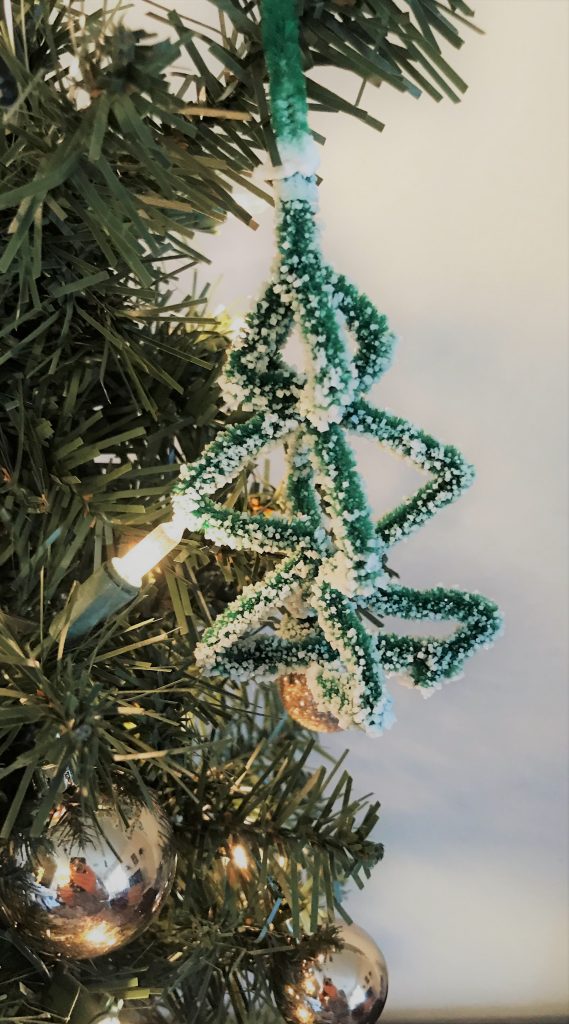
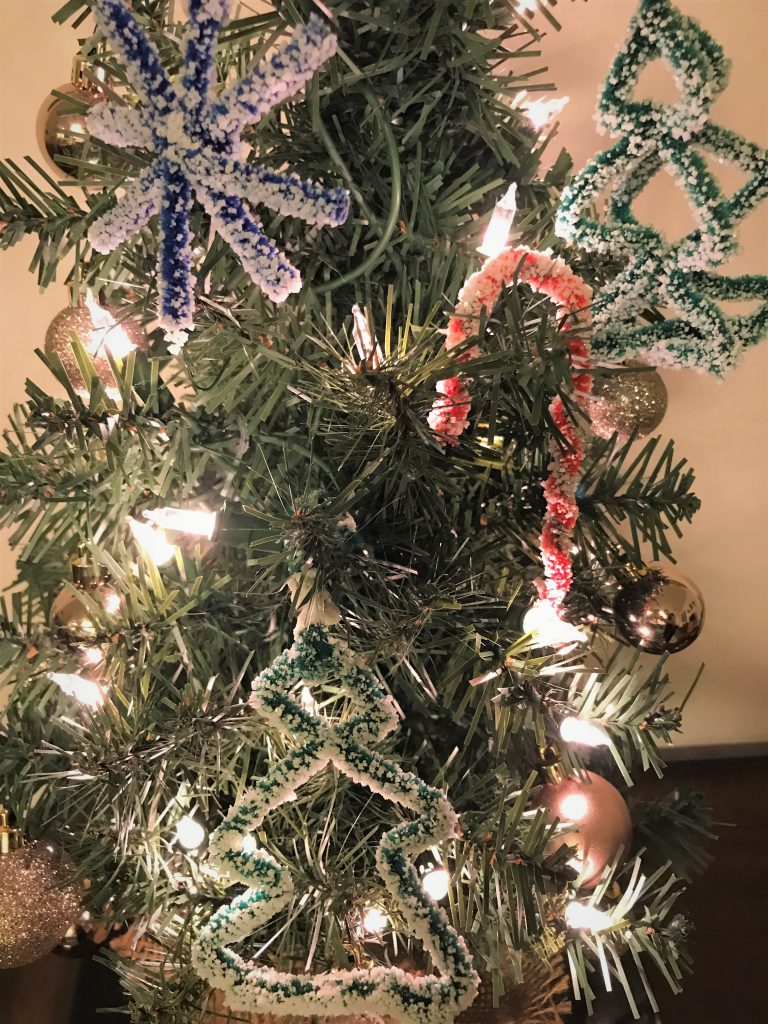
Start by creating designs with the chenille stems by bending and cutting them into different shapes.
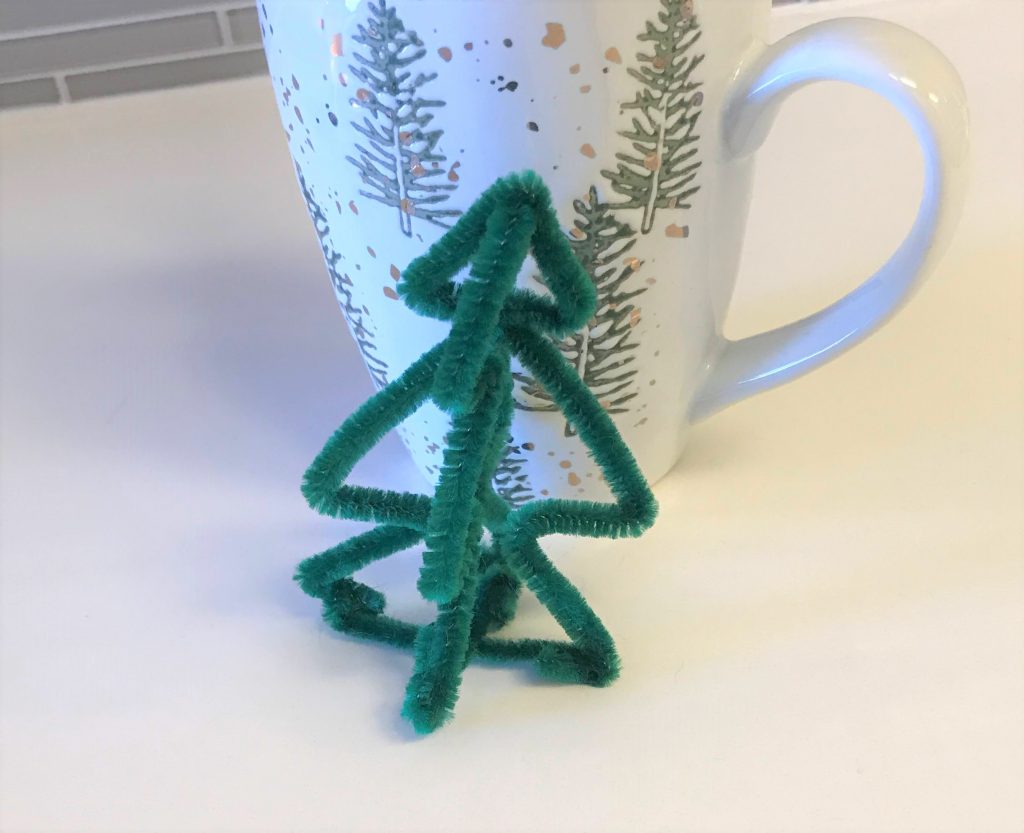
You can get creative and use multiple stems to create 3D shapes:
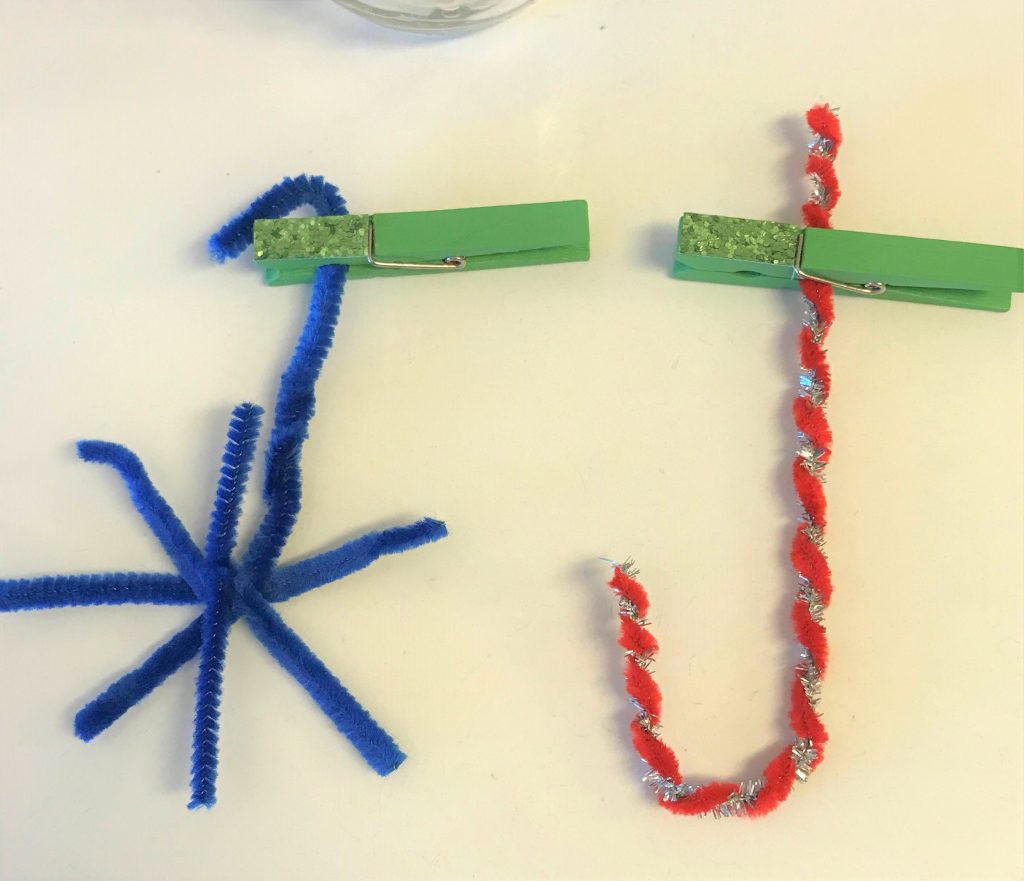
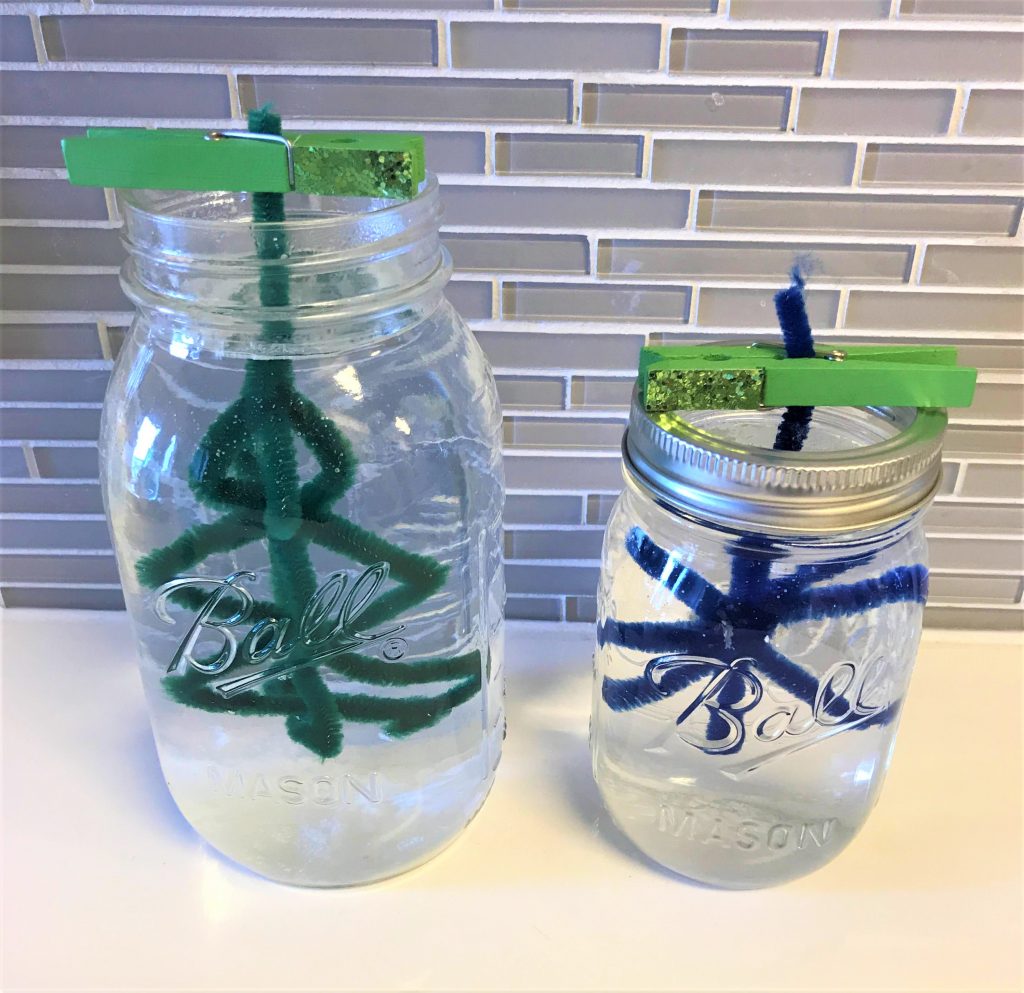
Add an extra piece of a chenille stem on the end of your ornament so that the clothespin has something to hold onto while still being able to submerge your ornament completely in the water. You could also just attach an ornament hanger at this point.
Prepare the salt water solution. (Heating water on the stove makes the process go more quickly, but you can also use hot tap water.) Use as much water as you need to be able to completely fill the jars. As the water heats up, pour salt in a bit at a time and stir to dissolve.
As more and more salt is added, the water will eventually not be able to dissolve any more salt. You will see the salt stay at the bottom of the pan. It’s now ready.
Pour the salt water solution carefully into the jars. (Please note, if you heated the water on the stove, the jars will be VERY hot once the water is poured in. Please use caution when touching them.) Carefully add the ornaments, one per jar. Make sure the clothespin rests at the top of the jar to keep the ornament suspended in the solution.
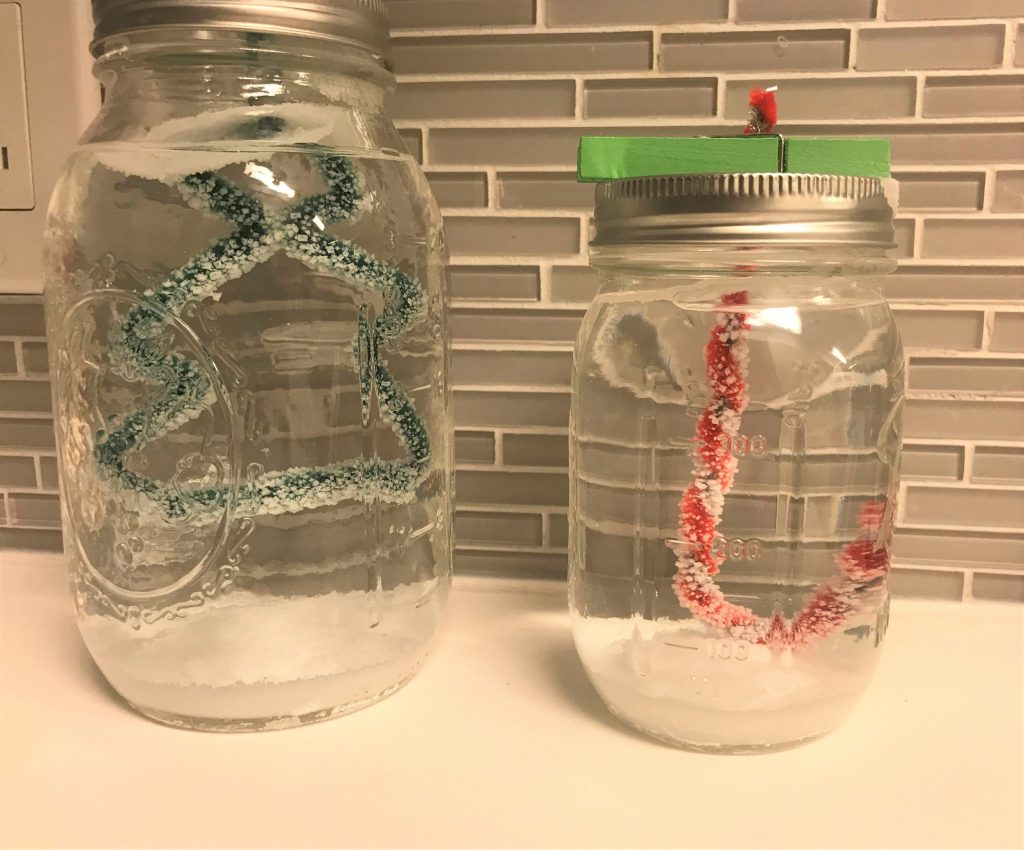
Salt crystals start forming pretty quickly on the ornaments. You should be able to see a nice layer of crystals after about an hour.
Why is this happening? When salt is dissolved in water, the water molecules separate the salt molecules. The added energy (heat) is what helps break the bond apart. As the water starts to evaporate in the jars, the salt molecules start to bond together again. This is called ionic bonding. As the salt crystals form and fall to the bottom of the jar (because they are heavier than the water), some cling to the chenille stems.
Leave the ornaments in the jars for about 24 hours. You can also try different lengths of time to see if that changes the amount of crystals that form. Then gently remove the ornaments and let dry completely.
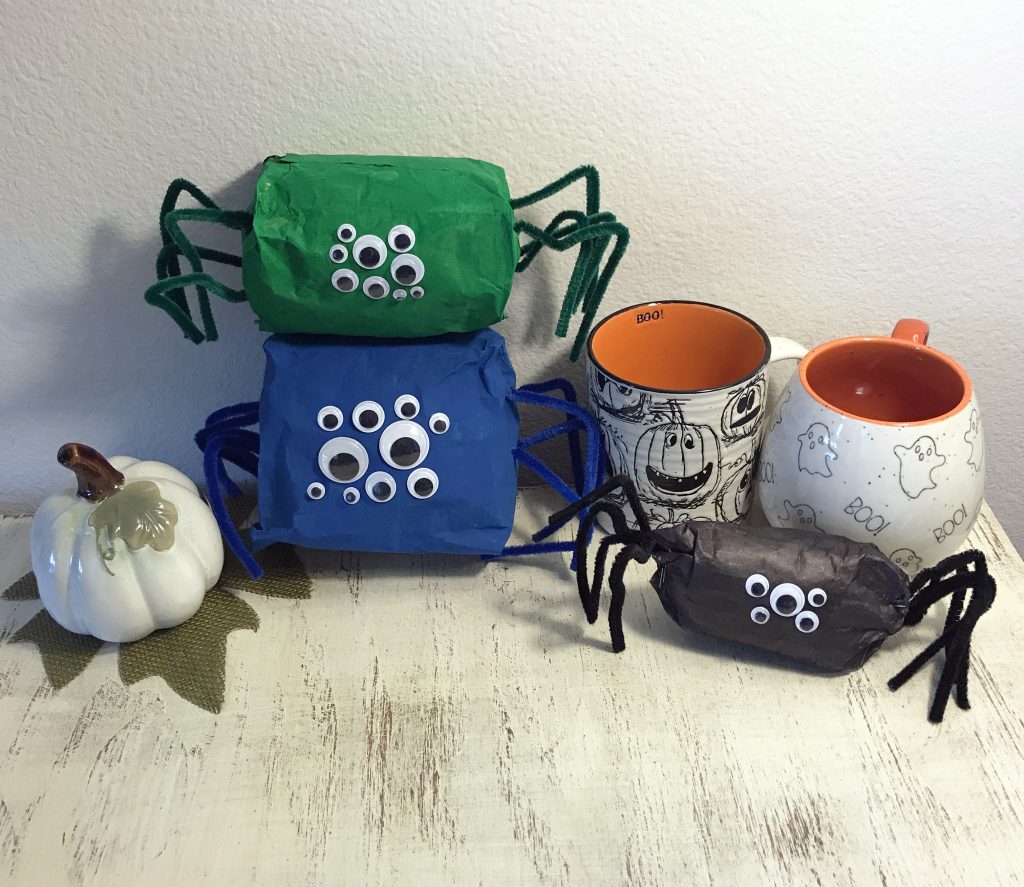
Halloween is almost here! Yes, it will most likely look a lot different than years past, but that doesn’t mean you can’t still have fun. If you’re looking for a quick and easy craft to do with kids, we have one for you that uses materials you probably already have lying around the house.
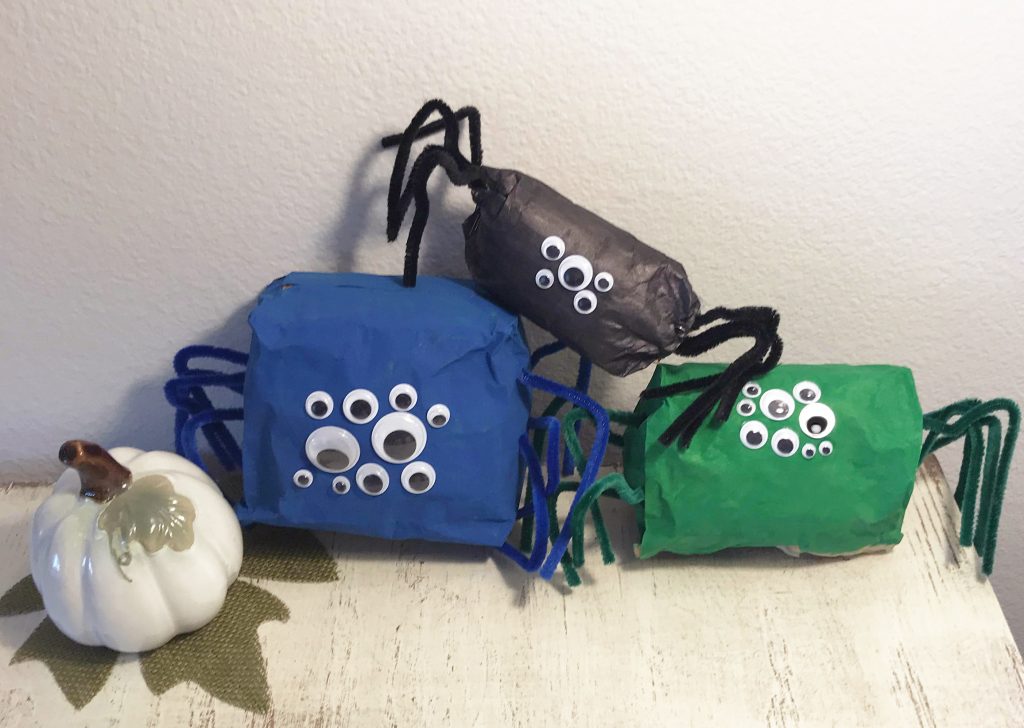
Paper bag spiders!
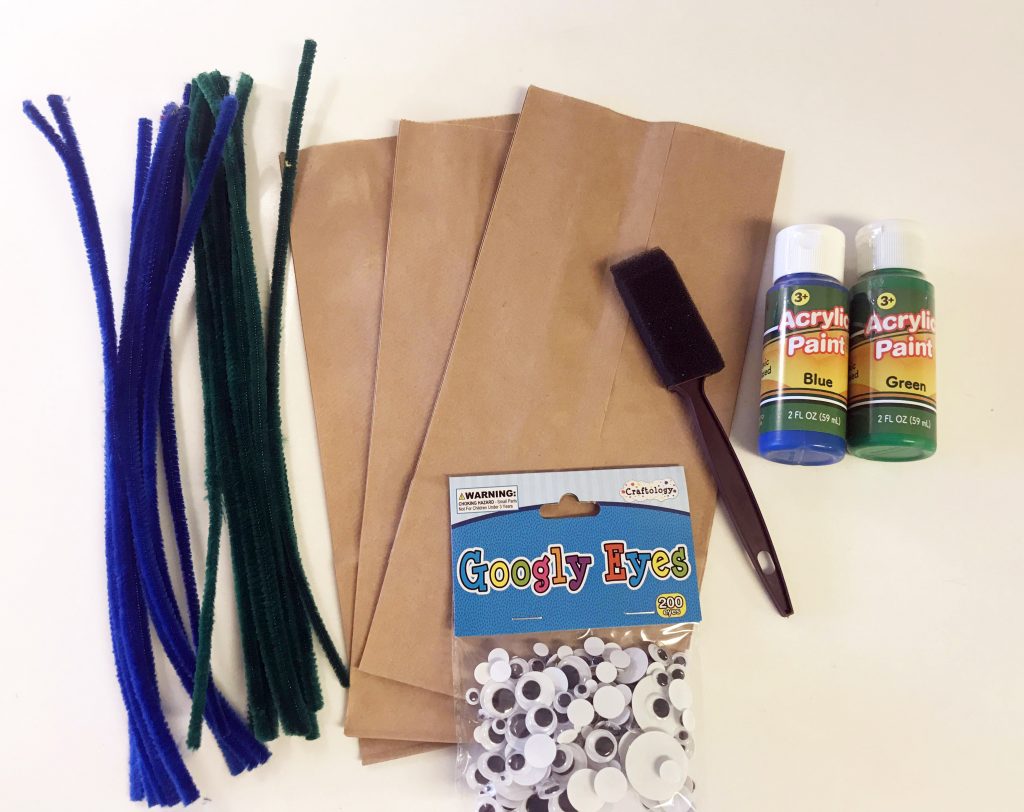
Materials needed:
paper lunch bags
paint/paintbrush or markers
chenille stems
googly eyes
glue
pencil or toothpick for poking holes
newspapers or plastic bags
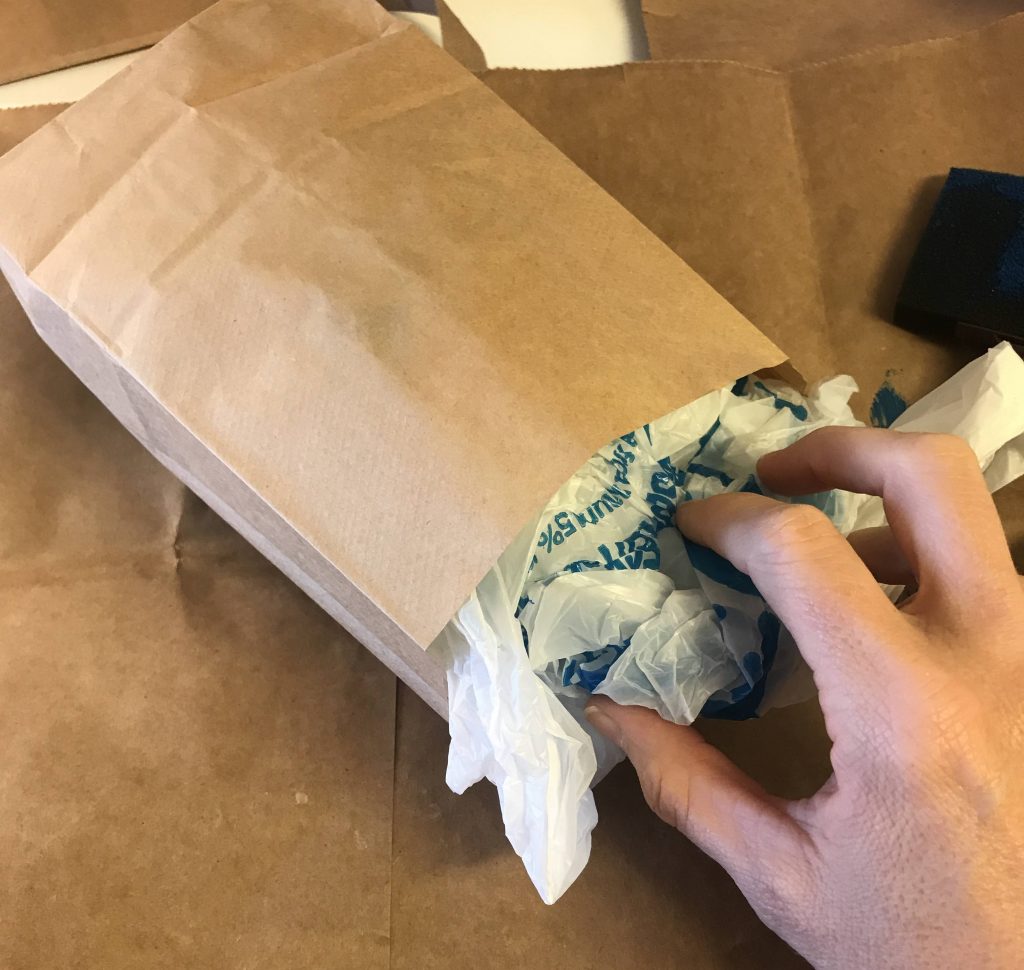
Fill the paper bag with newspaper or plastic bags until almost full. Leave a bit of room for stapling. If you are making multiple spiders, you may wish to cut the paper bags to different sizes.
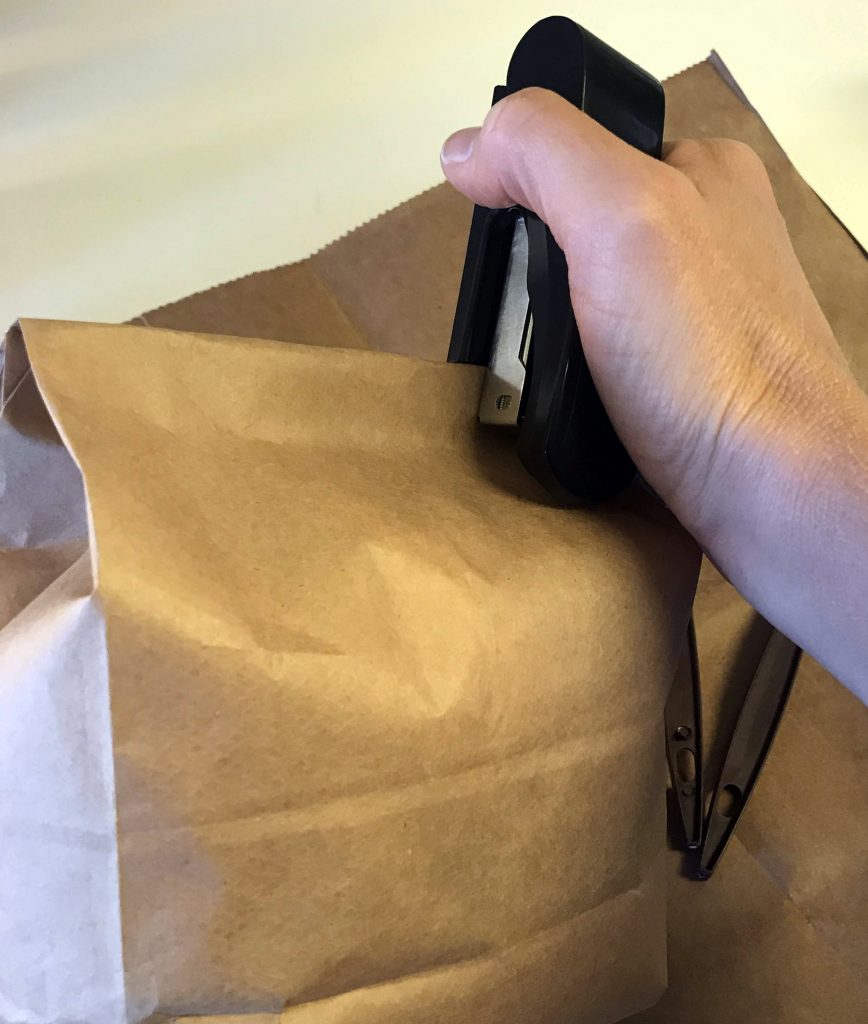
Fold over the top of the bag and staple it closed. When you create your spider, make sure the stapled side is on the bottom so it doesn’t show.
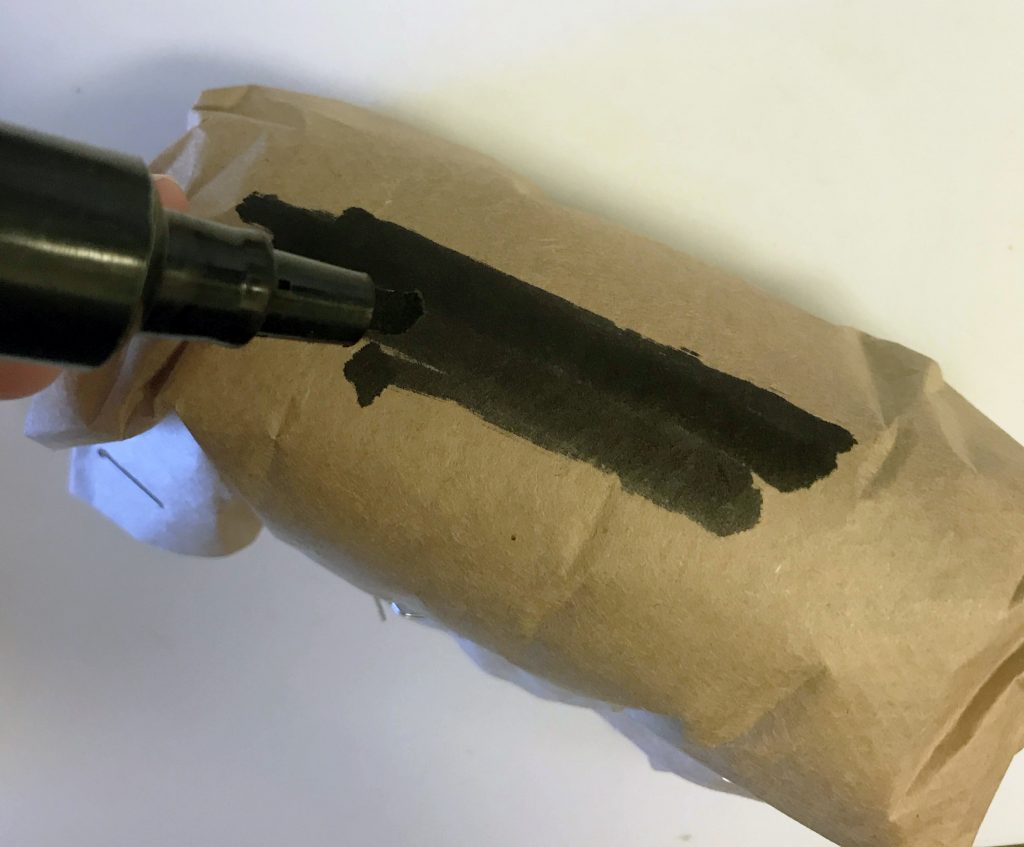
Paint or color each side of the paper bag.
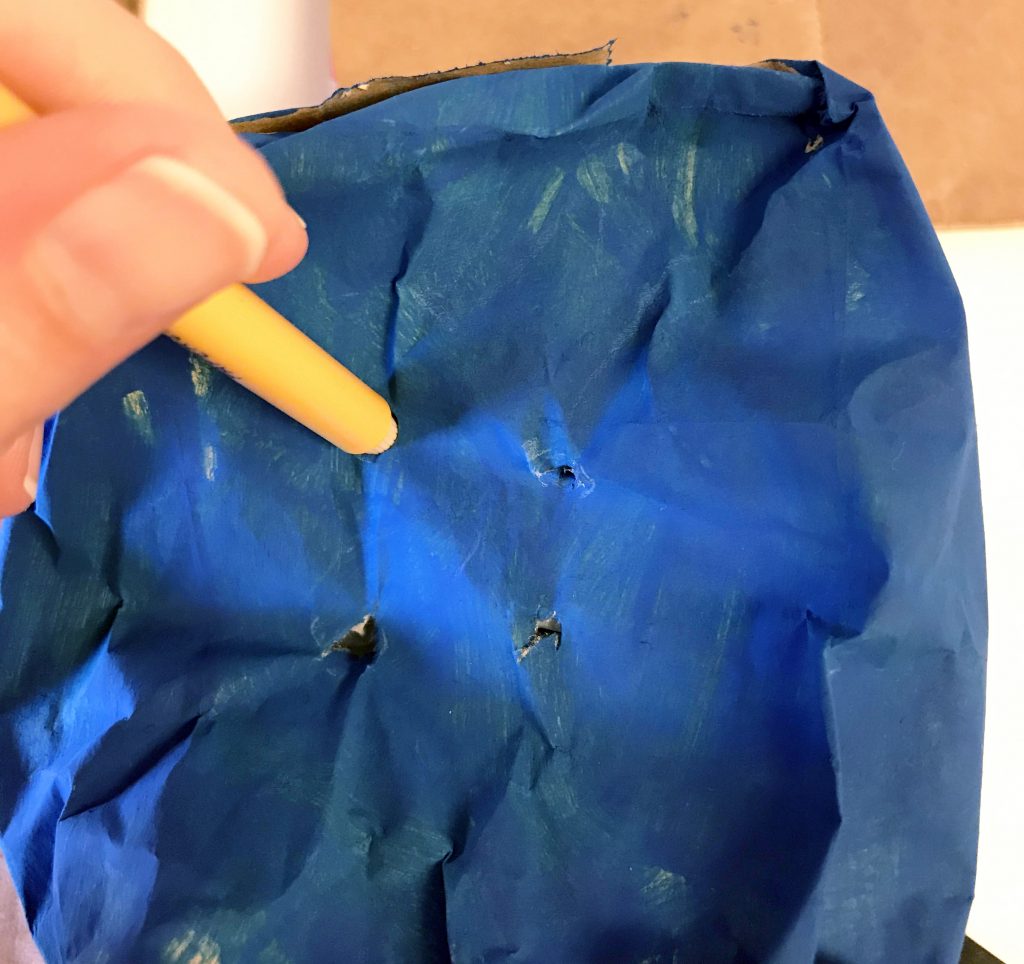
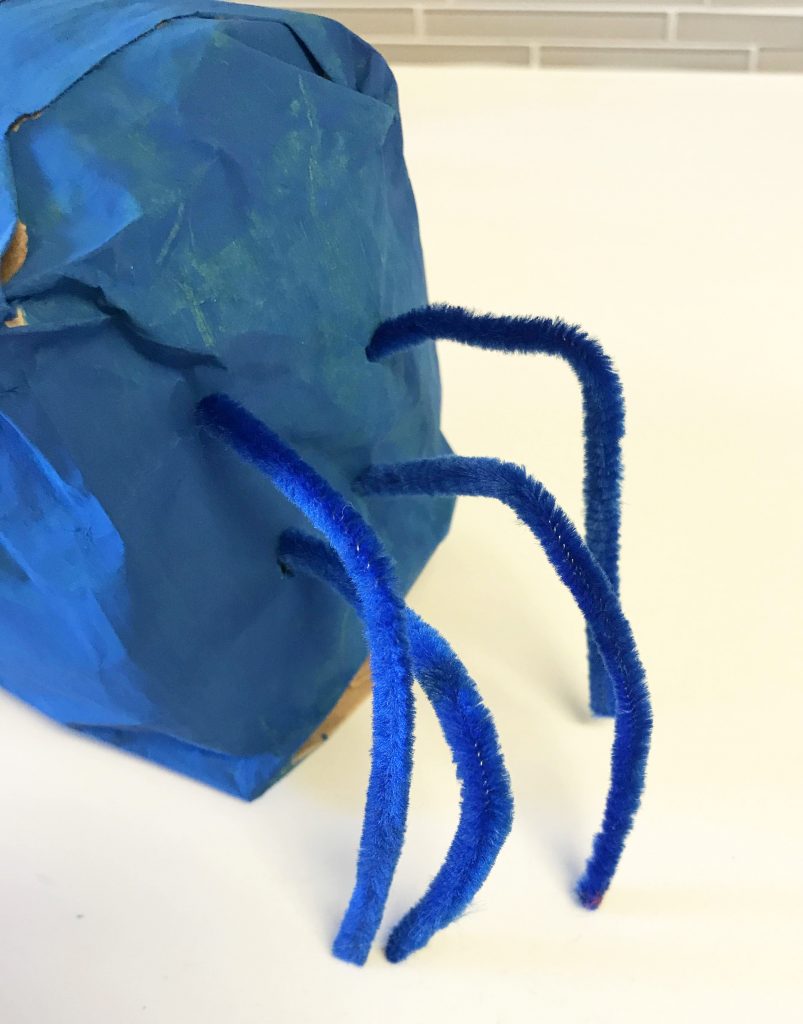
Take a pencil or toothpick and poke 4 holes on two opposite sides of the bag. Cut chenille stems in half and push one into each hole. Bend the stems so they touch the same level as the ground/bottom of the spider.
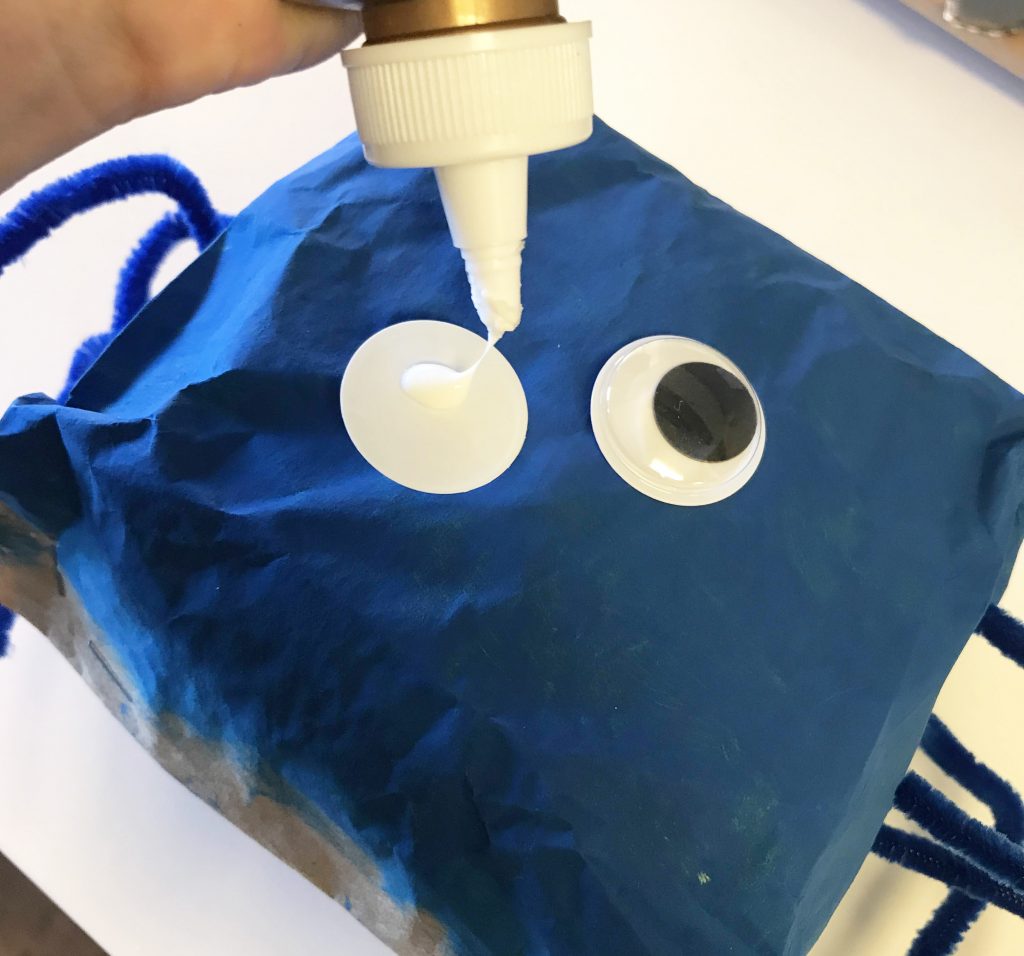
Glue googly eyes on the front of the bag. Spiders usually have eight eyes, but you can glue as few or as many as you’d like.
Display your spiders for a fun Halloween vignette. You can also use full-sized grocery paper bags and put them on your porch with your pumpkins!
This can be done as a stand-alone craft activity, or in conjunction with doing research and learning more about spiders and other creepy crawly critters.
For more fun Halloween crafts and other holiday activities, check out our holiday books.
The beginning of this school year probably looks a lot different than what you imagined, whether your children are starting remotely, going back in the classroom, or a hybrid of the two. Yet, regardless of how the actual school day looks, both teachers and students are still being held to the normal grade-level standards of your district. That’s why it’s important to make sure your students are performing at grade level and using products that are standards based to keep them on track and prepare them for the next year.
What exactly is standards-based learning? The term refers to instruction, grading, and assessment based on students demonstrating an understanding of the skills and knowledge they are expected to learn in each grade. Schools and districts determine goals of each grade level and subject at that grade level, (often based on state standards), and teachers determine how to teach students so they achieve those goals and expectations.
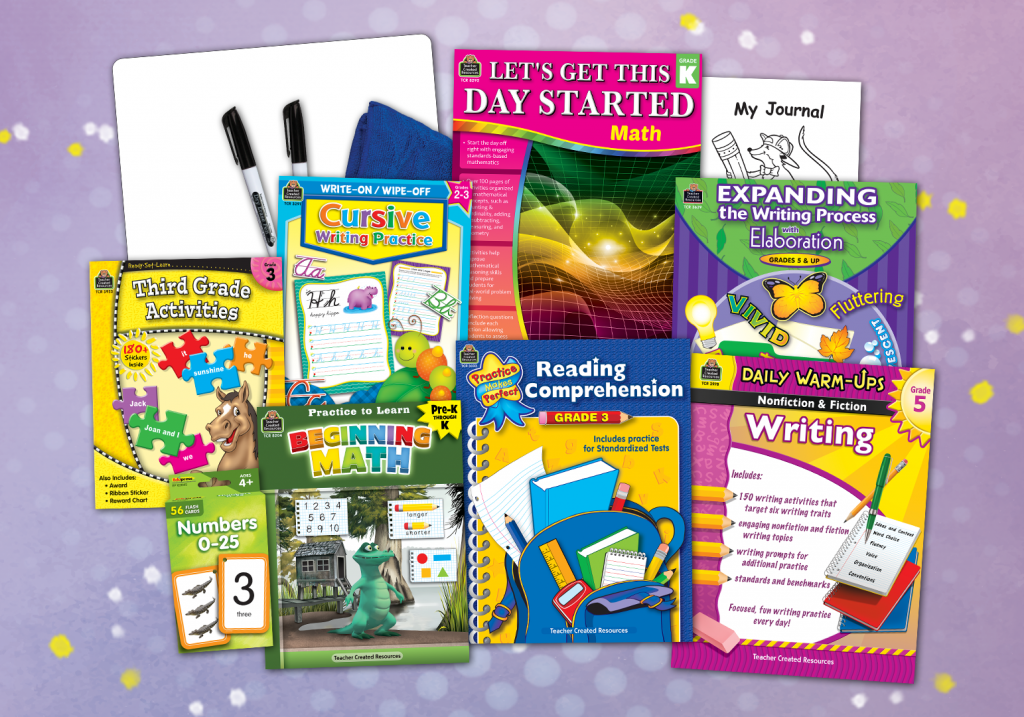
For parents, we understand that you may be concerned about keeping your child up to grade level given the unusual circumstances of the school year. That’s why we put together Learning Together sets. They include products that focus on essential standards-based, grade-level skills and provide daily practice to supplement classroom instruction. Plus, they are easy to use and require very little supervision, allowing children to learn and review independently. Below are five tips to help you incorporate these kits into your child’s learning day without making more work for you.
You may wish to start with a grade level below the one your student is starting this fall. Summer learning loss is real, and given that the end of the last school year was so chaotic, it’s a great idea to review skills to bolster your child’s confidence as well as reinforce the building blocks needed for their new grade level. Plus, since this will most likely be review, children can probably do most of the activities on their own.
Check your child’s coursework, (either online or what they bring home from school) and see what topics they are being introduced to in each subject. (Often the teacher will address which standards are being taught and list them somewhere in the classroom or online.) You can then peruse the activities in the various books of the Learning Together set and find some to match/reinforce what is being taught in class.
You can also check the school’s or district’s website to see the standards for your child’s grade level and find activities in the Learning Together set that reinforce the standards. If you’re unsure of whether the standard has been addressed yet, check with your child’s teacher.
Encourage your child to peruse the activities during their independent-work time, especially if they are learning remotely for now. They might finish their classwork early, and the activities in the books from the Learning Together set will keep them on task as well as reinforce what the teacher is demonstrating.
Get to know your children as learners. These materials can help you see areas in which your child shines and conversely, where they need more help. You can also monitor how they approach the activities; do they need more time for reflection? Do they like one format better than another? Do they need to take an academic break before finishing and come back later in order to better process the activity? This is valuable information for when they are required to do classwork on their own. You can discuss their learning methods with them and help them self-regulate according to their own academic styles and needs.
Bonus tip: Go easy on yourself and remind yourself that you are doing your best. You and your children are navigating this unfamiliar territory as well as you can. Not only will you get through this, but you’ll also have a better understanding of standards-based education as well as your individual children’s learning styles. By giving you and your children grace for a gigantic learning curve, you are also helping them stay calmer and more focused, and they’ll know you’ll be proud of them for piloting this learning journey to the best of their ability.
These are uncertain and unprecedented times. You’re doing your best to adhere to all the rules and regulations. You’re following all the safety and health precautions. You’re staying home and hunkering down. You’re also about to lose your mind. It’s only a few days into “homeschooling”; you’re out of (energy and) novel ideas, you’re ready to pull your hair out, and you have a sneaking suspicion that your kids are secretly plotting a mutiny.
We’re here to help. While we can’t take your children off your hands or speed up the search for a cure, we can offer you some activities to do with your kids to keep everyone from going absolutely bonkers while you’re isolating.
Here’s our current list of sanity-savers. We hope to add to it regularly to keep you and your family engaged and occupied.
Go Outside Yes, really. As of now, doctors, health professionals, and the World Health Organization are still encouraging people to go outside for mental as well as physical health. Even if it’s just a walk around the block to break up the monotony of being stuck inside. It’s also okay to ride bikes, walk the dog, and go to the park. (Just remember to keep a safe distance from others.)
How about an outdoor scavenger hunt? Write down some objects to find and have your children check them off as they find them. Easy things to search for are: – a bird – a mammal – animal tracks – a nest – animal hole in the ground – a pinecone – litter – a flower – a pebble – a feather – a flying insect – a person riding a bicycle – a person wearing a hat – a person walking a dog
Indoor Physical Activities Bad weather? Try some of these physical activities that can be done inside. Yoga: (Just search for “yoga videos for kids.”) Yoga is a great physical activity and stress reliever. There are also a ton of other videos with different workouts for kids. There are also yoga online classes out there but what kinds of yoga classes are available? Pick a new one for each day of the week! Freeze dancing: Play music and have everyone dance, then stop it randomly. When the music stops, have children freeze in their pose and hold it until the music begins again. Obstacle Courses: Half the fun is creating them! Help children make one and then time them as they go through. See if they can beat their best time! Follow the leader: Pick someone to be the leader and then have everyone copy all their moves. Encourage lots of energetic movements such as jumping, stomping, bending, and squatting. Building: Forts, domino mazes, block towers, a contraption for getting a ball from Point A to Point B. Chores (Ugh, we know.) Designate a specific time for getting them done and then blast some fun music while everyone pitches in. Set a timer so kids know that this torture won’t last forever.
Check on Your Neighbors (from a safe distance) Some neighbors might not be able to go to the store to pick up necessities. It’s a great time to offer to help shop for elderly neighbors, single parents, or immunocompromised folks. Drop the goods off on their doorstep so there’s no worry about transmitting anything. Have your children include handwritten notes of encouragement.
Cooking We all have to eat. Look up fun and easy recipes online that your kids can help make. There are some fun, gross ideas that are usually reserved for Halloween but might elicit some interest from even your most reluctant sous chef.
Science Experiments Yes, this is the perfect time to study germs and all things disease-related. But it’s also a great time to engage in some hands-on STEM activities. Gather household materials and start a list of what to make next. Some popular online STEM searches: – egg drop – balloon car/rocket – cloud in a jar – catapult – bridge building – tower challenge – marble maze – simple machines (pulley, winch)
And of course, you can never go wrong with the good old baking soda and vinegar volcano.
Board Games Get on your step stool and pull down those dusty board games from the top shelf of the closet. Need some buy-in from older kids? Create a tournament using a few different free bingo games and have prizes for the winners.
Online Time Many children’s authors are live streaming the reading of their books. Check your favorite author’s website, or your library website for online activities.
Write a Letter To Grandparents Elderly persons are at greater risk of getting sick, so many families are not able to currently spend time face-to-face with grandparents. While you may already have your children video conferencing with them, a good writing activity would be to have children write to people they are separated from.
Write in a Journal These are historical times. Children writing about the current situation is a wonderful way to keep a record of this monumental time in their lives. Journaling can also help children express their feelings, some of which might be frightening right now. Writing down thoughts and emotions is a great exercise in stress relief.
Movies Try having your children watch movies with a critical eye. Ask them to think about a certain theme or certain imagery that reoccurs throughout. You can also have them read the book beforehand and have the movie as a treat when they’re done!
School Activities/Skills Practice When you need some structured “school” time, we have lots of free activities you can use to help your children keep up with their academic skills. Reading comprehension, sight words, and math skills by grade level are just a few of the things you’ll find to keep your kids’ academic abilities up to date.
We’re sure you have some ideas, too. Share them in the comments!