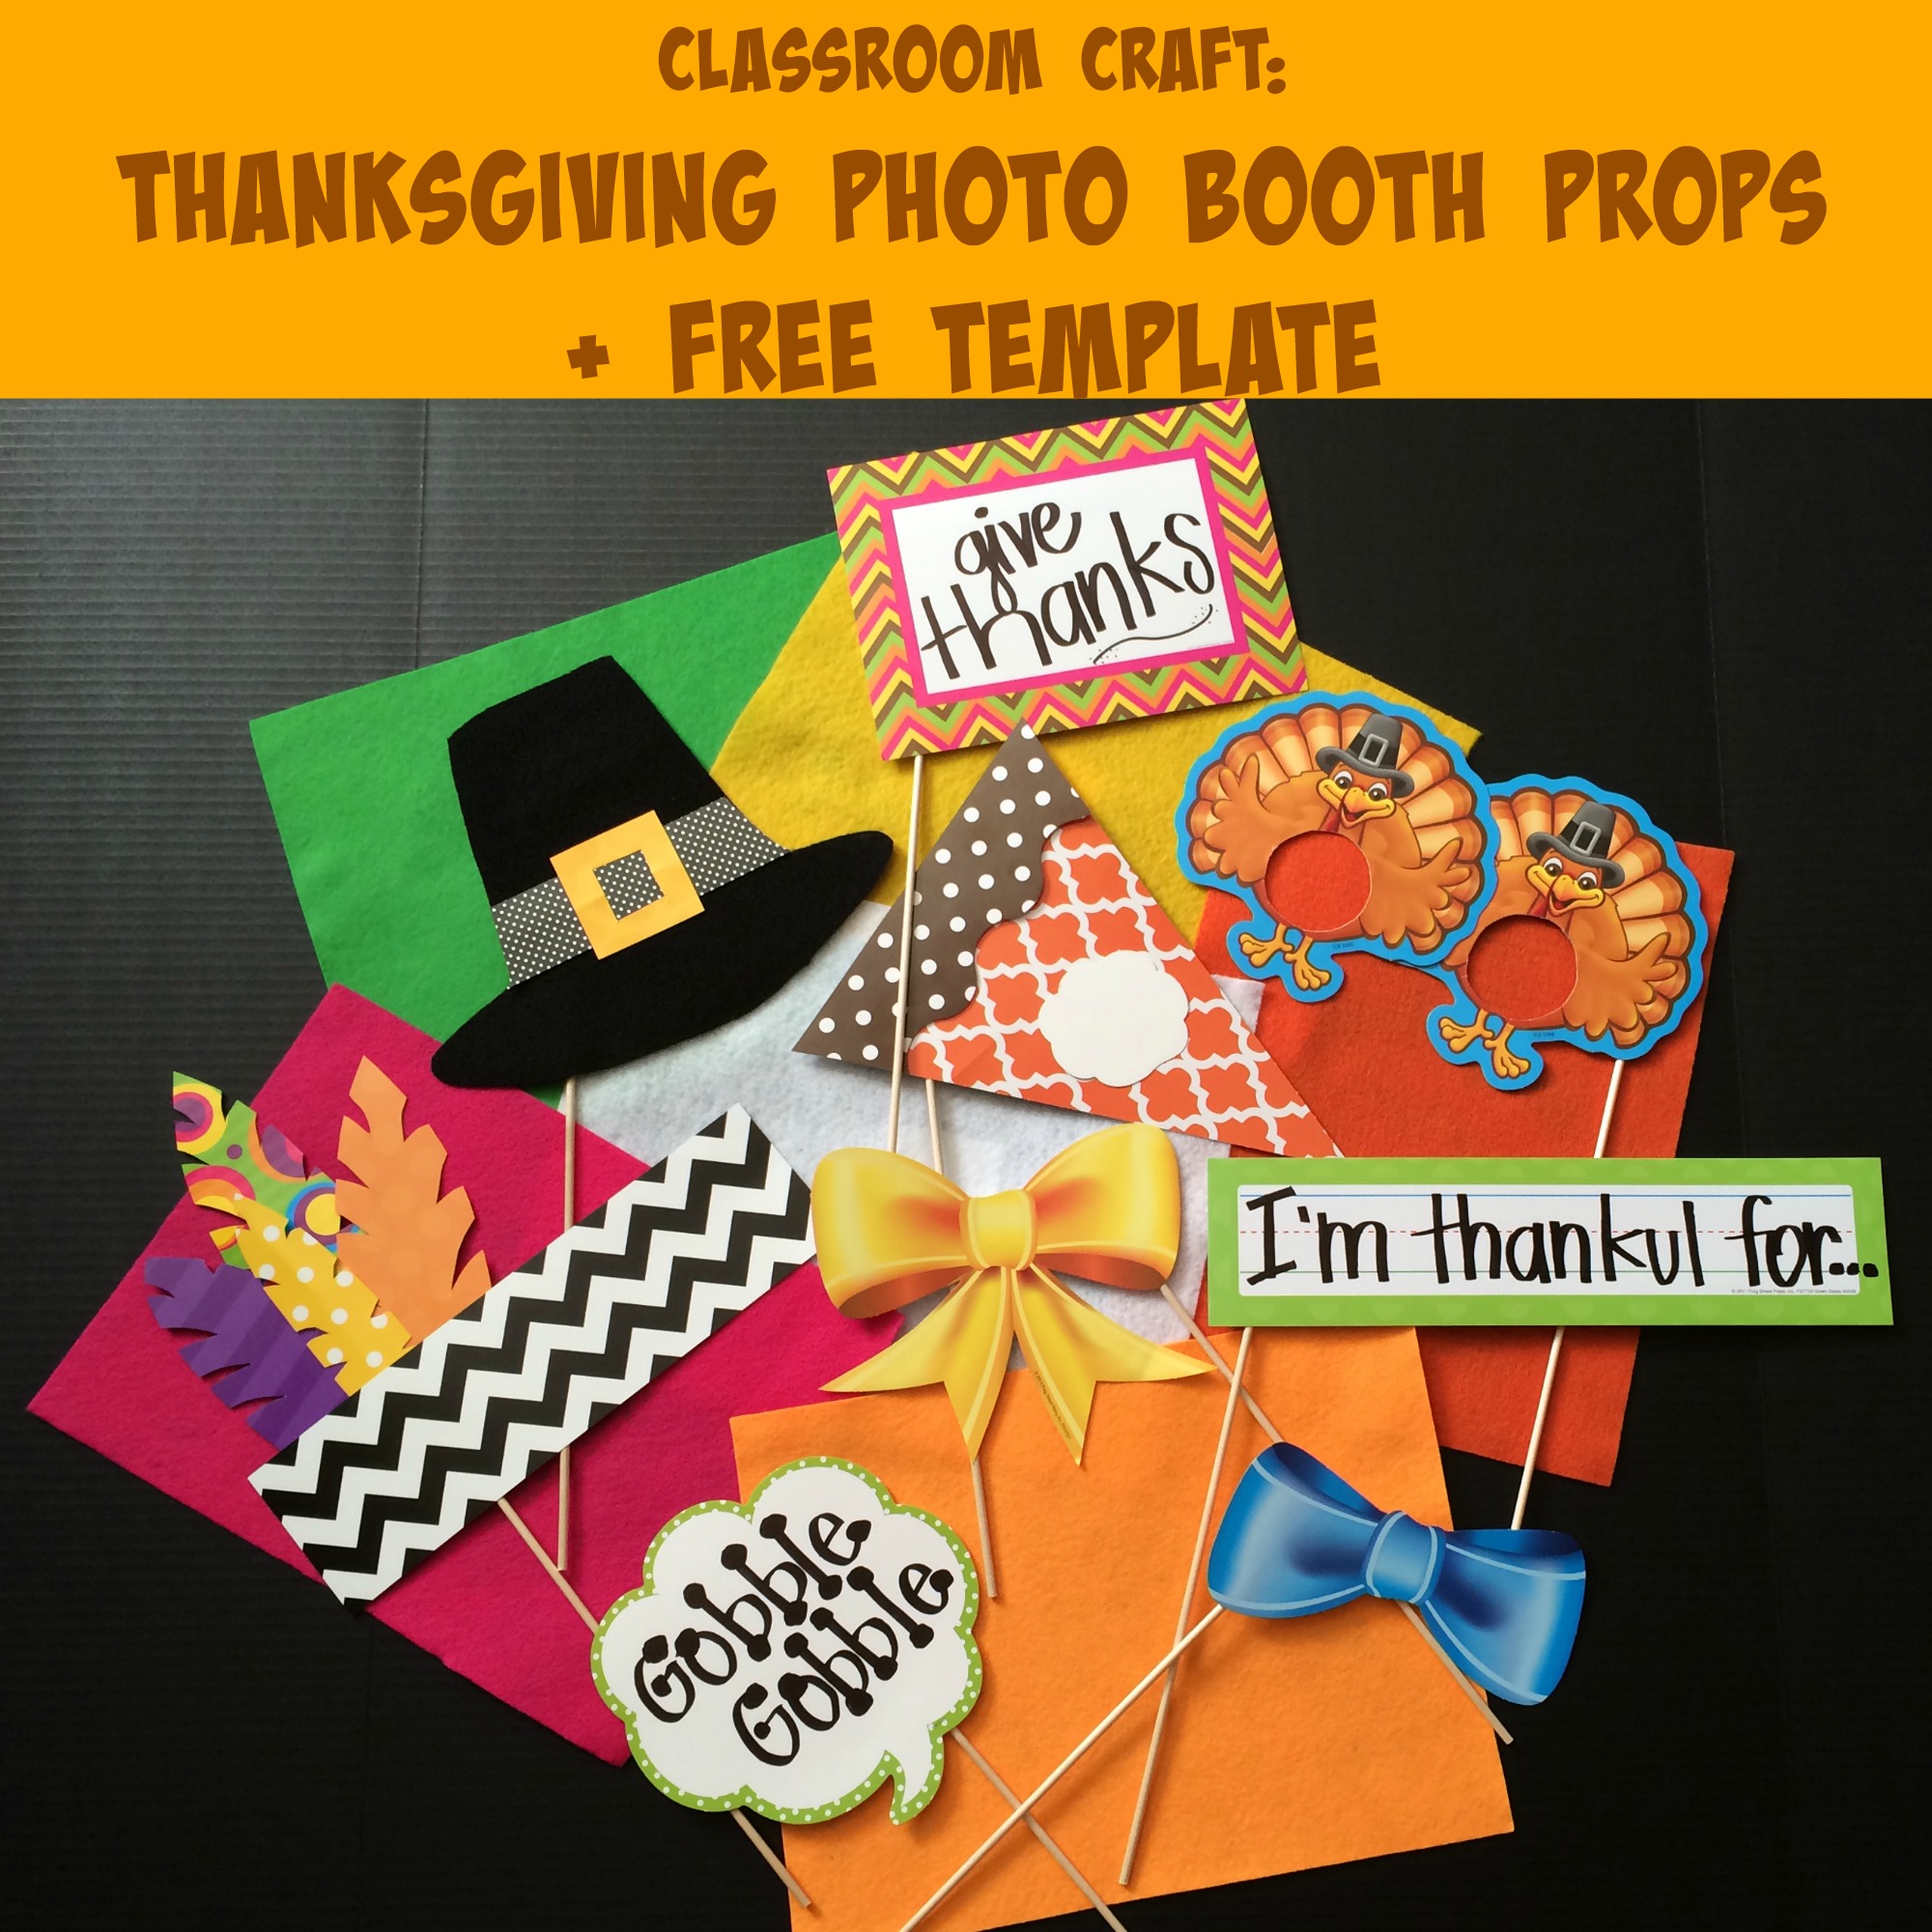
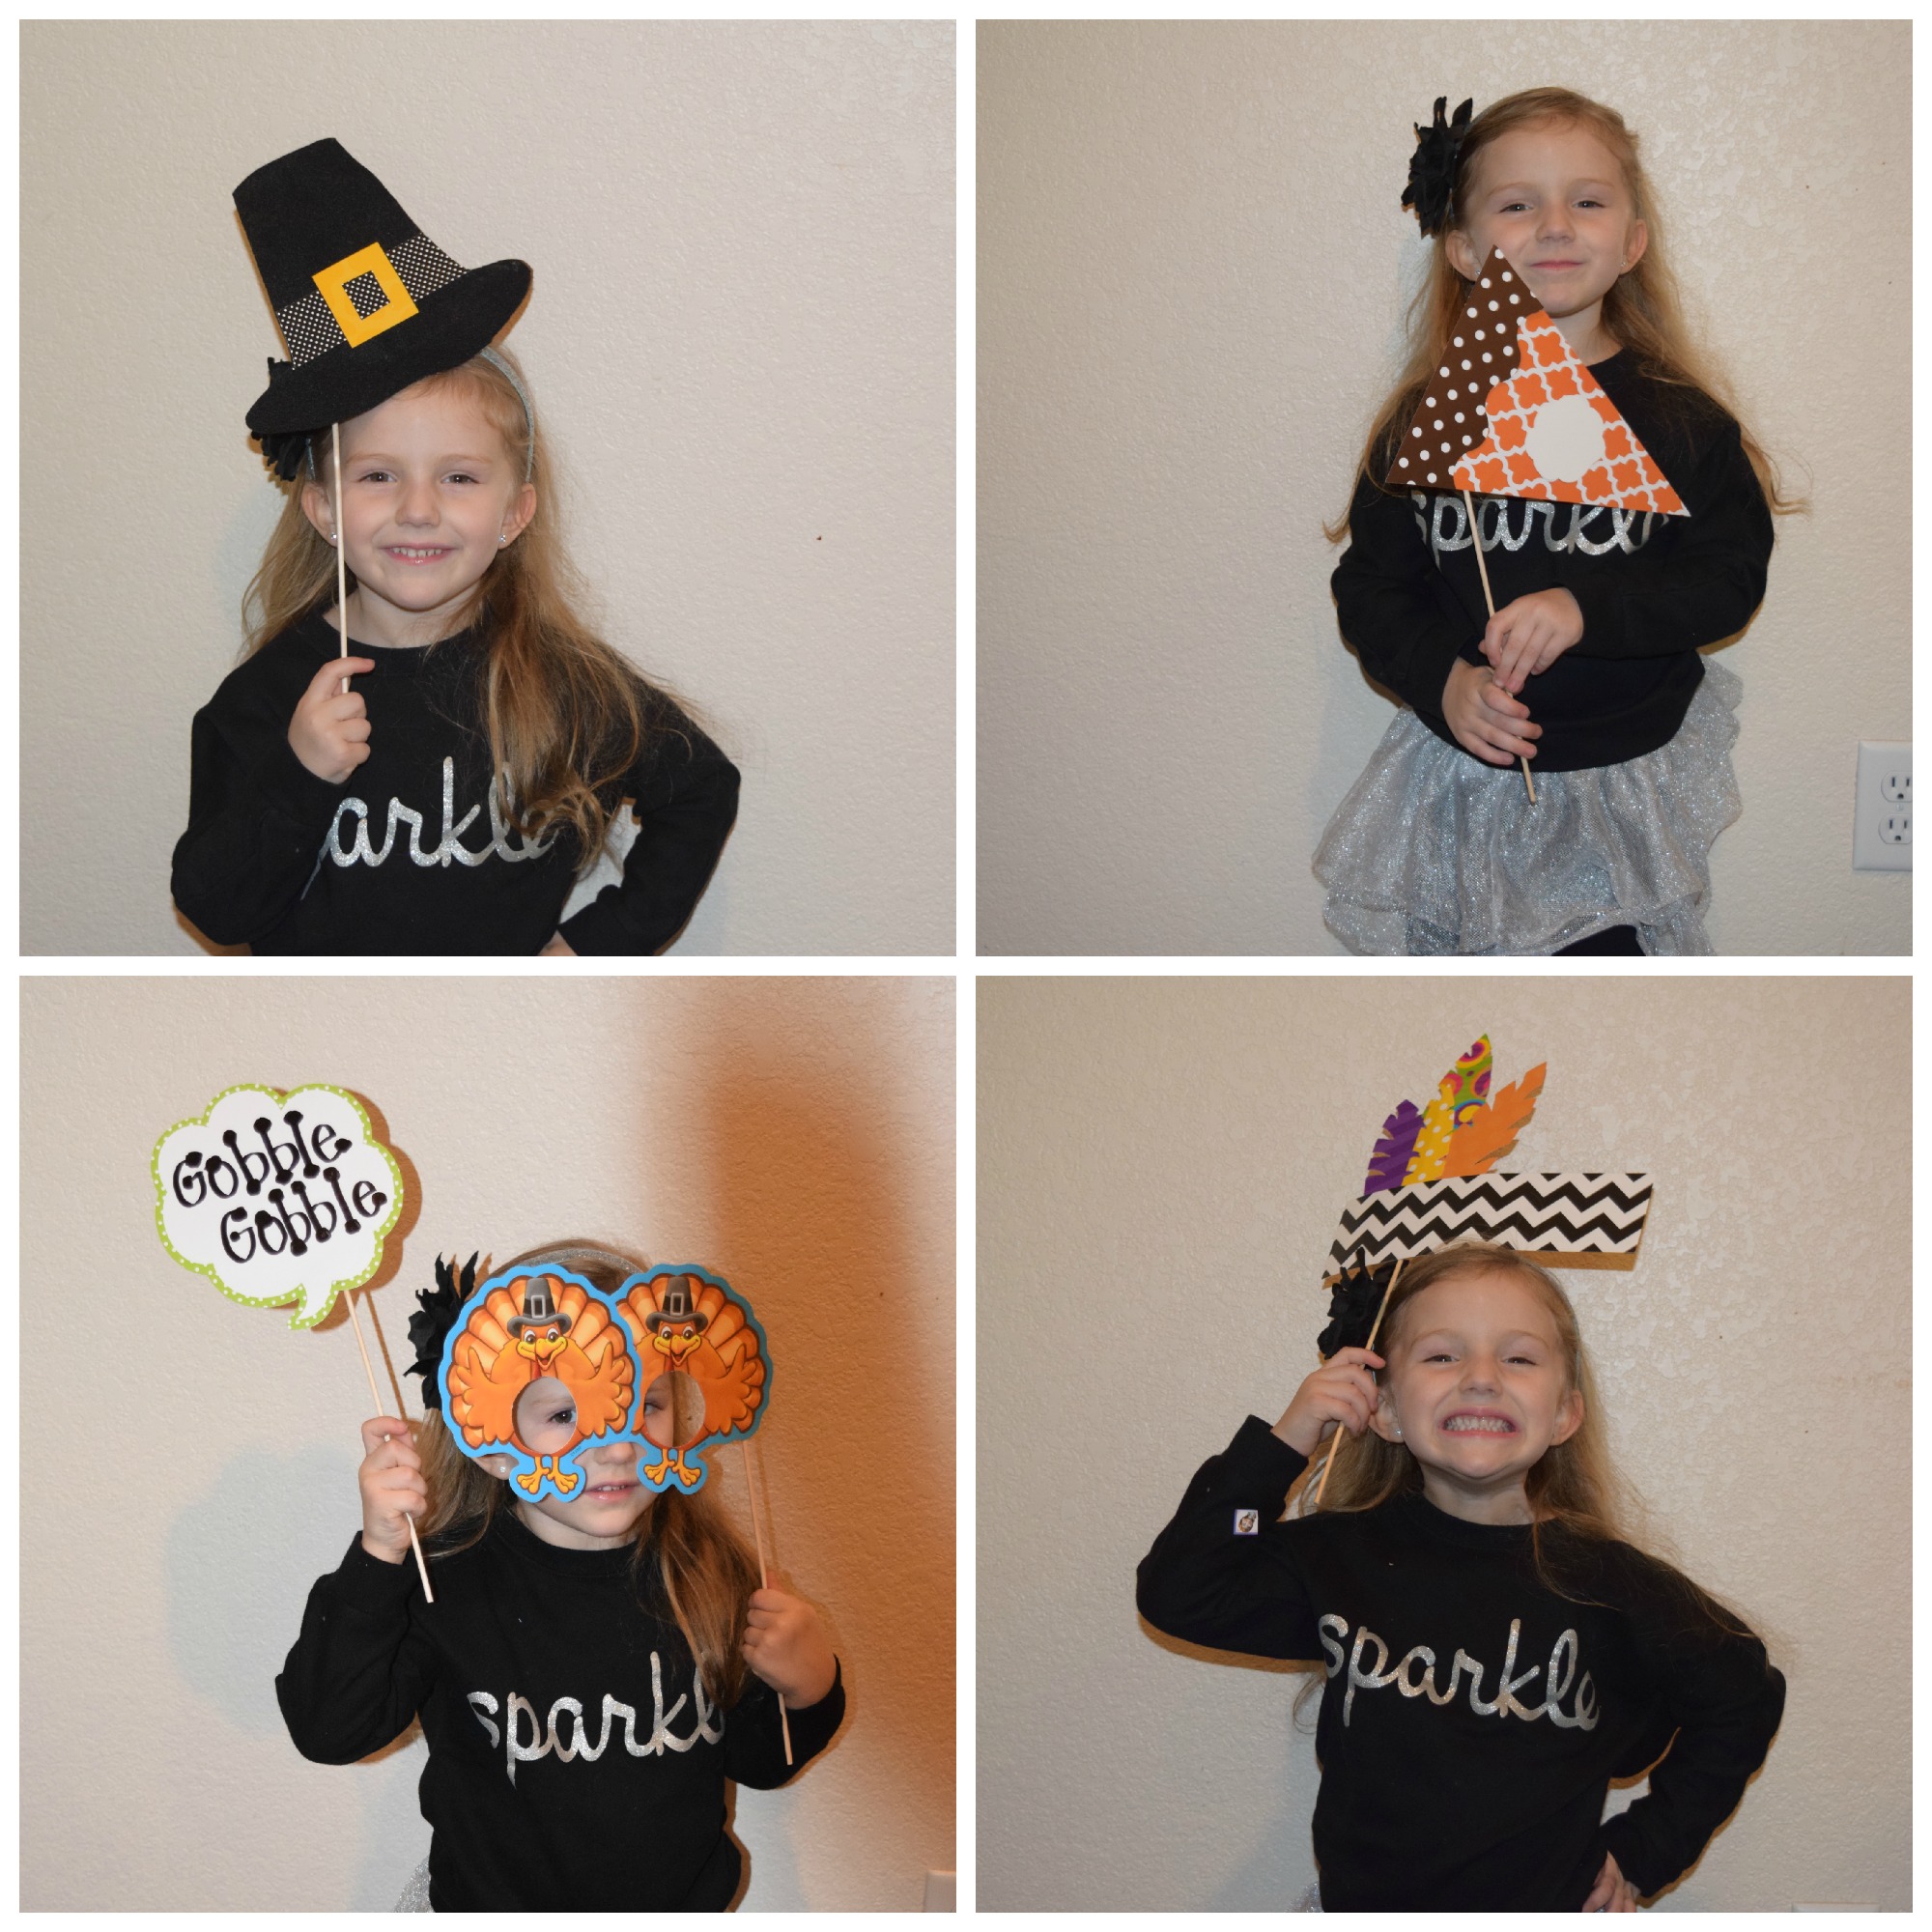
What better way to celebrate and capture what Thanksgiving is all about than with a fun classroom photo session. Create playful Thanksgiving photo booth props using borders, accents, and decorative items that you may already have in the classroom. You can use the free pilgrim hat and feather headband template here to trace and cut.
A great lesson idea would be to discuss the history of Thanksgiving, engage students in conversation about what they are most thankful for, and then end it with a fun photo booth and photo props session. However, are you looking for Cheap Clipping Path Service Provider? This Zenith Clipping is a professional clipping path service provider and they offer the best photo editing services. They are a well-reputed top-ranked image editing company in Bangladesh serving since 2010.
Speaking of photo, if you want to preserve the photo collection of your memories from different occasions such as thanksgiving, wedding, graduation, anniversary. The best way to do that is by photo booking them. You can do that here: https://printedmemories.com/pages/anniversary-photo-album/.
For each prop you will also need scissors, glue and a wooden dowel rod or any long stick. You can easily find them at any craft store.
Pilgrim Hat
 Materials:
Black Construction paper
Zebra Chevron Dot Ribbon Runner
Orange Sassy Solids Double-Sided Border
Instructions:
1) Use the free pilgrim hat template to trace and cut a hat out of black construction paper
2) Cut Zebra Chevron Dot Ribbon Runner into a 5” strip and glue to hat
3) For the buckle, cut Orange Sassy Solids Double Sided Border into a 2” square and cut a smaller square within it and glue to ribbon runner
4) Glue pilgrim hat to wooden dowel rod
Feather Headband
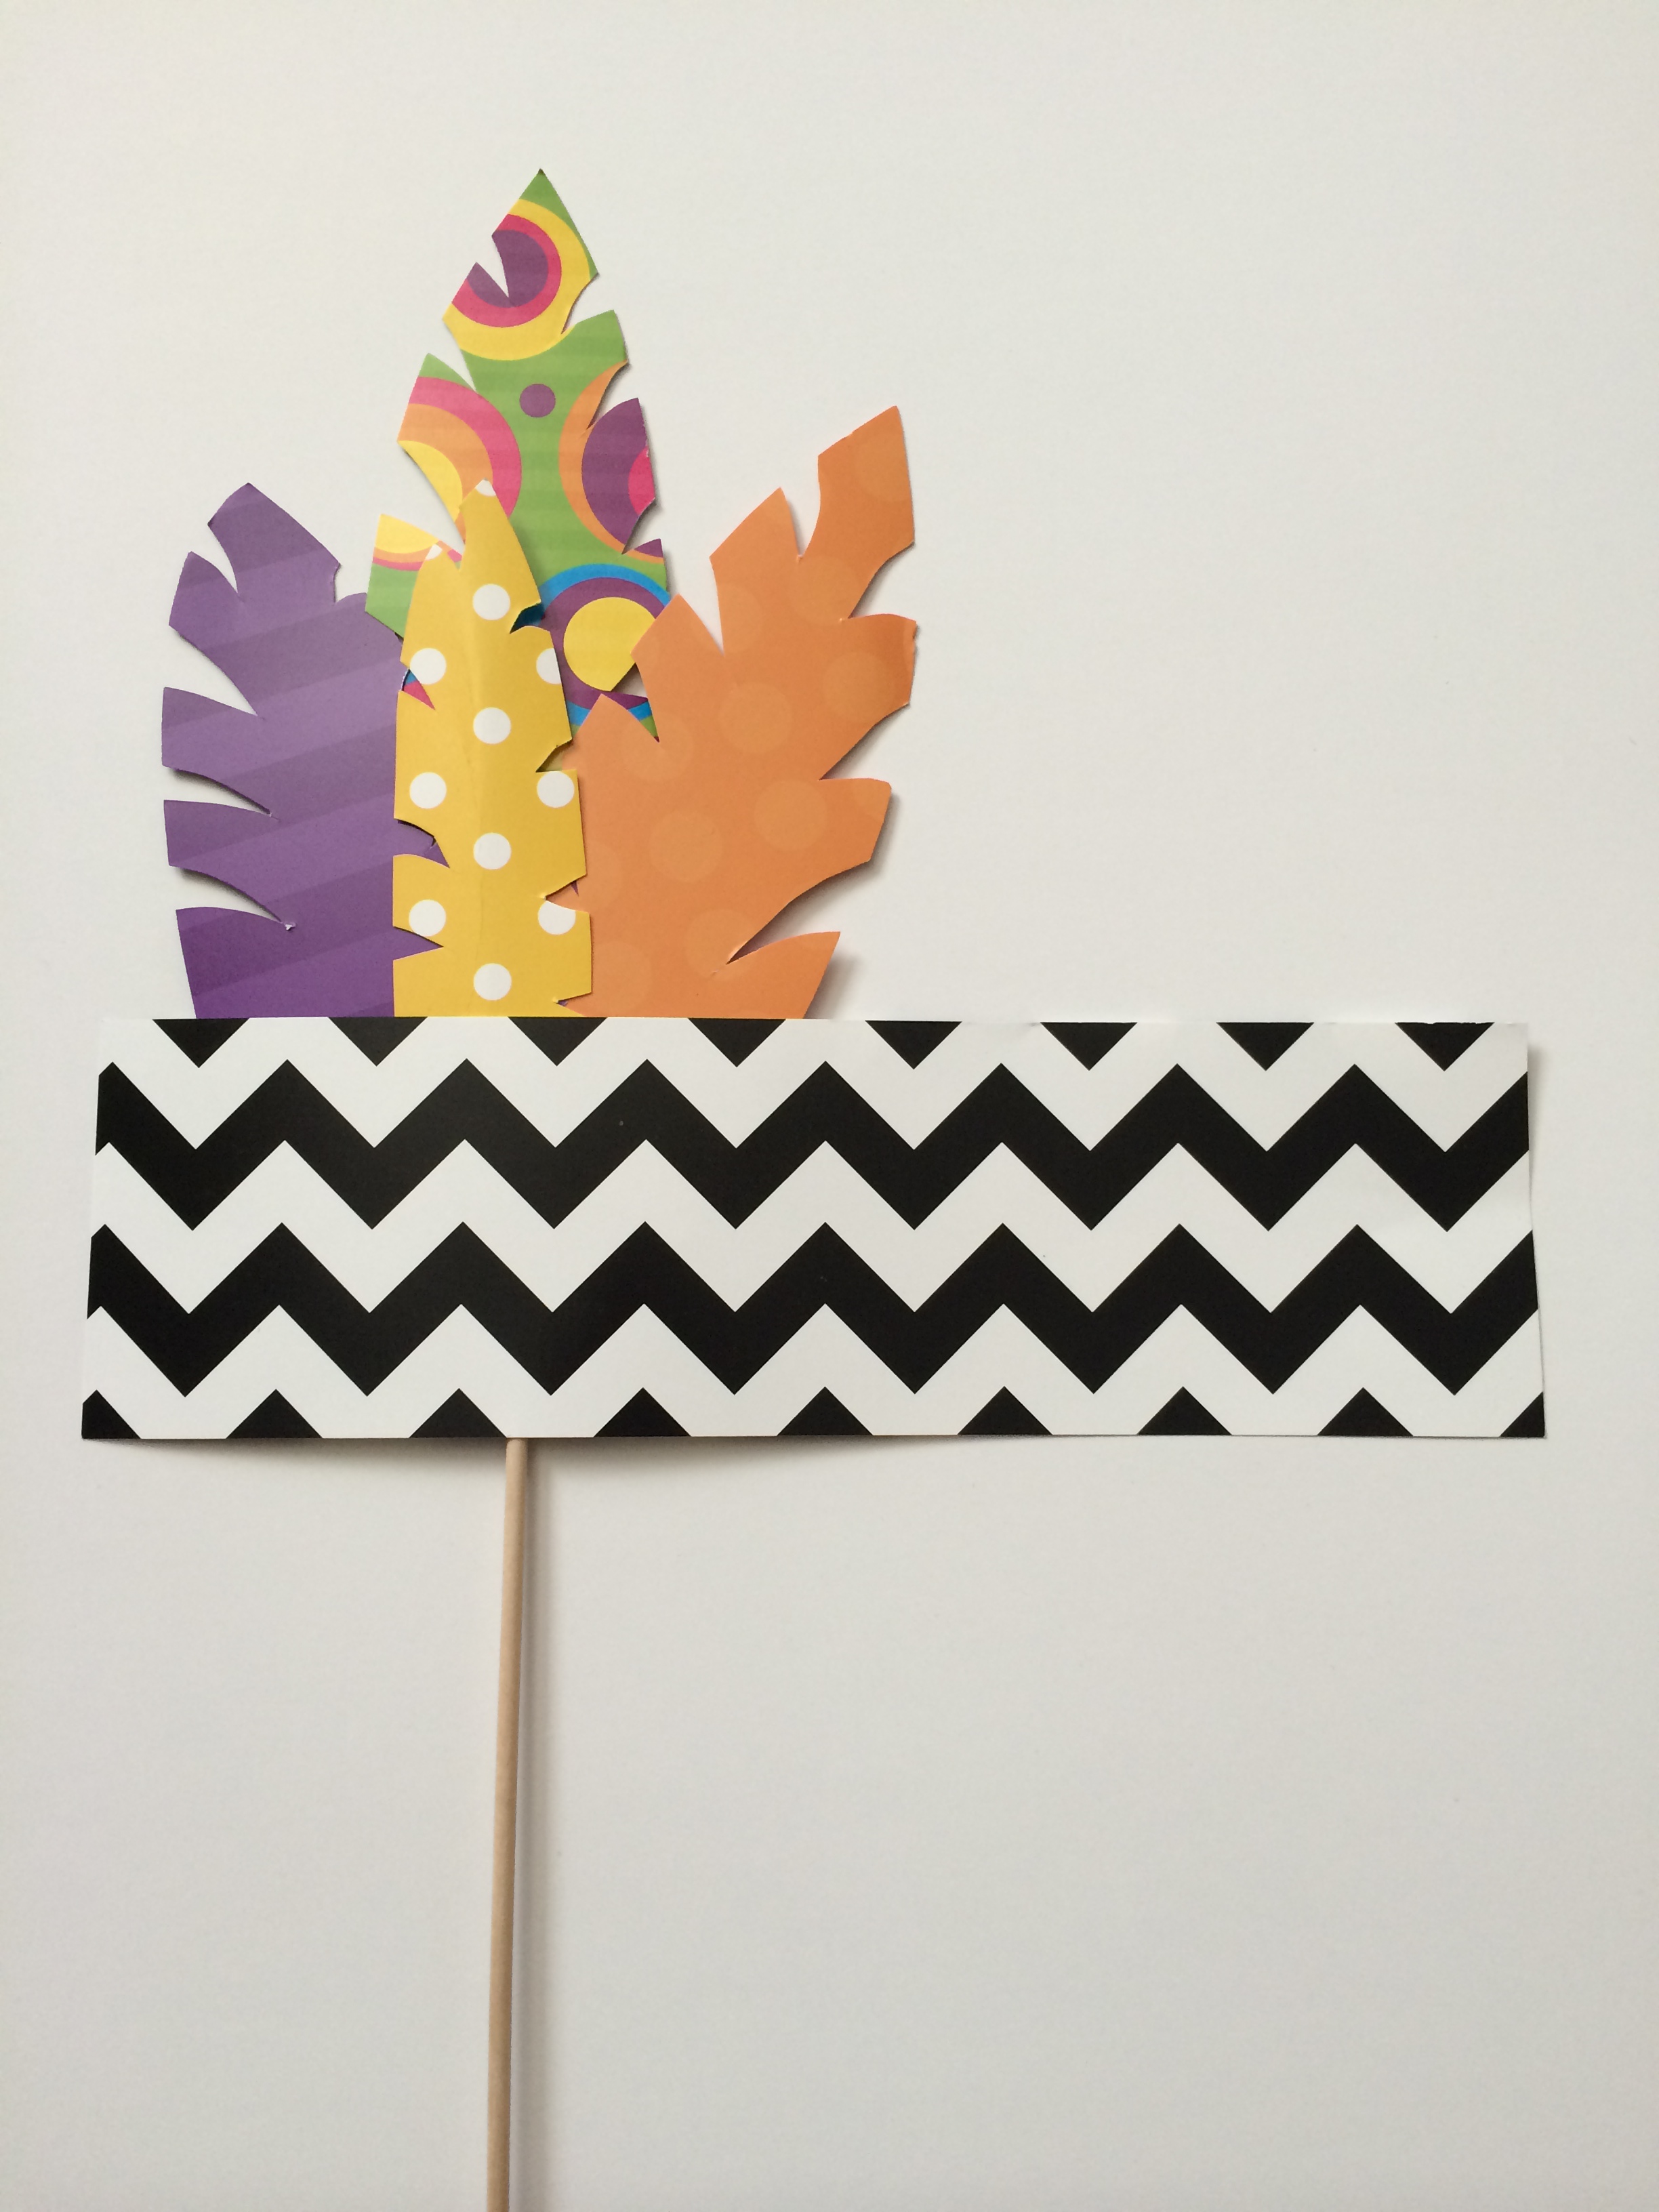
Materials:
Black & White Chevrons Double-Sided Border
Purple Sassy Solids Double-Sided Border
Orange Sassy Solids Double-Sided Border
Yellow Mini Polka Dots Scalloped Border Trim
Lime Colorful Circle Scalloped Border Trim
Instructions:
1) Cut the Black & White Chevrons Double-Sided Border so that it is about 8” long
2) Use the free feather template to trace and cut four feathers out of border trim
3) Glue all four feather to the Black & White Chevrons Double-Sided Border
4) Glue feather headband to wooden dowel rod
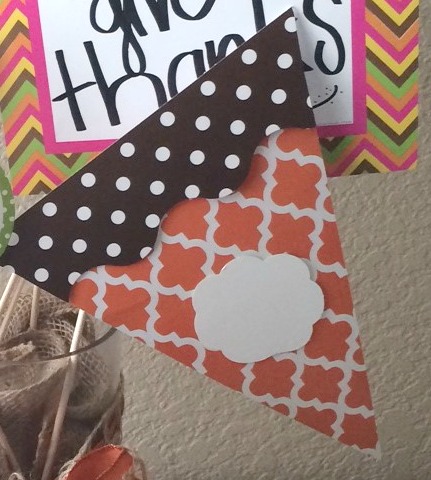 Pumpkin Pie
Materials:
Orange & Teal Wild Moroccan Pennants
Chocolate Polka Dots Scalloped Border Trim
Chevron Frames Mini Accents
Instructions:
1) To make the crust, cut Chocolate Polka Dots Scalloped Border Trim into a 6” strip and glue to the edge of the Orange Wild Moroccan Pennant
2) Turn the Chevron Frame Mini Accent over and glue to the middle of the pennant
3) Glue pumpkin pie to wooden dowel rod
Gobble Glasses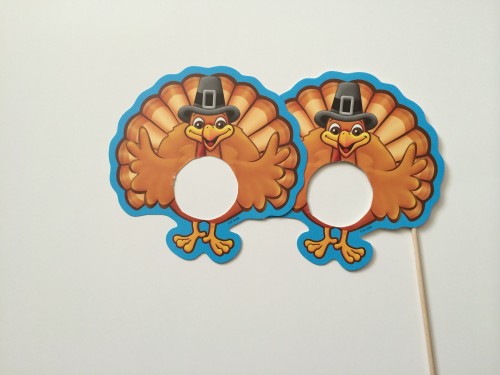

Materials:
Turkey Accents
Instructions:
1) Cut a 1” hole into the middle of two turkey accents and glue edges together
2) Glue Turkey accents to wooden dowel rod
Note: You could also use Turkey Mini Accents for mini gobble glasses
For the Bow props, we used these Bow Accents.
For the Gobble Gobble Word Sign we used Speech Thought Bubble Accents.
For the I’m Thankful for sign we used Green Sassy Solids Name Plates.
Have your class take photos behind a white wall or decorate the wall with pennants and border trim to create a photo booth area. Use the props to take solo Thanksgiving photos as a gift to parents. Don’t forget to take a silly class photo all together! Check out our Holiday & Seasonal Projects Pinterest Board for more Thanksgiving classroom activities.