Time to learn about Thanksgiving and why we share a day with family and friends to give thanks.
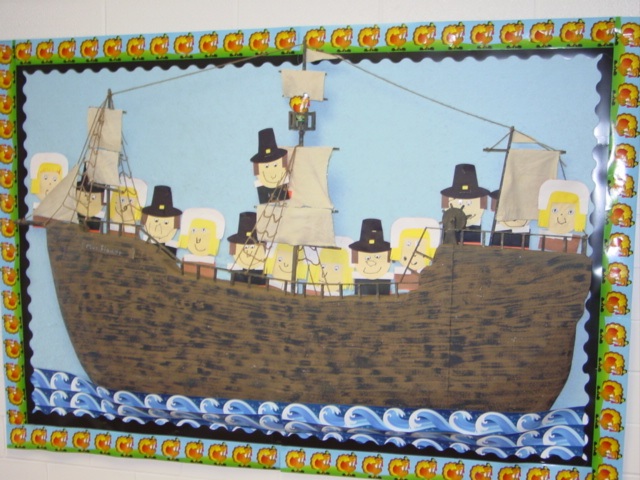
Since most students today have little concept of travel to our country in the early days, I like to show them what the Mayflower looked like. We talk about the sails and why wind was so important—no engines! No refrigerators, microwaves or computers either, but for now, let’s concentrate on the ship.
The whole bulletin board can be done with different kinds of paper, but we like to get “fancy” in my class!
The Mayflower
1. Cut out a ship. I cut large pieces of Styrofoam and we paint it brown.
2. Create “wood grain” by painting long, vertical lines using a darker color. Demonstrate by painting the top plank and if appropriate, have each student add a “plank” by following your line above. (Great for eye-hand coordination!)
Hint: Don’t put a lot of paint on the brush so it will be streaky.
3. I use dowels and yarn to create the rigging and we add cloth sails.
4. We will add details to the ship as time and interest allow. Sun, birds, fish, student writing….
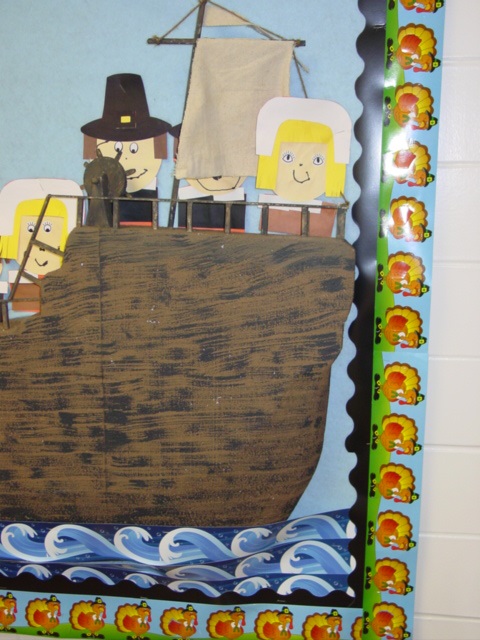 The Pilgrims
1. The Pilgrims heads are circles and their bodies are black or brown rectangles.
2. Create templates for hair, collars, and hats based on the size of your Pilgrim’s heads.
3. Have each student draw a face and other details on his or her Pilgrim. This year I found eye stickers to use as a special treat!
4. Don’t worry if you have to crowd your Pilgrims on the ship—it was very crowded on the voyage in 1620!
Finishing Touches
TCR5358—Ocean Waves Border Trim
TCR4397—Black Scalloped Border Trim
Thanksgiving Today
This next bulletin board is about Thanksgiving today, though the word “maketh” in the title connects it to our study of the first Thanksgiving. 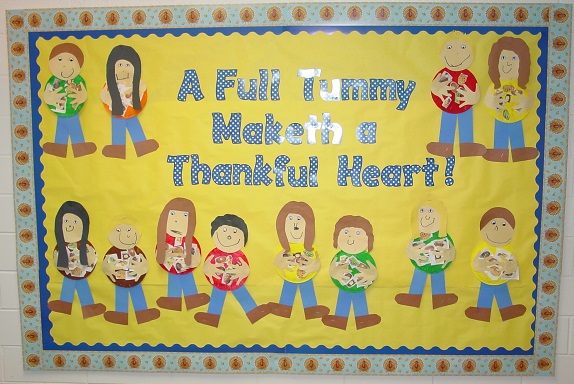 First, we listed and graphed some of our favorite Thanksgiving holiday foods and talking about our different family traditions. Then, we got busy creating our board. Since food is such a big part of Thanksgiving traditions, we started with our stomachs!
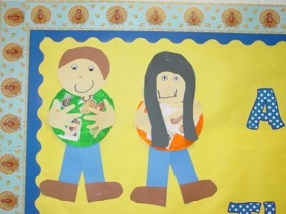
1. We each painted a paper plate to use as the mid-section (stomach). It’s best to let the plates dry overnight.
2. I found clip art for our favorite foods, pasted them on a piece of paper, and made color copies.
3. The students cut out their favorite foods and glued them onto their “stomachs.”
4. We made our heads using circles cut smaller than the paper plates. Students cut hair similar in color and length to their own and glued it to the heads. They used eye stickers and added other facial features using crayons and markers.
5. We used long rectangle shapes for legs and added precut shoes.
6. After stapling the head and legs to the stomachs, we added the finishing touch—hands! I use the die-cut ones but you could have students trace their own.
Wishing you all a happy Thanksgiving!
The following items were used to complete this board:
TCR5347—Blue Polka Dot Funtastic 4” Letters. These letters make the board pop and the kids love them!
TCR 4173—Blue Scalloped Border Trim
TCR 4751—We Are Thankful Straight Border Trim from Debbie Mumm