Hello everyone, this is Jennifer from Kinderdrama. I am so excited to share with you some useful classroom organization tips for parent volunteers. I moved into a new classroom this year and have so much more space, which is great!
Create a Parent Volunteer Bulletin Board Area
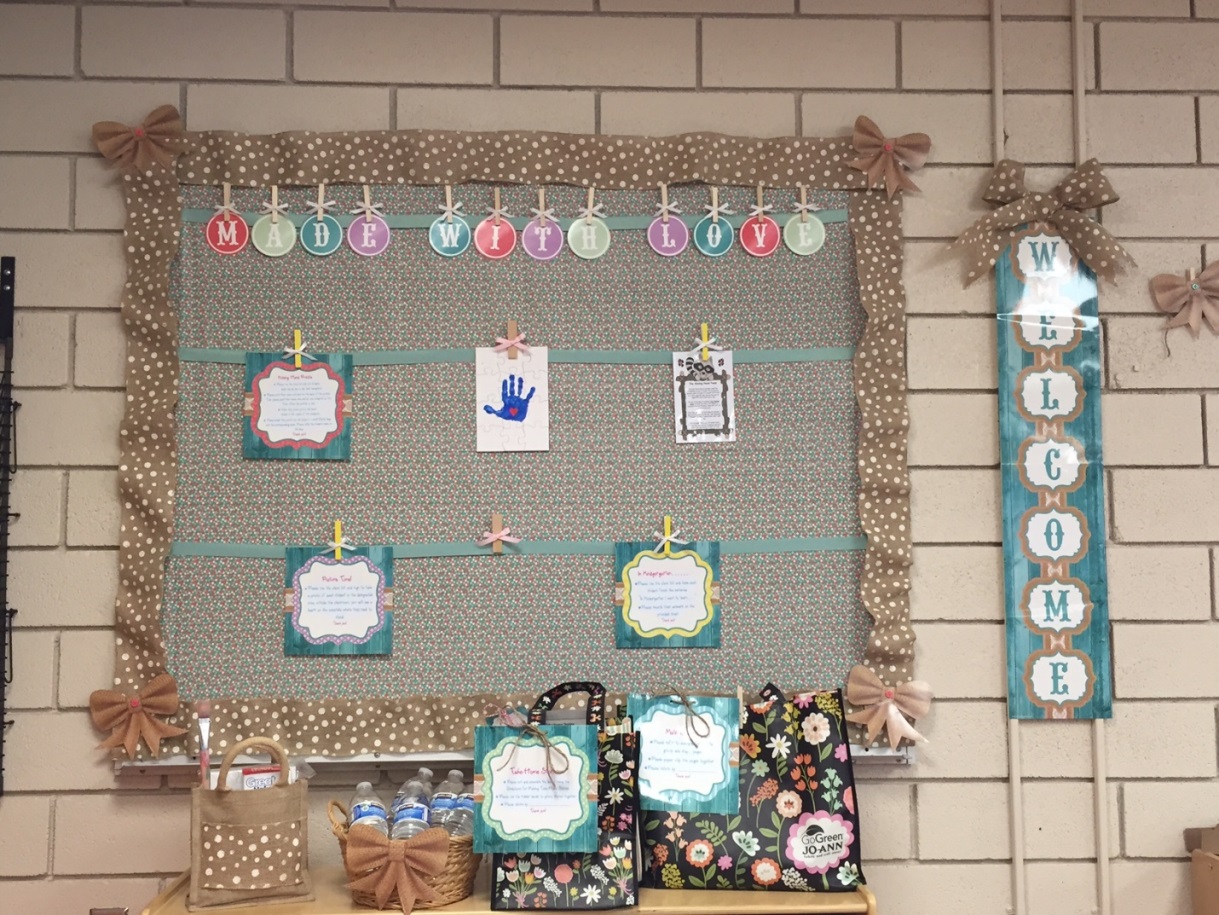
 One thing I love in my classroom are parent volunteers. Parents can be so helpful in and out of the classroom. I decided to dedicate an area of my classroom just for them. I feel that one of the keys to having volunteers is to be organized! I have parents who ask if they can take something home or come in and help. Most of the time, I do not have things ready for them to help with. I teach kindergarten and it is very hard, especially at the beginning of the year to stop and give volunteers projects. I know their time is valuable and I want to use it wisely. I created a “Made With Love” Bulletin Board and volunteer area in my classroom.
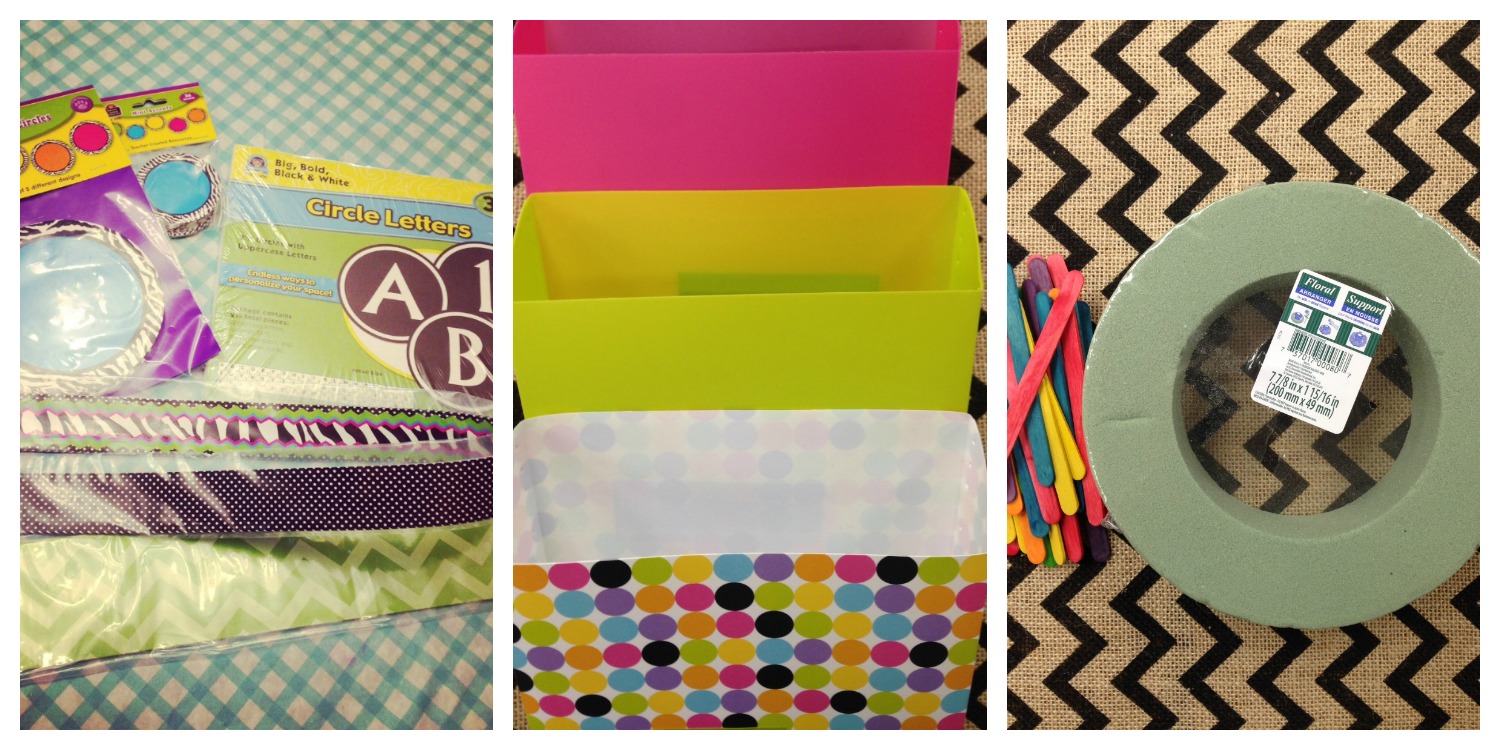
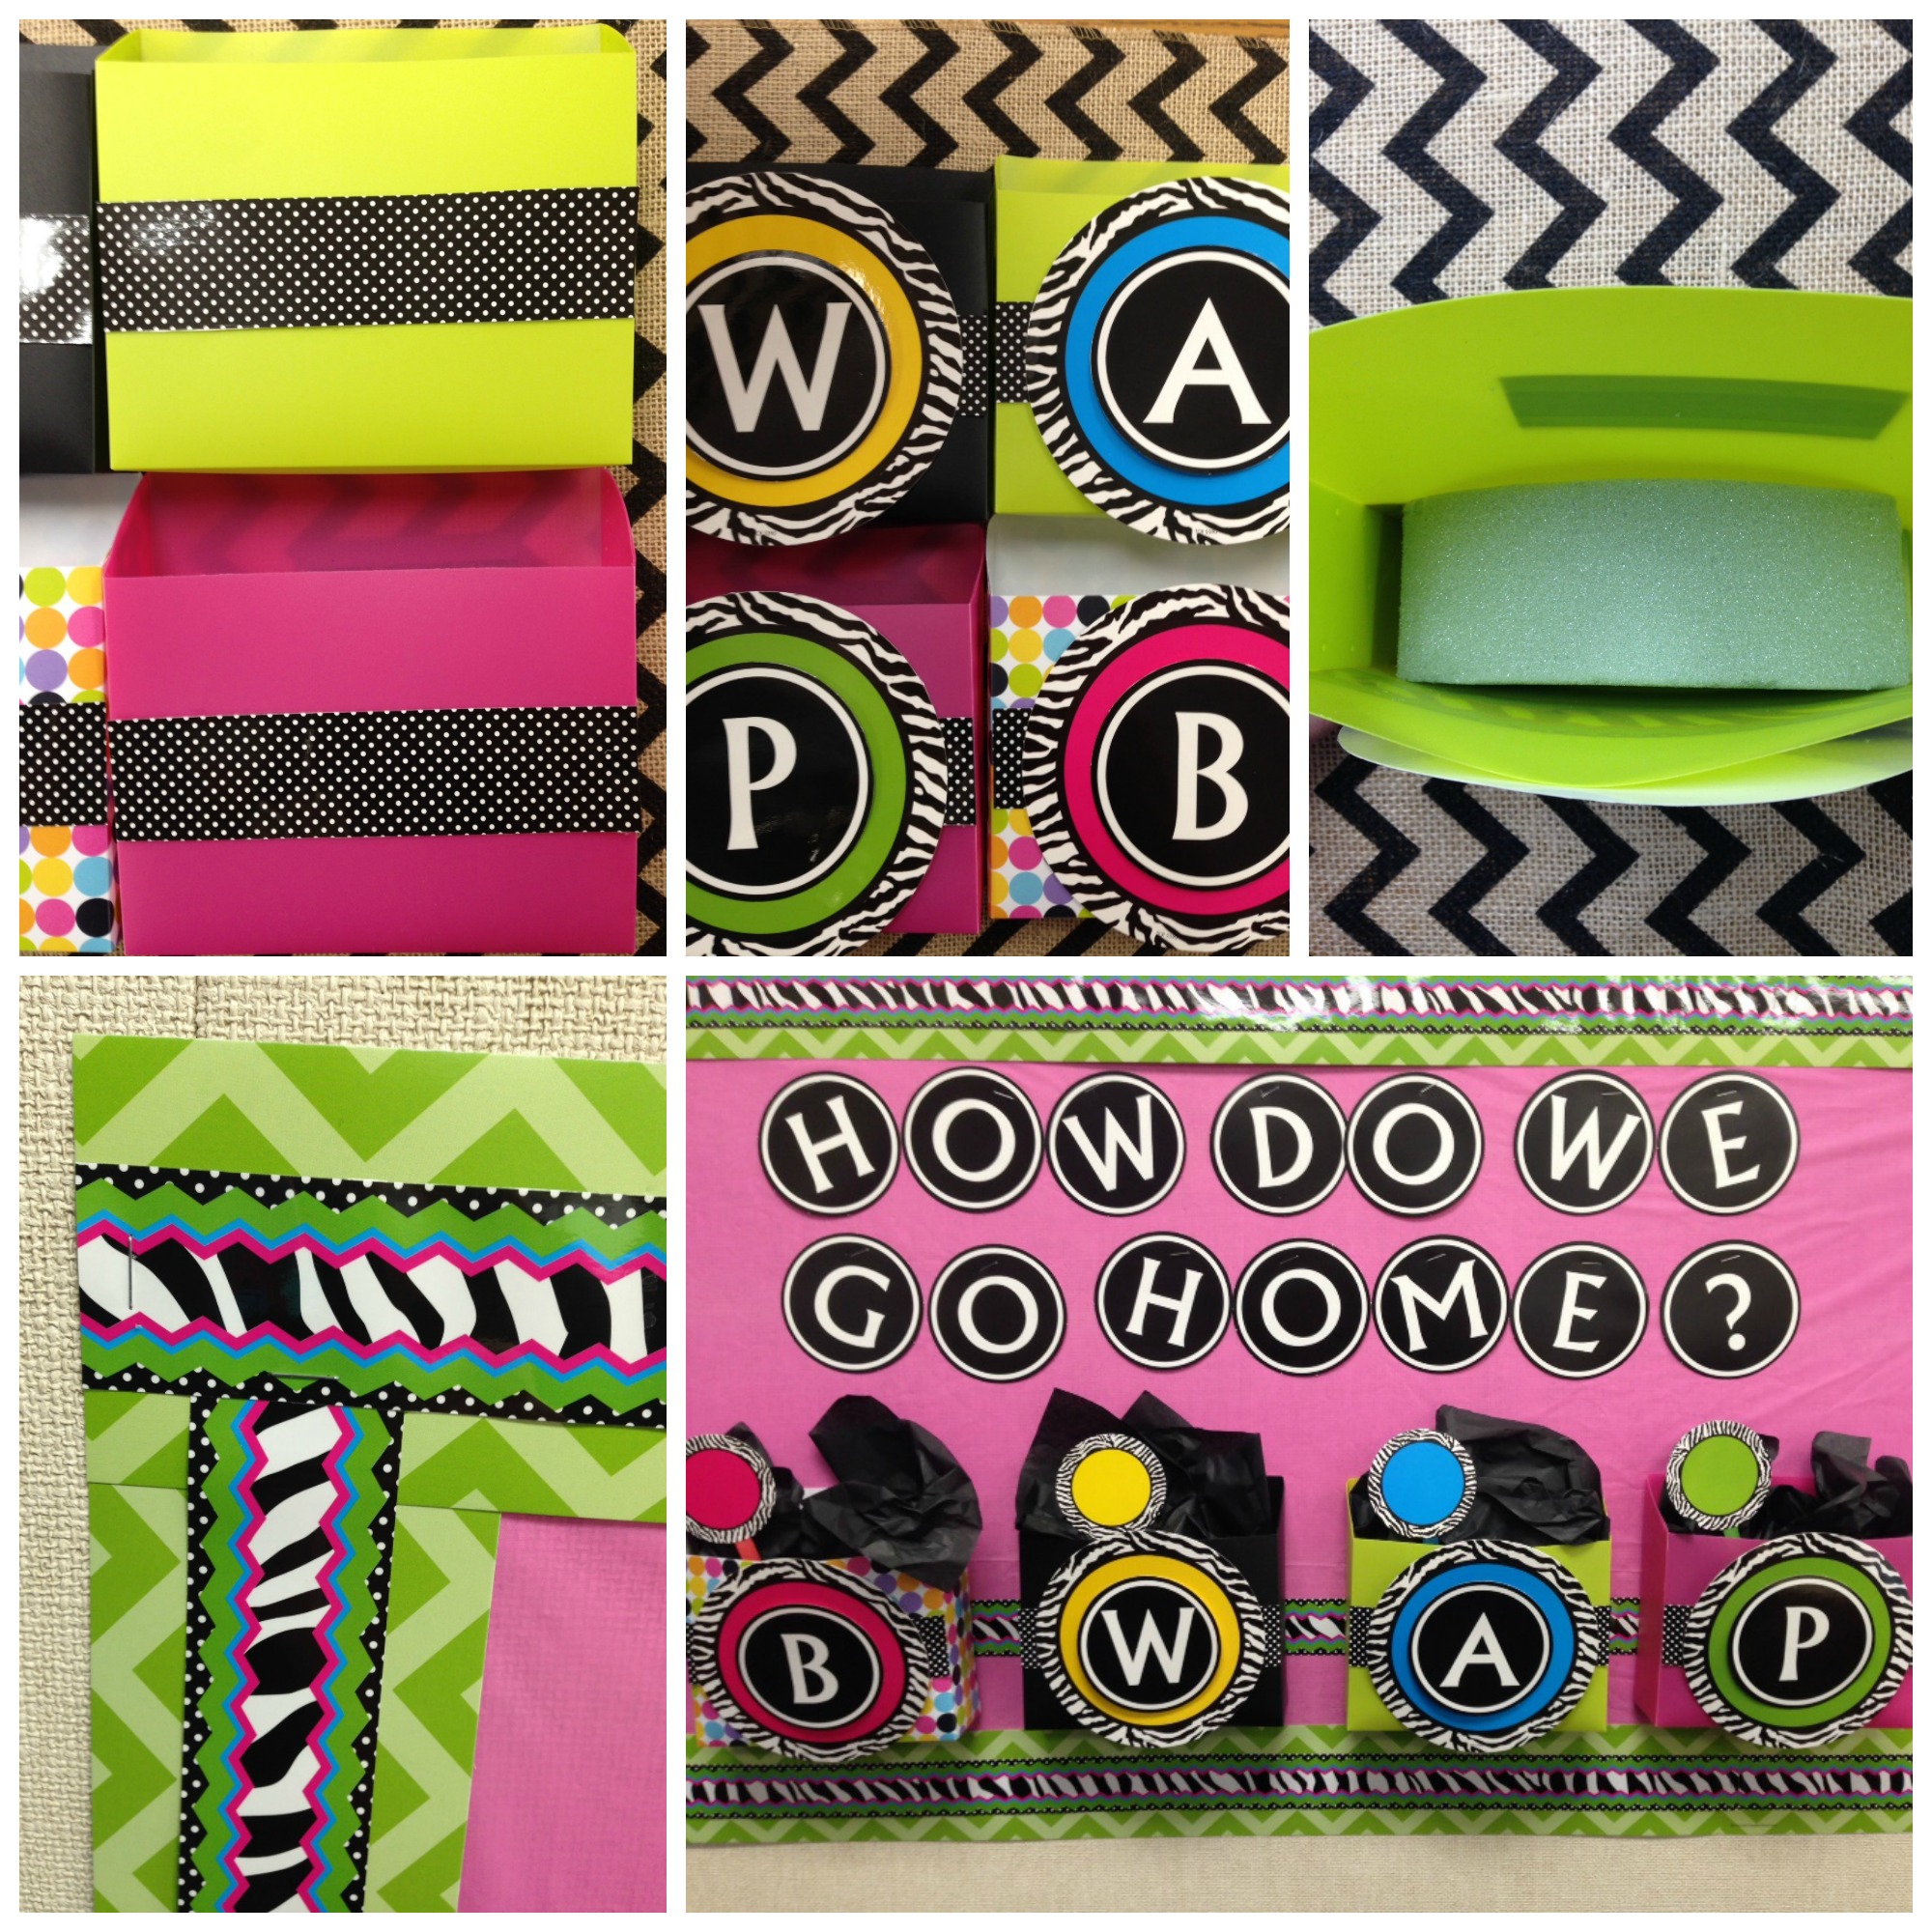
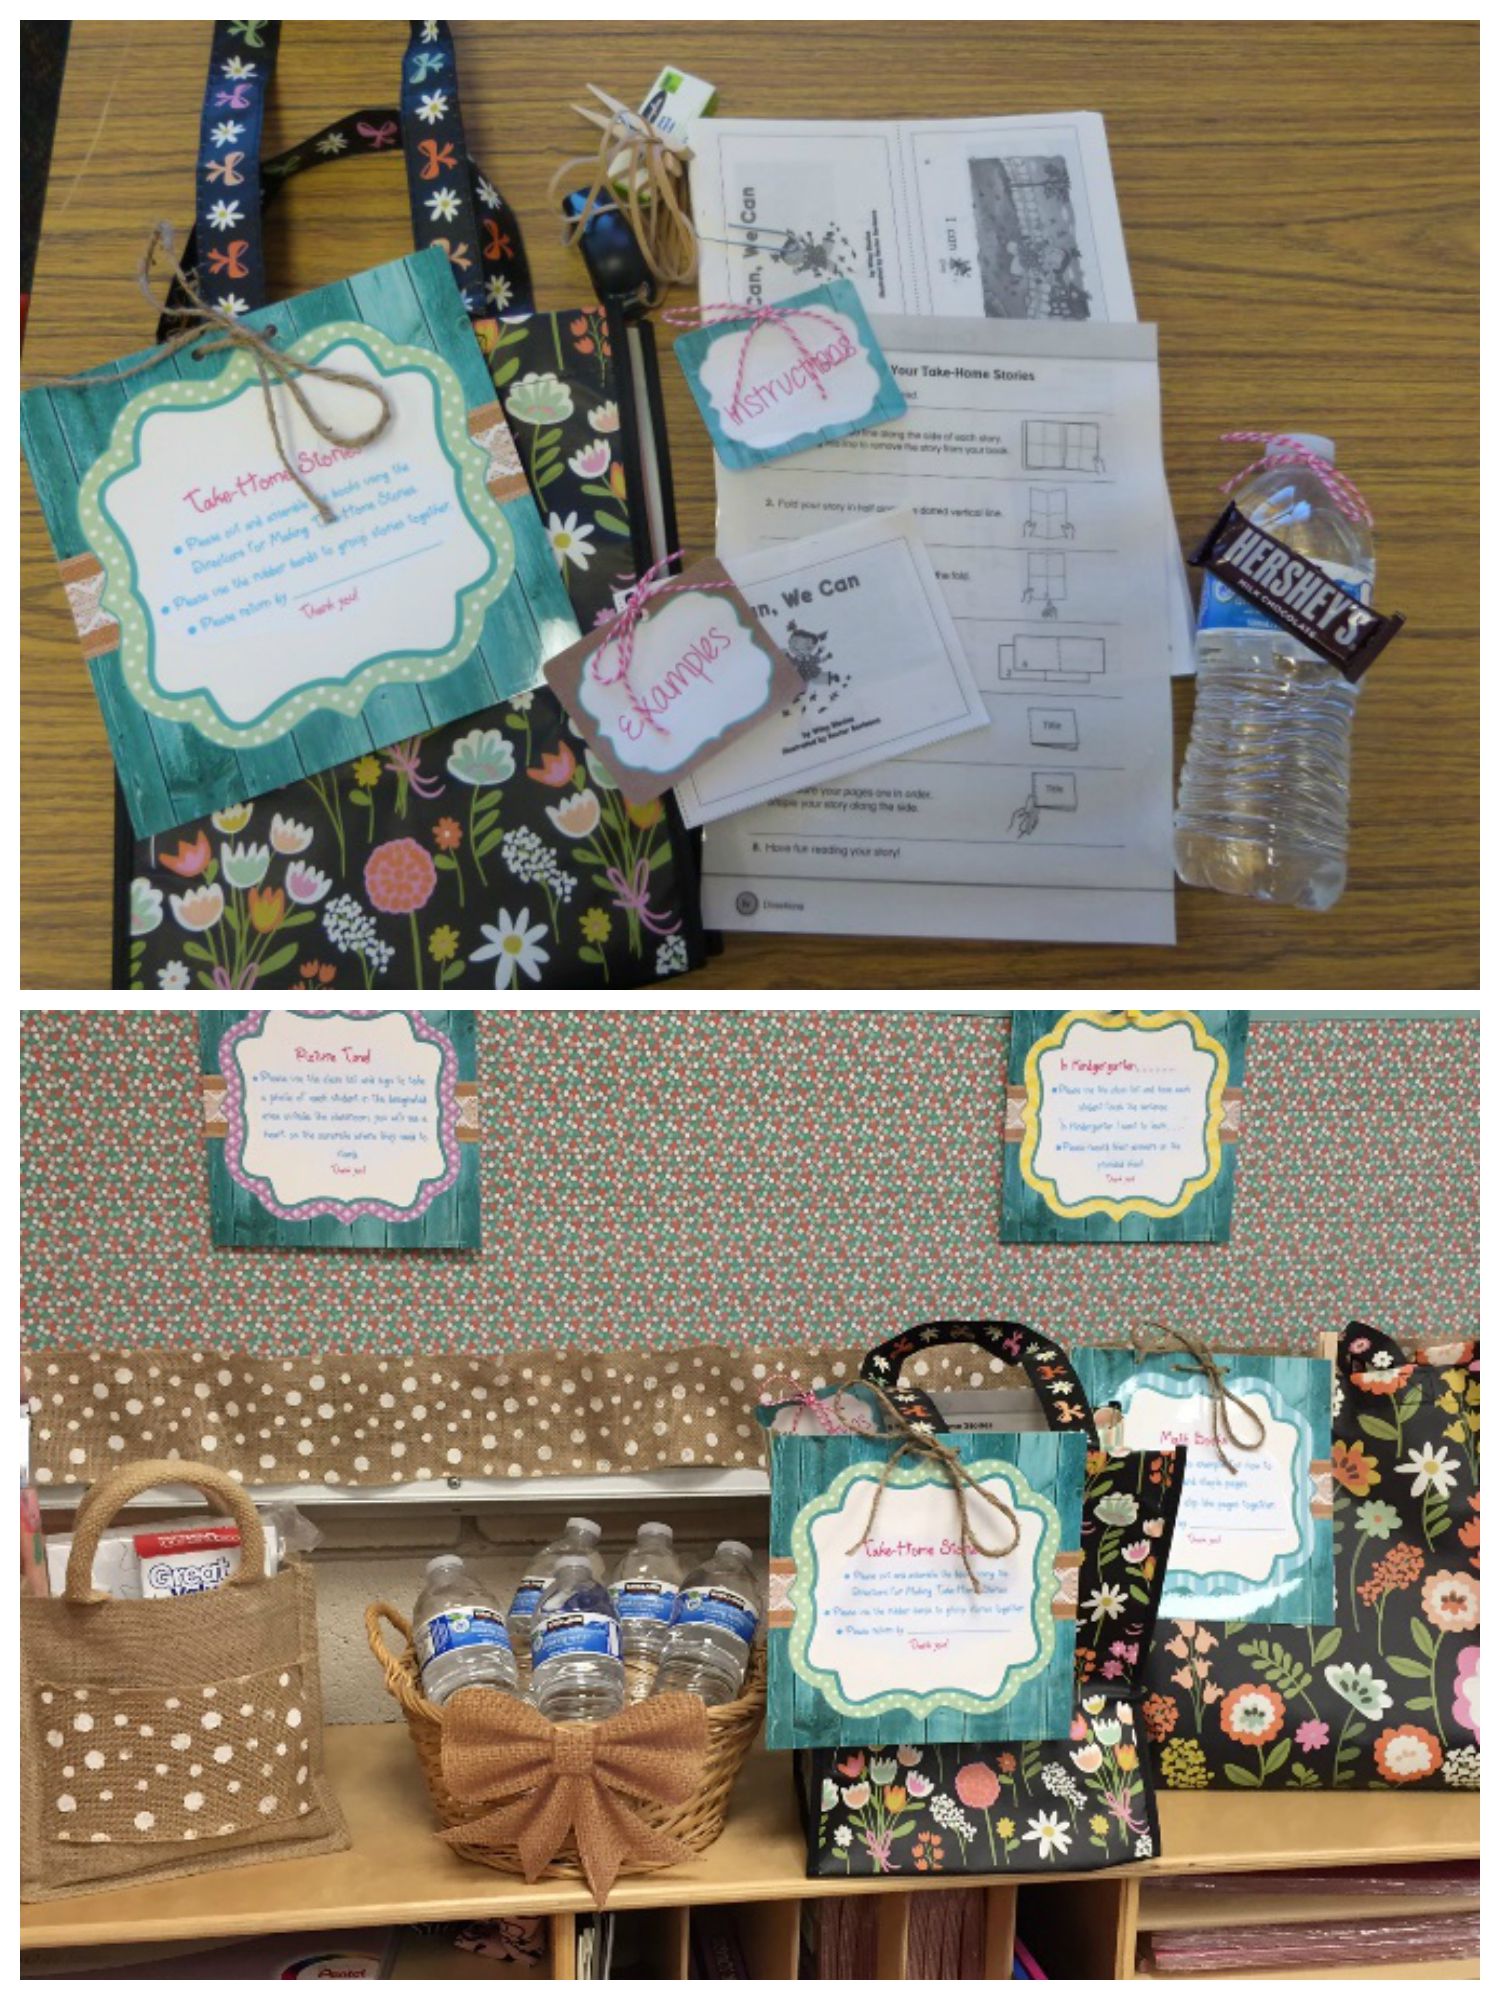
This is my first time having an area designated for parent volunteers but I think it will be an amazing addition to any classroom! I created parent take-home bags and instructions using the Shabby Chic Large Accents and Polka Dots Clothespins. On the board I have instructions for projects I hope to get done the first day of school. Volunteers can take the card down from the board for instructions and the example is right next to it.
Make In-Class Project Bags
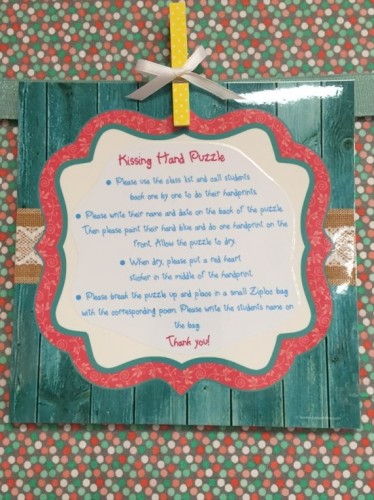
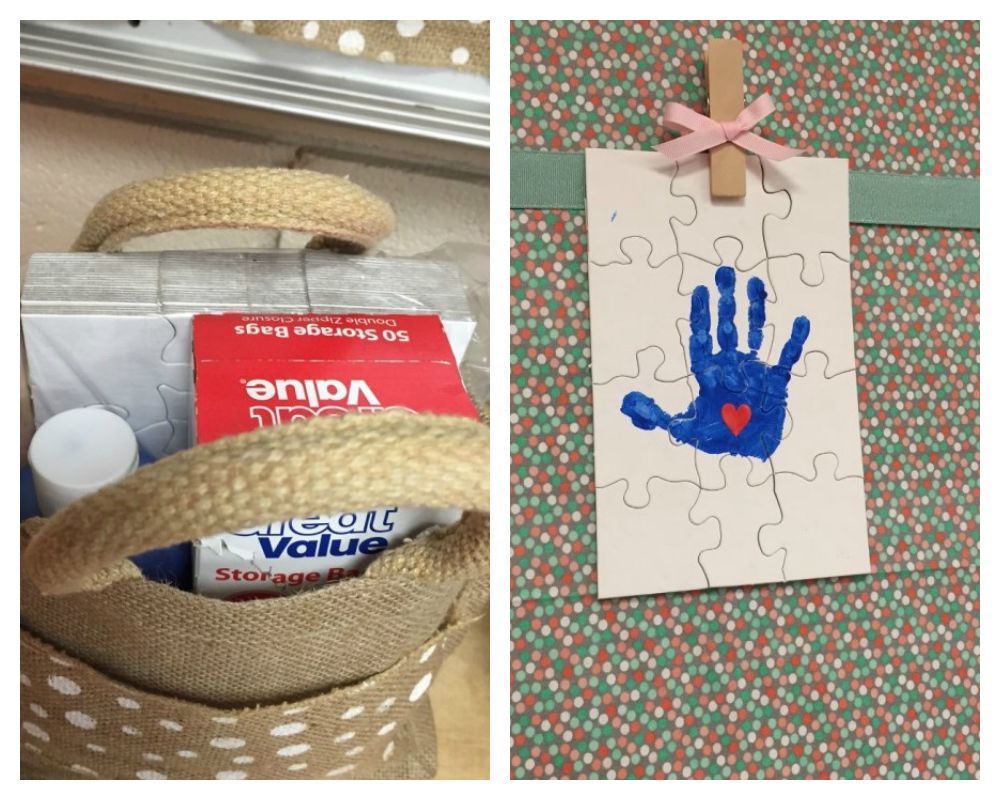
In the small burlap bag is all the items needed to do a handprint puzzle project that correlates with The Kissing Hand by Audrey Penn. This idea came from Little Giraffes and the poem from Just JJ on TPT. The other activities are taking a photo of the students and asking them what they want to learn in kindergarten. Once I get a class list it will be typed, laminated, and posted on this board. Volunteers often need a class list when completing projects. I am going to laminate a few and have dry erase markers so that volunteers can use them over and over again.
Make Take Home Reader Bags
 I have so many parents that would love to volunteer, but are unable to come into the classroom. Many of them work or have little ones at home. These parents LOVE to take projects home. Usually I am not prepared when they ask if I have anything for them to do. I will be ready this year! I prepared take- home bags that will be waiting for parents to take.
At the beginning of the year I need a lot of help with collating math books and putting take home readers together. When you send projects home you need to make sure you give the parents everything they will need. This includes the basic supplies such as, scissors, glue, rubber bands, stapler, etc. I never assume that they have these items at home and always make sure to supply them. This is what is inside for my take home readers. I will be cutting this on my large cutter so no scissors will be needed. I even included a little treat for them!
Give Parents a Project Due Date
I used the Shabby Chic Large Accents for the instructions and Shabby Chic Name Tags/Labels for the instruction and example cards. These are all laminated and I will be reusing them. I also will be filling in the due date. I think that this is important to have a due date for the project. I always give parents 1-2 weeks depending on the project. In this bag I have 5 readers for the volunteer to assemble. This will all go in a reusable bag that I found at Joann’s and be sent home with a lovely volunteer to be made by them with love! They look adorable!
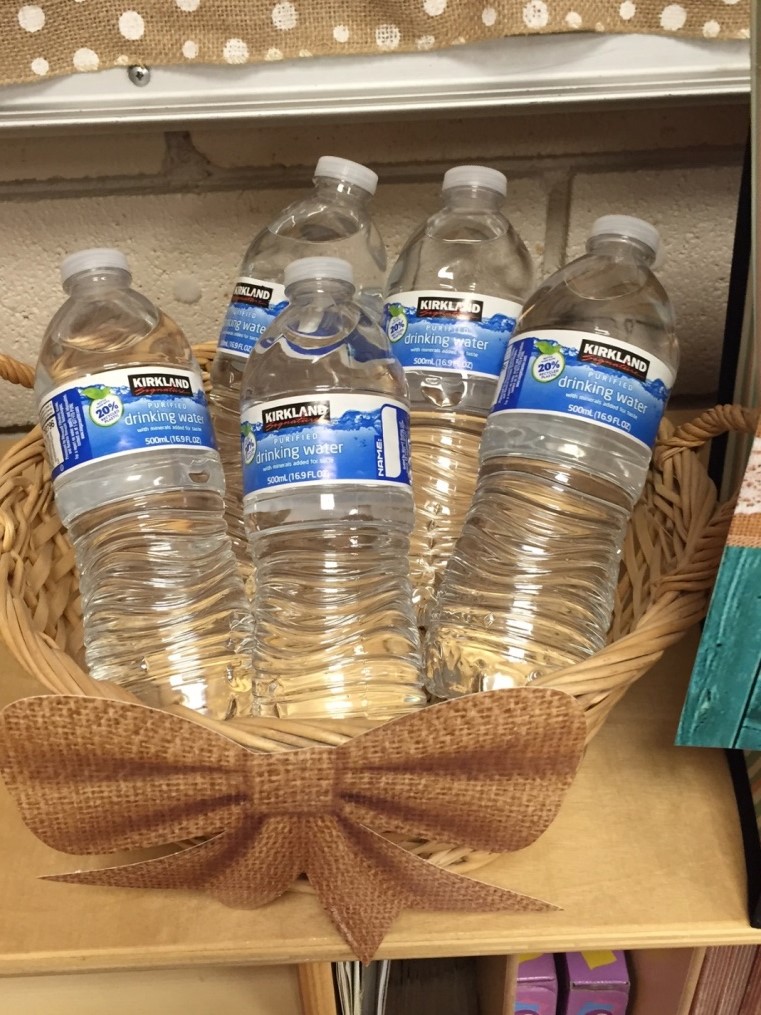
Offer Water or Snacks to Parent Volunteers
I appreciate volunteers in my classroom and feel that it is very important to make them feel welcomed. Some volunteers stay all day and help when they can. I will be keeping these water stocked for my volunteers this year, and will also have occasional treats out. I decorated this basket with Shabby Chic Bows.
Work Wall for Back to School Night
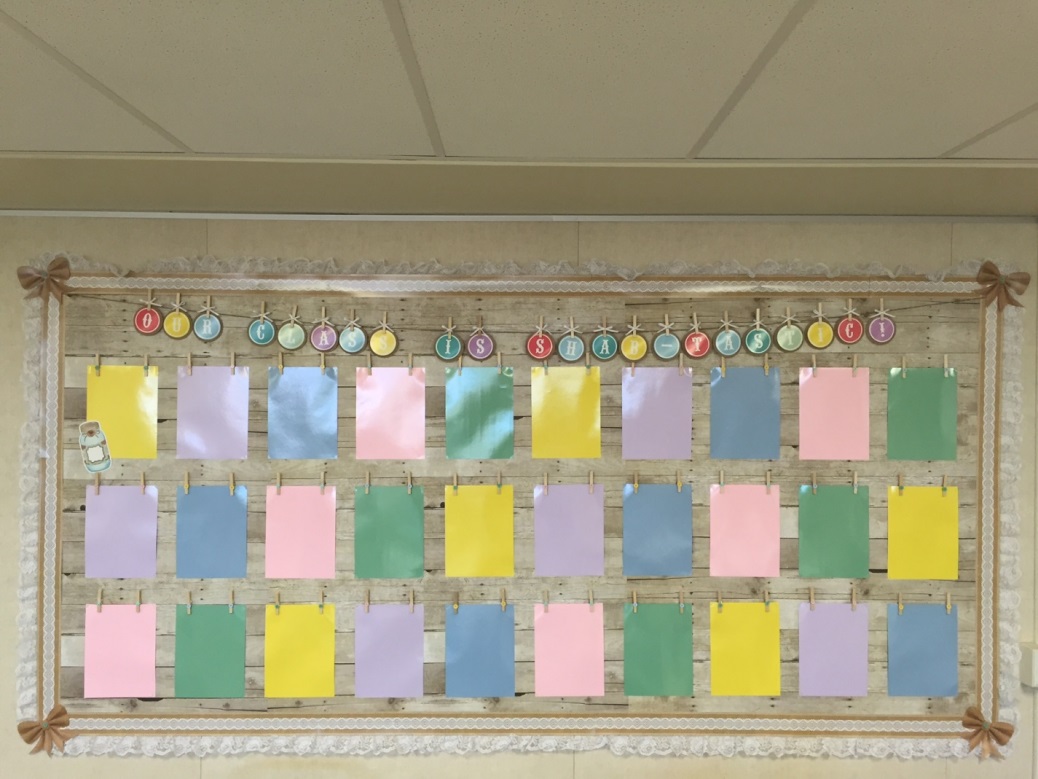
Our Back to School Night is always early in the year. It is so important to be organized and have our classrooms ready. Every year, I have a bulletin board where each student’s name and work is displayed. This year, I used the Shabby Chic Classroom Decorations.
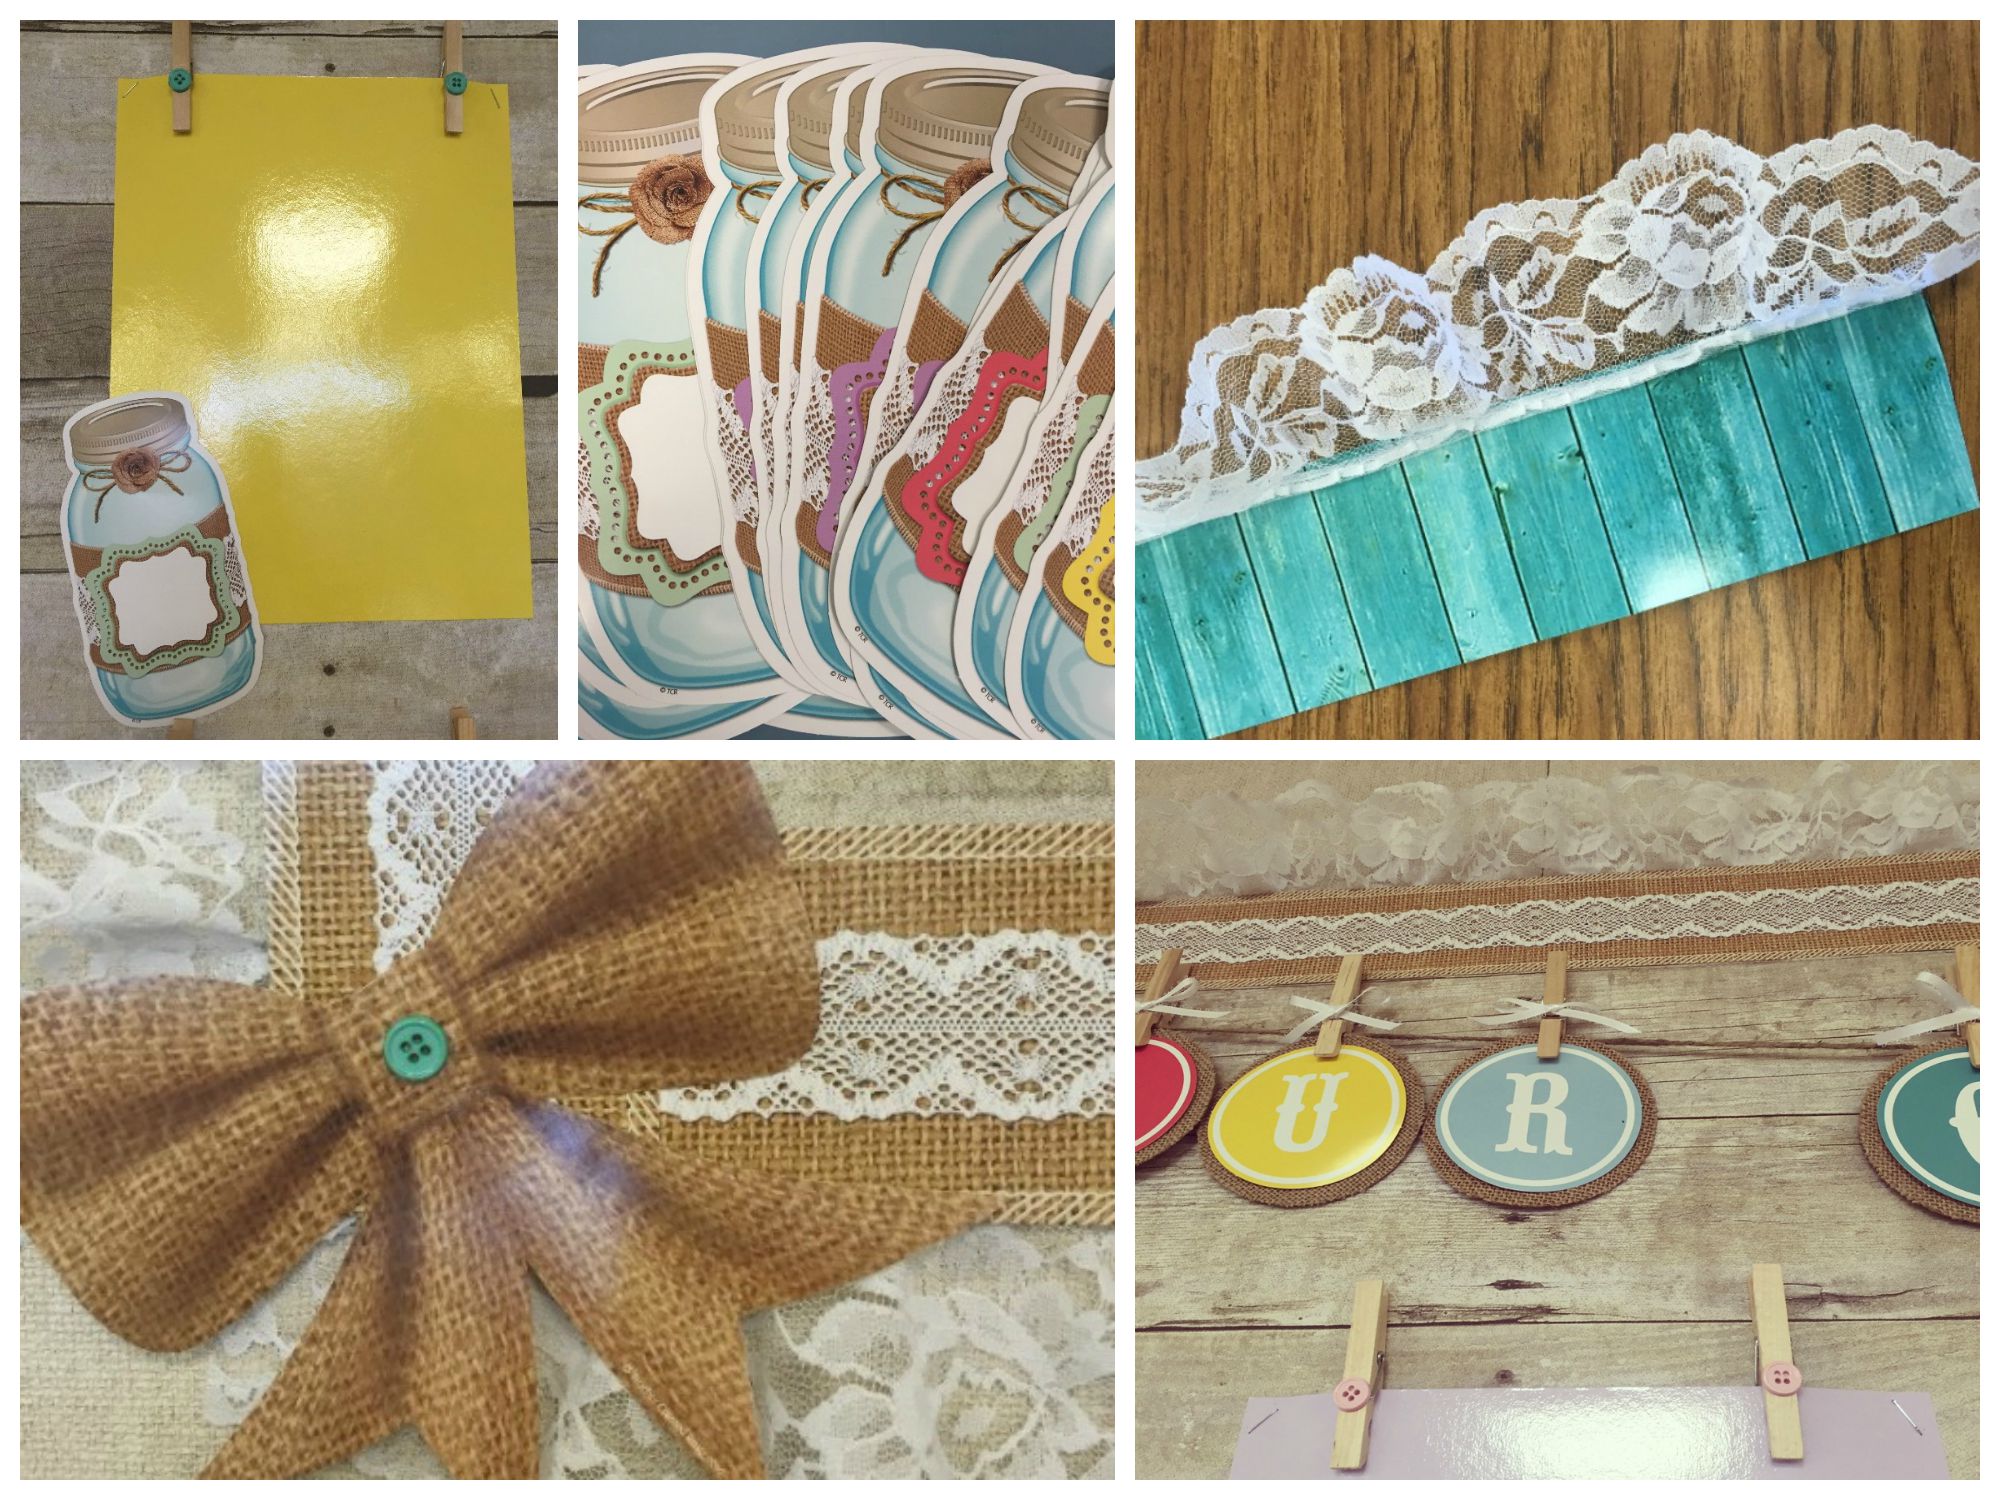
The saying for our work wall this year using the Shabby Chic circle letters is, Our Class Is Shab-tastic! I love this bulletin. It is one of my favorite ones I have done. The background is fadeless paper and helps to create the shabby chic look. I love the Shabby Chic Double-Sided Border , it was so hard to choose a border side! I outlined the border by hot gluing lace to the back. This turned out adorable! The Shabby Chic Bows are one of my favorite accents.The Circle Letters are outlined with burlap paper and the clothespins decorated with bows and buttons. As soon as I get my class list I will label these cute as can be Mason Jar Accents and put one up for each student.
I hope you enjoyed my organization ideas for parent volunteers! Below you can find the links to the Shabby Chic Classroom Collection, handprint puzzle, and poem.
For more classroom decorating ideas, visit my blog KinderDrama.