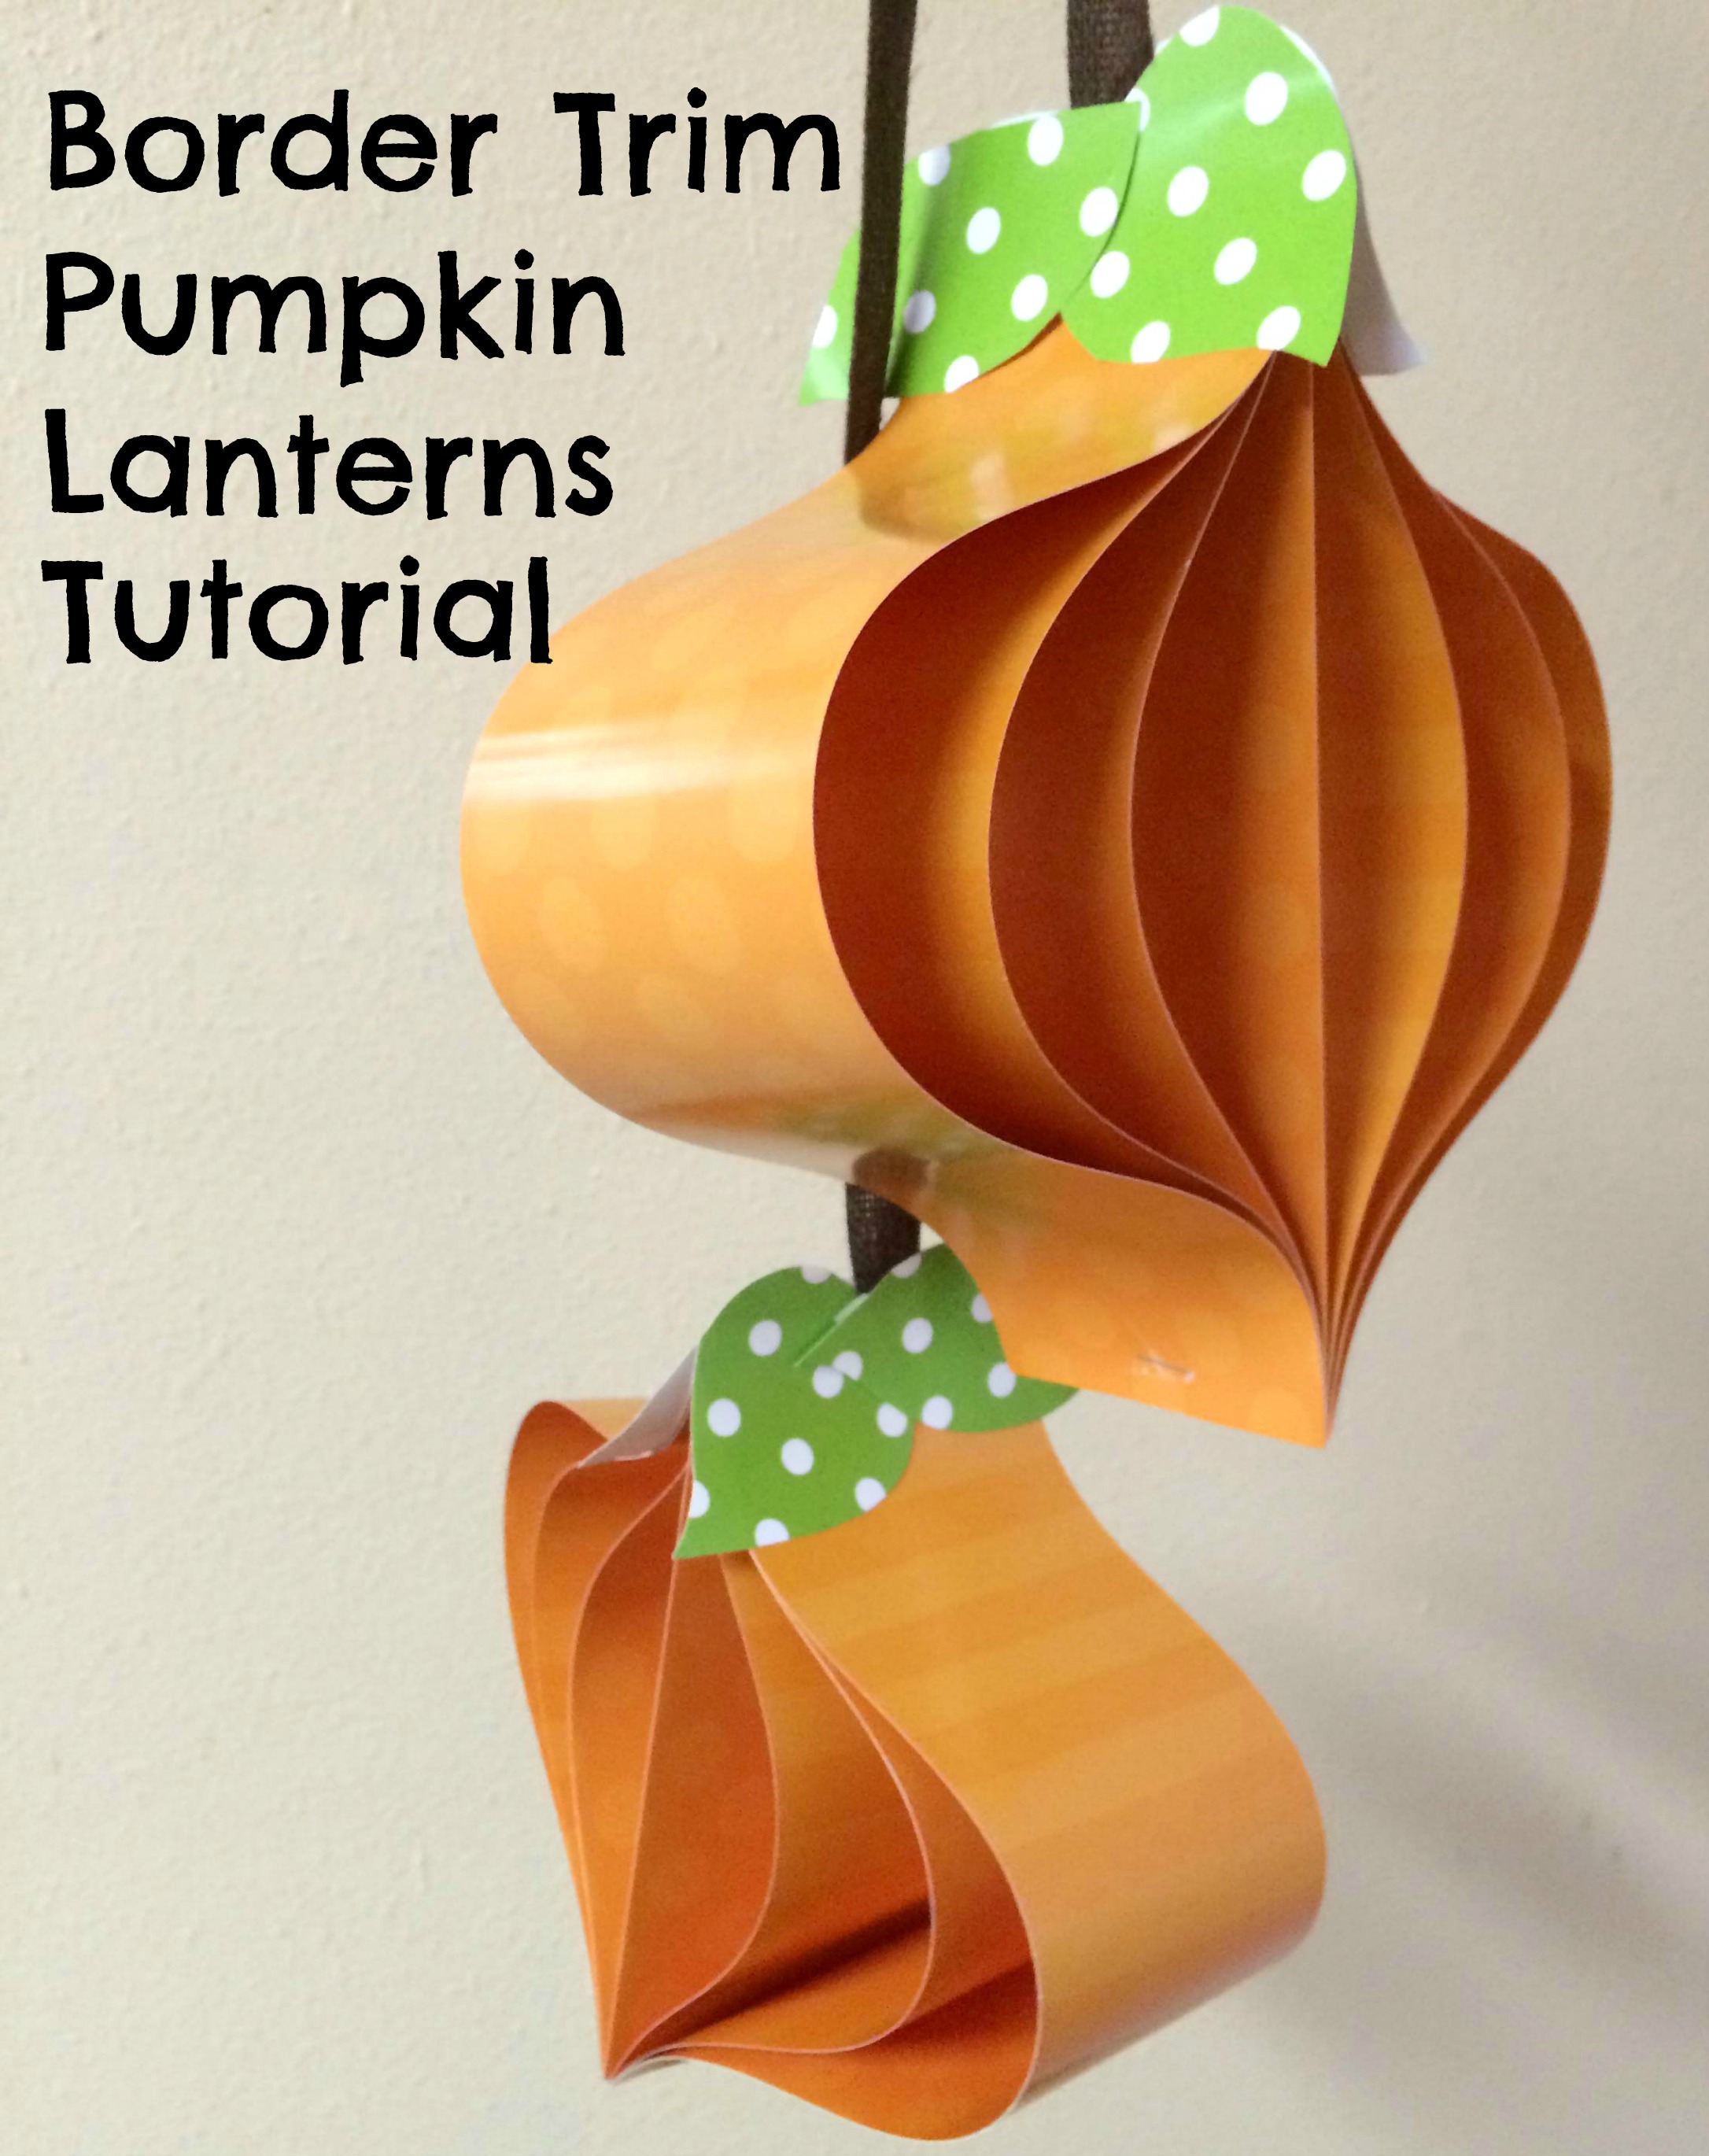
Have you started thinking about Halloween decorations for the classroom yet? If you have leftover border trim around, this easy hanging pumpkin lantern is a great way to transition your classroom into October.
Materials:
(3) 36” Orange Border Trim
(1) Green Border Trim
Ribbon
Scissors
Stapler
Glue
Instructions:
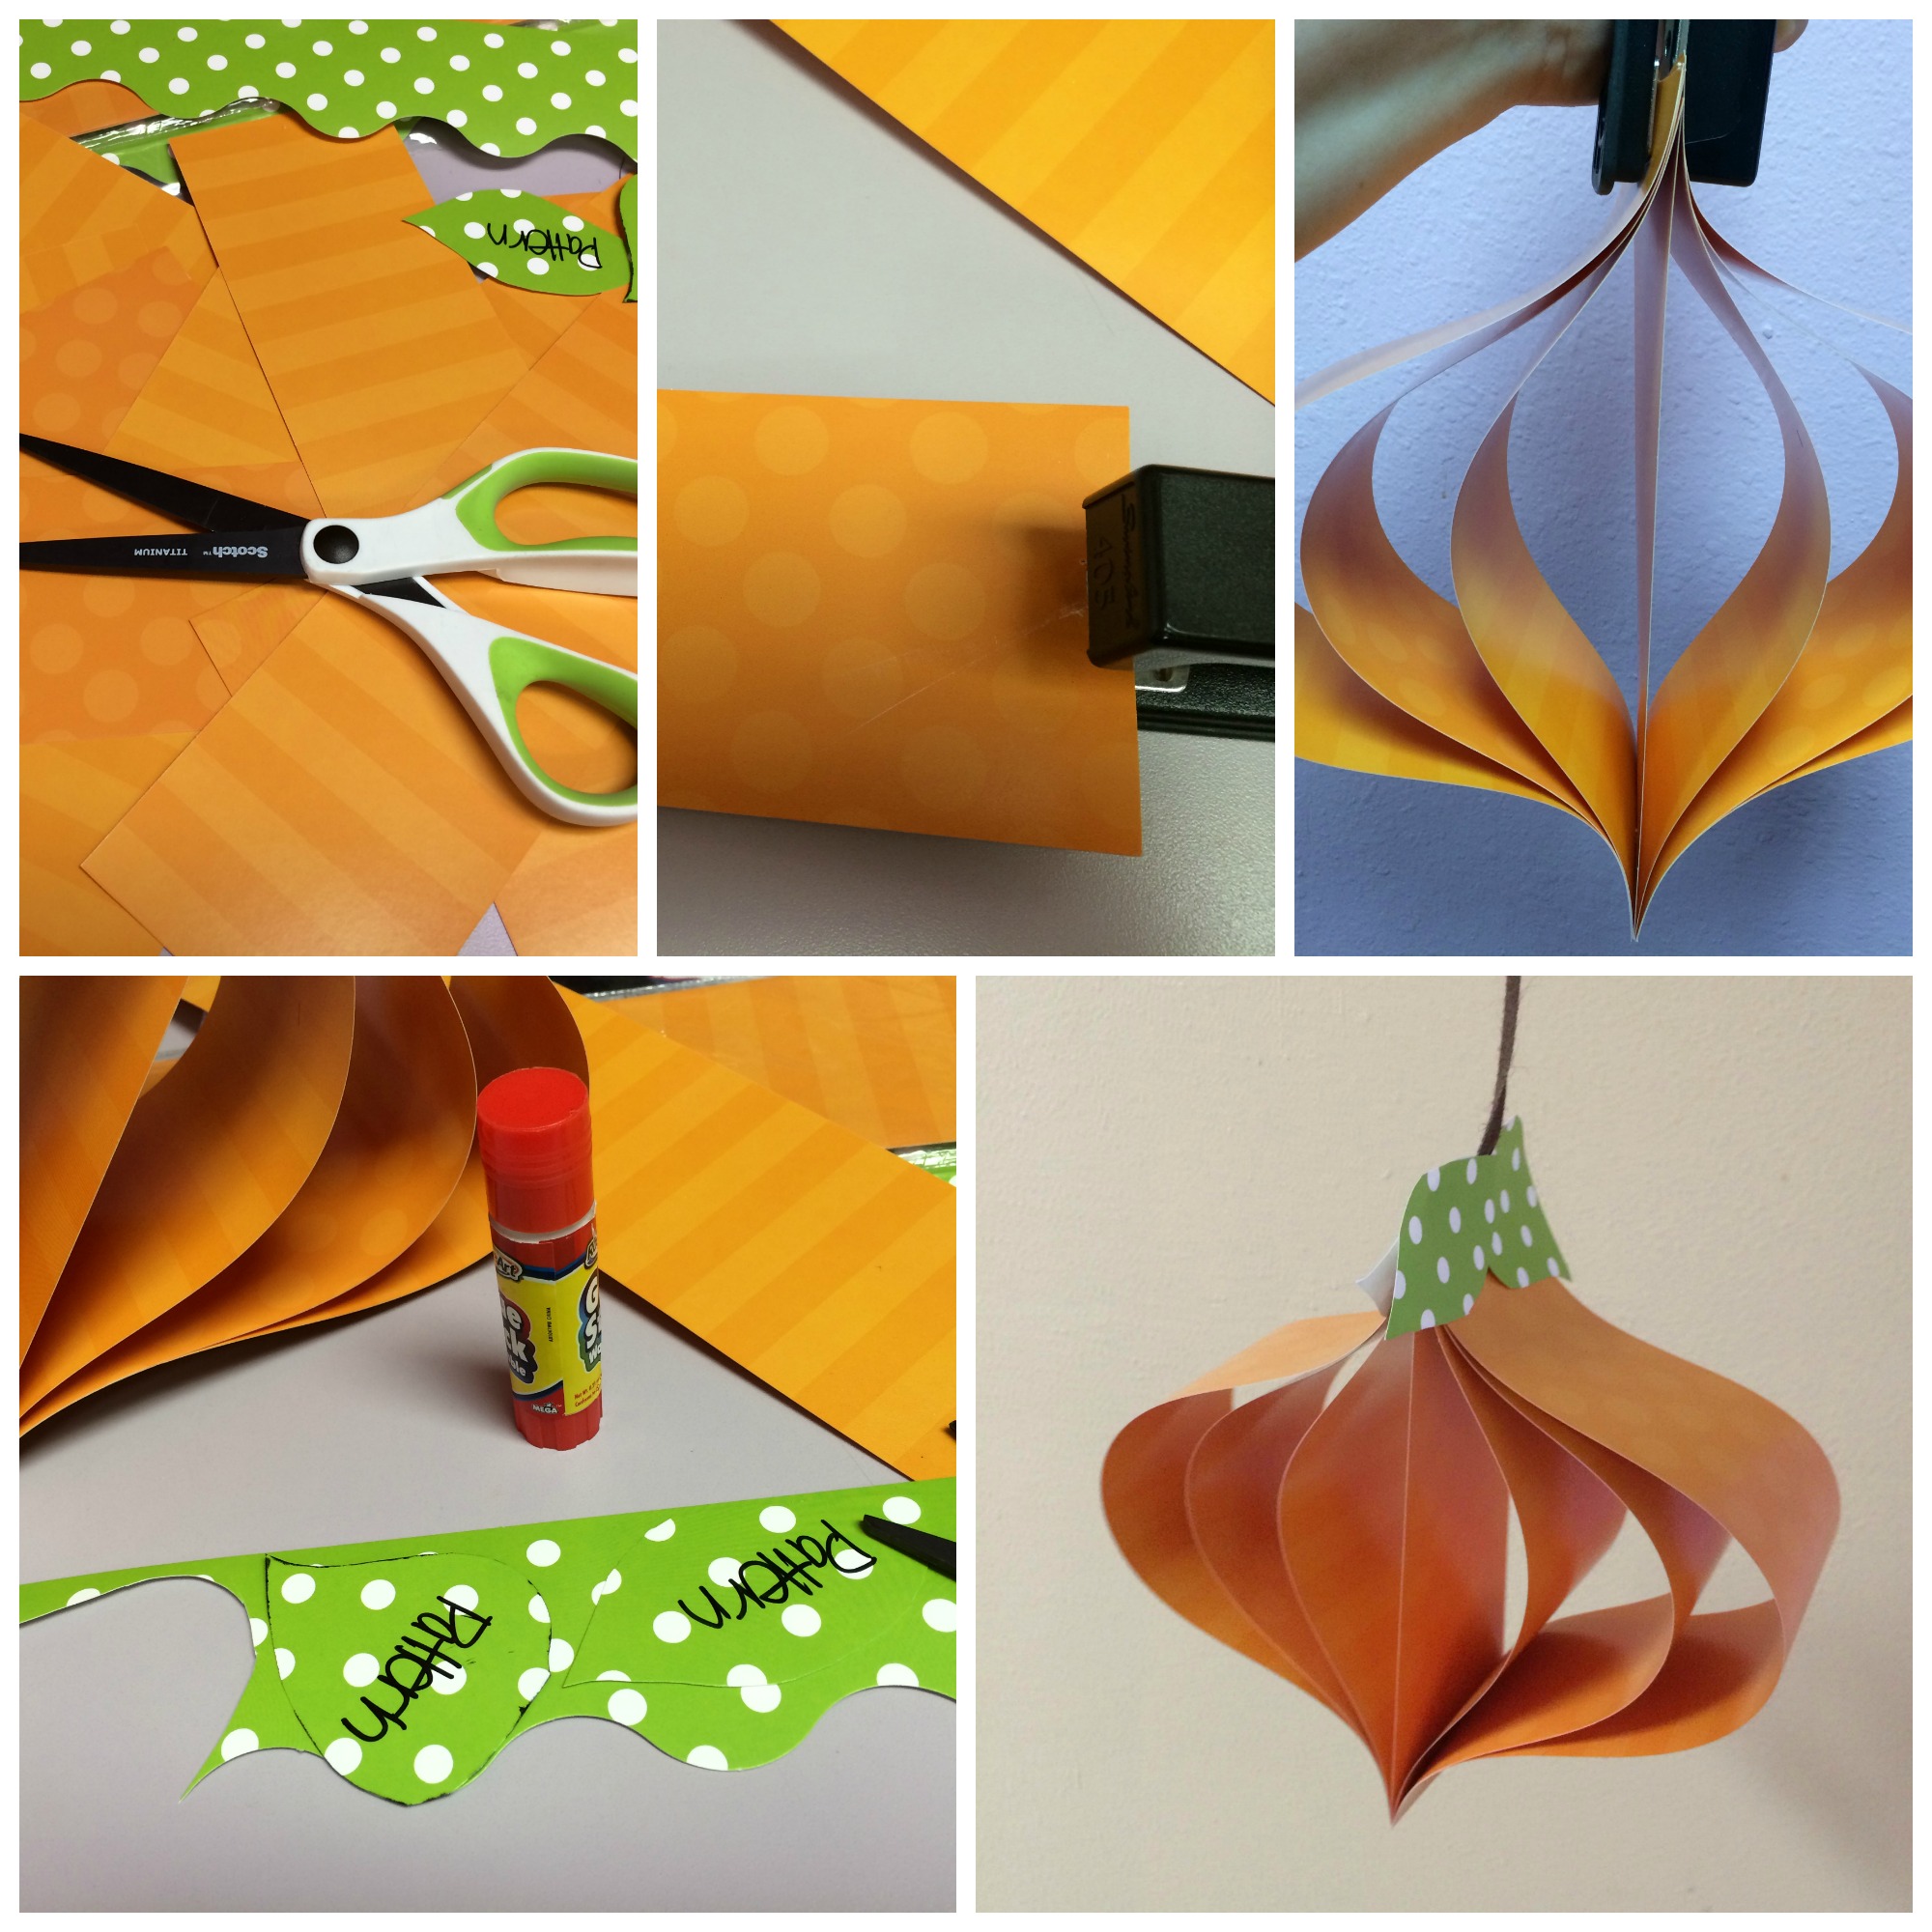
1) Cut your orange border trim into the following strips:
-13 inches (x2)
-11 inches (x2)
-9 inches (x2)
-8 inches (x1)
2) Stack the border strips altogether. The 8” strip would be in the center and then sandwich them from shortest strip to longest strip. Push the stack of strips down to make the pumpkin shape and staple. Push the bottom strip up and staple.
3) Draw or trace two leaves using green border trim and secure to the top of the pumpkin with glue.
4) Attach a piece of ribbon (brown burlap ribbon looks great) and hang a bunch of pumpkins lanterns from the ceiling.
These border trim pumpkin lanterns are also a great craft for students. Each student can make their own pumpkin lantern so you can use them to hang them above their desk or students can take them home to their parents. For more Halloween classroom crafts see our Halloween Classroom Ideas Board on Pinterest.